How Can We Help?
Subrogation
Subrogation Overview
A new & enhanced Subrogation process has been incorporated by integrating DXC Assure Claims with SubroPro (Powered by the Amali Solutions Group). For more information, click here.
| SubroPro is a unique subrogation payment and workflow engine systematizing 70% or more of the inbound recovery payments for the insurance carrier. |
This integration enables the posting of financial data from DXC Assure Claims to SubroPro for seamlessly processing Subrogation on a Claim in both Online & Offline modes.
As part of DXC Assure Claims & SubroPro integration, financial data will be posted to the SubroPro system for calculating Subrogation over a claim via two modes (offline and online mode). In offline mode, a batch job will be executed from the Task Manager screen of DXC Assure Claims. In online mode, Subrogation data will be pushed one by one via the Reserves screen of the Claims zone.
Once the financial data is sent, the Subrogation calculation will be done in the Amali SubroPro system. After the process is completed in the SubroPro system, the calculated Subrogation data and its associated party (entity) are sent back to Assure Claims via Web API. Upon receiving the data in Assure Claims, a recovery reserve will be created over which a collection is done for the Subrogation amount sent by the Amali SubroPro system.
Click here for more information regarding the installation and setup of SubroPro integration.
Initial Setup & Configuring of SubroPro in Assure Claims
One-time settings involved for Assure Claims-SubroPro system integration include the following steps:
Step 1: ThirdPartyInterfaceAPI must be hosted along with the Assure Claims application on IIS. This API can be found at: ~\Riskmaster\ThirdPartyInterfaceAPI.
Step 2: Corresponding to the ThirdPartyInterface API, Insurance RISKMASTER ConnectionString must have a ThirdPartyDataSource node. Example:<add name=”ThirdPartyDataSource” connectionString=”Driver={SQL Serv-er};Server=databaseservername;Database=databasename;UID=uid;PWD=pwd;”providerName=”Sy tem.Data.SqlClient” />
Note:
This node needs to be updated in the Assure Claims ConnectionString (at all the places where the connection string is present in Insurance RISKMASTER). Also, in the Client_Detail table of MTSecurity Database if Insurance RISKMASTER is MT-Environment. (In short, at all the places where other nodes of connectionstring are present. This needs to be included as well.)
Also, in the above node the ThirdPartyDatabase is a blank database with any name which needs to be created and same name is to be updated in the node. After the database creation following scripts must be manually executed:
Create_thirdparty_schema_sql.sql – This script can be found at
~ Riskmaster\ThirdPartyInterfaceAPI\ThirdPartyDatabaseScripts
Step 3: Next step would be to create Amali specific blank database and the following script must be executed: create_tables_subpro_sql.sql which can be found at:
~ Riskmaster\ThirdPartyInterfaceAPI\ThirdPartyDatabaseScripts
Step 4: Make sure that the SubroProRMAInterface.exe (a tool’s utility) is placed at ~WCFService/bin folder.
Step 5: Go to Riskmaster -> Utilities -> General System Parameter Screen
Step 6: Scroll down to third-party Interface Settings section.
Step 7: Select the Enable Amali Interface Checkbox highlighted below:
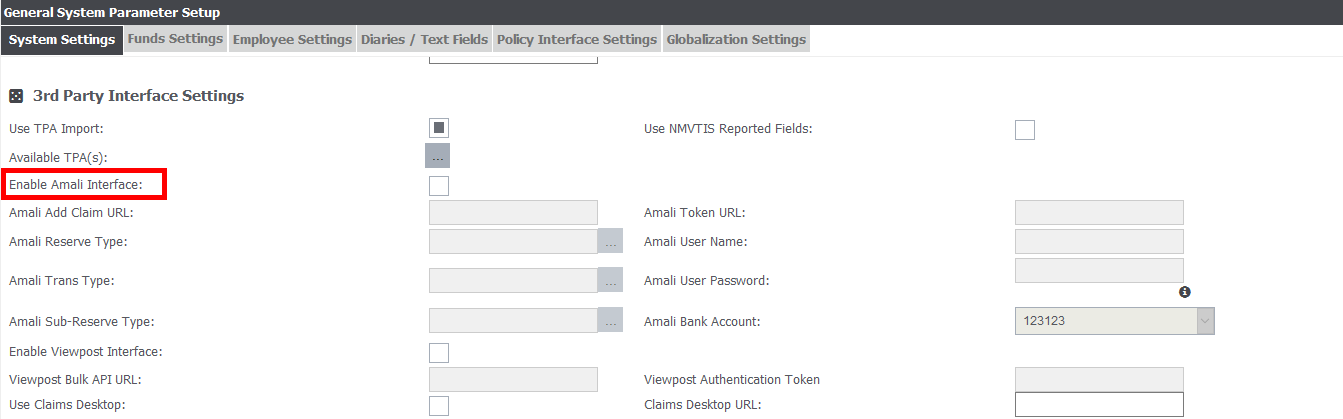
Step 8: After clicking on the checkbox, the fields disabled above will get enabled and will become mandatory.
Note: Fields marked in red above i.e. Web API URL with user name and password for authentication are required from the Amali SubroPro side before any further setup is done as they are mandatory in Assure Claims.
Step 9: Click on the Save button after filling all the mandatory fields.
Note: Authentication token and rmA Add Party and Add Payment URL need to be sent to Amali SubroPro for Amali system requests to get validated in Assure Claims system.
Example of rmA Add party URL: http://servername/rmA/Amali/AddParty
Example of rmA Add Payment URL: http://servername//rmA/Amali/AddPayment
In order to generate an Authentication Token in Assure Claims, follow the steps below:
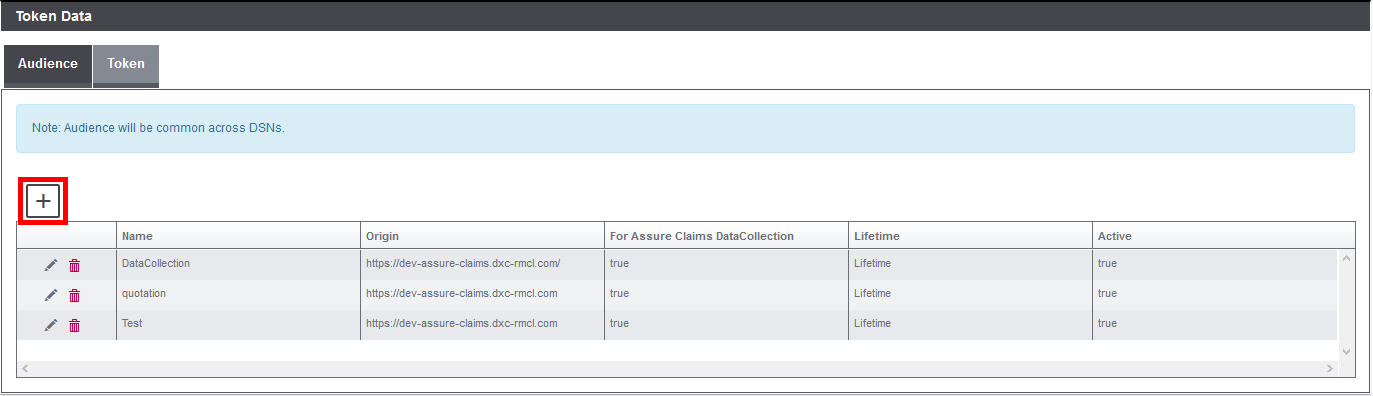
Step 10: Go to Utilities -> Tokens under System Parameters
Step 11: Click on + icon to create a new Token.
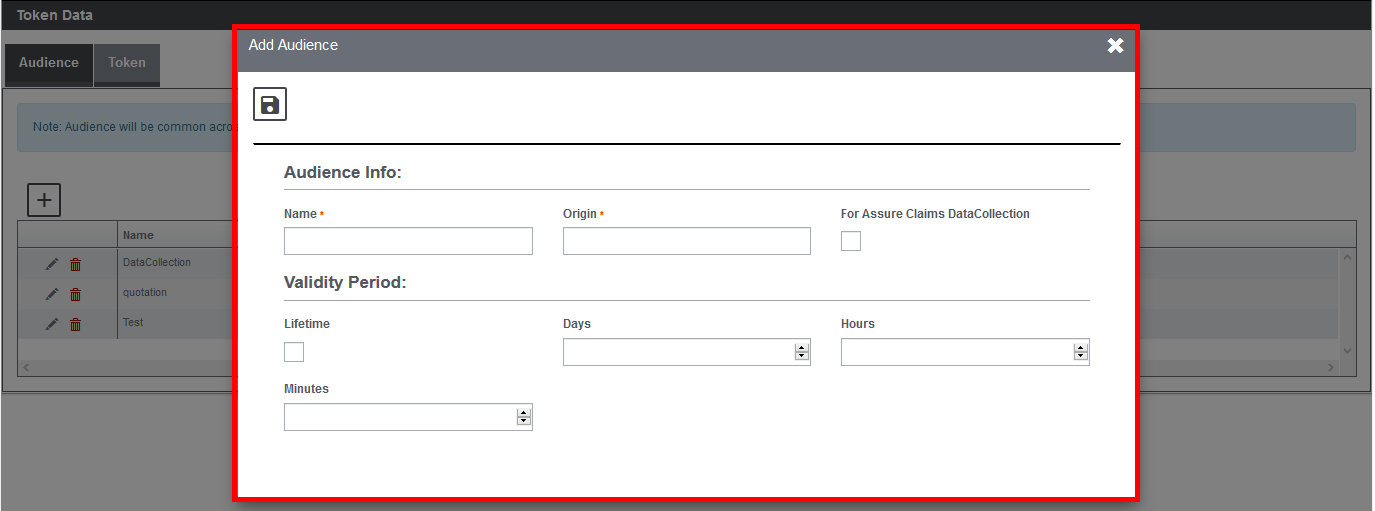
Step 12: Provide all the mandatory field values in the grid above. Enter “riskmaster.com” in Origin Field Name should contain a unique name for every user. Click on the Save button.
Copy the value in “Token” field which is generated and sent to Amali SubroPro.
Step 13: Next step would be to associate a DSN to Amali specific database. This is done from the SMS Screen. Go to Security -> Security Management System (SMS). Next, select the current DSN. On the right side, a new ToolButton will appear.
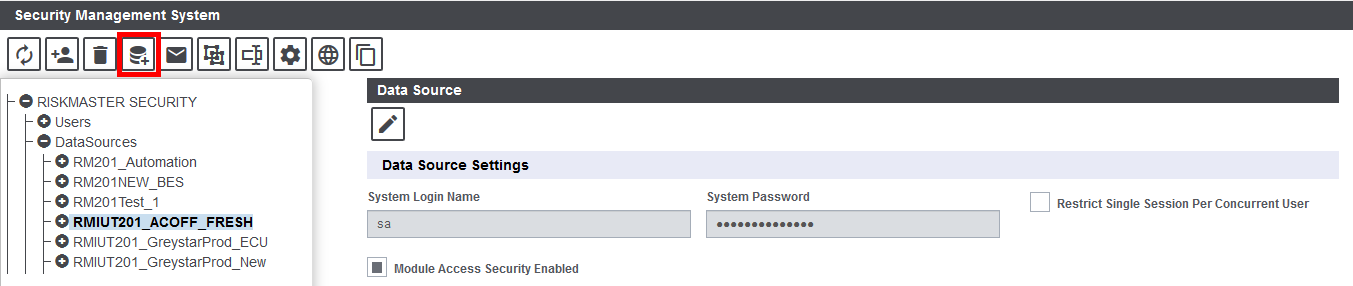
- Select the icon highlighted in red in the toolbar menu. Next, add third-party Amali Database information which was created in Step “c”.
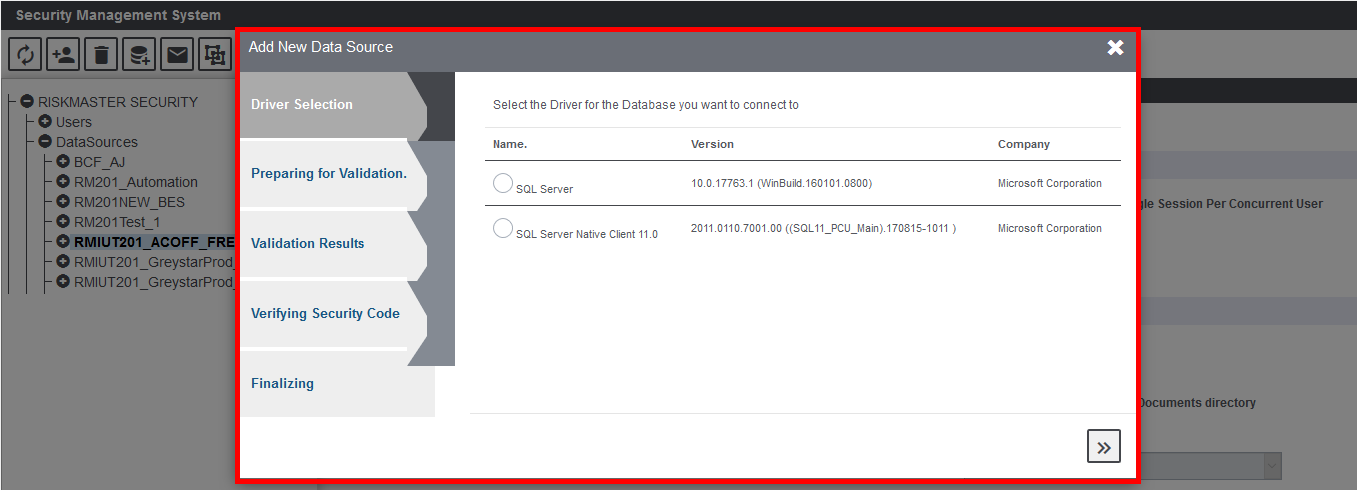
- Select the Client Type.
- Select the Driver.
- Provide Third Party Database specific to the client selected.
- Provide the authentication key.
Step 14: The next step would be to do the Third-party Mapping of codes. This step is mandatory otherwise data will not be pushed to the SubroPro system because of missing code mappings. Go to Utilities > Third Party Setup under Manager section. If the Third-Party Setup Node is not visible, then, make sure the checkbox labeled, Use TPA import is checked in Utilities > General System Parameter under third-party Interface settings.
Step 15: Enter Third-party name in the textbox “Third Party Interface Name” above. Click on “+” icon and it will show a row created in the grid below. Reload the screen.

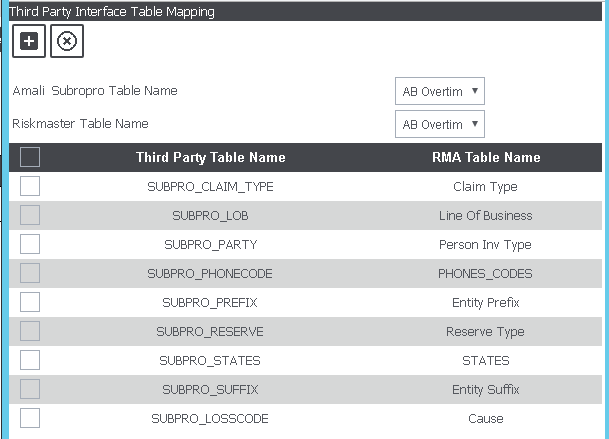
Step 16: Click on ‘+’ button present in the grid above. The following screen will open. Map the Third-party code table with rmA code tables. Following are the pre-defined code tables for Amali SubroPro in rmA system for which the code mapping is required:
- SUBPRO_RESERVE
- SUBPRO_STATES
- SUBPRO_PHONECODE
- SUBPRO_CLAIM_TYPE
- SUBPRO_LOSSCODE
- SUBPRO_LOB
- SUBPRO_SUFFIX
Note: These above code tables would be automatically created in Assure Claims system when Amali setting is turned ON in the General System Parameter screen.
In addition to above tables, there are two more SubroPro tables which are SUBPRO_VEH_MAKE and SUBPRO_VEH_MODEL and there are no corresponding rmA code tables for the same. Hence no third-party mapping is required for them. The only requirement is to have unique IDS generated for each value in Assure Claims for them and stored via table maintenance as description.
Step 17: Now click on second tab RMA-Third Party Code Mapping and following screen will open.
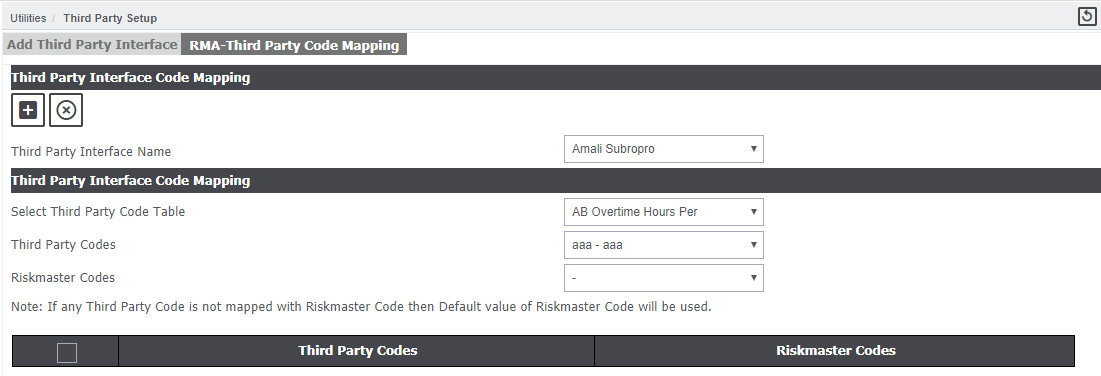
Make sure to select the correct name from the Third Party Interface Name dropdown. In the code mapping section first, select the “Third Party code table” from the dropdown.
Step 18: Select each Third-party code table one by one and its corresponding Third-Party Code and RISKMASTER Codes. Click on ‘+’ to save the mapping. Mapping will be listed in the grid as follows:
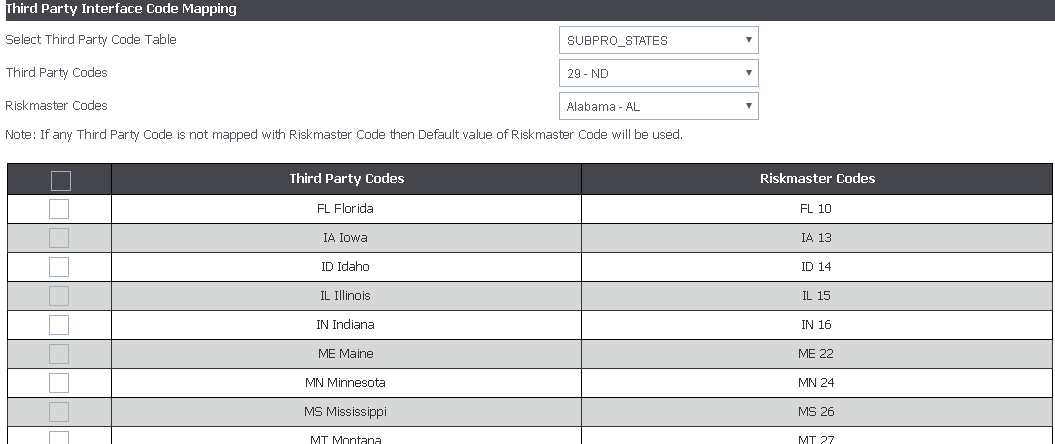
Note: There can be multiple RISKMASTER Codes for which the user might not find the appropriate pre-generated Amali SubroPro codes or vice versa. All these code tables are user defined in Assure Claims.
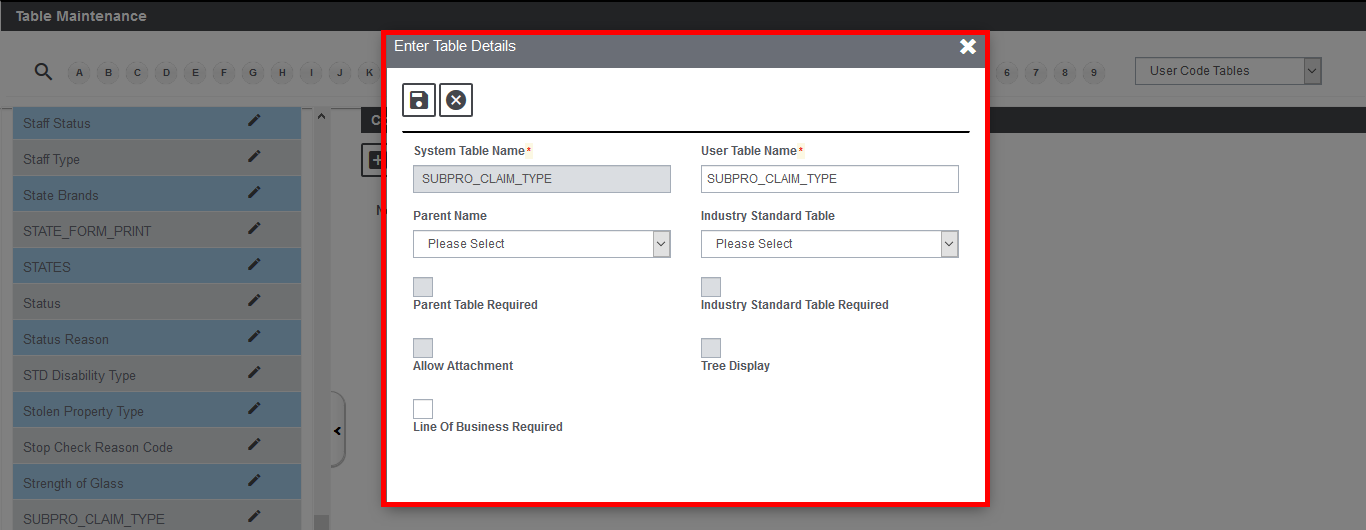
In this scenario, for each RISKMASTER code a corresponding code must be generated first in Amali SubroPro system and then same must be added in rmA through ‘Table Maintenance’ under Maintenance section for the defined Third-Party Code table.
Make sure to add the Amali SubroPro generated system code for corresponding RISKMASTER code as description value (highlighted in red below) and not code value (highlighted in red below) since their code exceeds length 25 which is the maximum limit for code in rmA. The code value to be given can be the corresponding code of rmA table.
A list of predefined codes created for RISKMASTER codes in Amali SubroPro system is present in the excel file below.
For SubroPro tables SUBPRO_VEH_MAKE and SUBPRO_VEH_MODEL, there are no corresponding rmA code tables for the same. Hence, no third-party mapping is required for them. The only requirement is to have unique IDS generated for each value in Assure Claims for them and stored via table maintenance as description.
Once the integration is complete, Subrogation can be leveraged, follow the steps mentioned below:
- Search for the claim for which subrogation is to be done.
- From the right-hand navigation pane, select the
 button adjacent to the Subrogation option.
 - A Lookup results window opens.
- From the Lookup results window, select the required Subrogation information from the existing list.
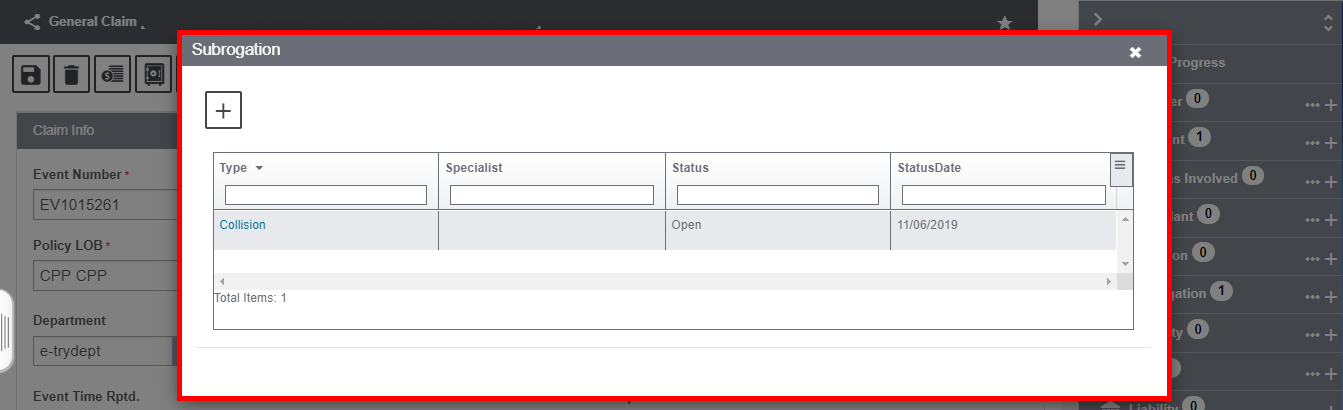
- In order to create a new Subrogation record, select the
 sign to get redirected to the Subrogation screen. Provide the required information and save.
The Subrogation screen features a number of accordions. The various accordions of the same are discussed below:
Subrogation Window – Subrogation Info Accordion
Enter the basic subrogation information in this accordion of the window.
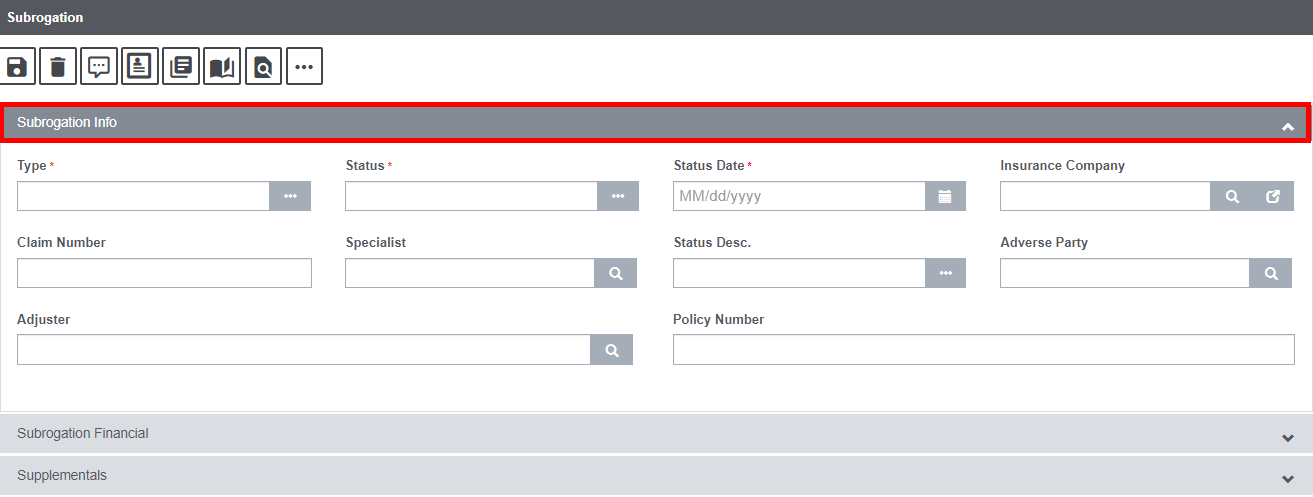
Field Definition:
Type: Select the Subrogration type from the lookup table by selecting the ![]() button.
button.
Status: Select the Subrogration Status from the lookup table by selecting the ![]() button.
button.
Status Date: Enter the start date of the current subrogation status.
Insurance Company: Select the Insurance Company name from the lookup table by selecting the ![]() button.
button.
Claim Number: Displays the Claim number for which the subrogation calculation is being done.
Specialist: Enter the specialist name in this field or you can search for the same by selecting the ![]() icon.
icon.
Status Desc.: Enter the text that best describes the status of Subrogation.
Adverse Party: Enter the Adverse Party name in this field or you can search for the same by selecting the ![]() icon.
icon.
Adjuster: Enter the name of the adjuster in this field.
Policy Number: Enter the Policy Number of the claim for which Subrogation is being done.
Subrogation Window – Subrogation Financial Accordion
Enter the financial detail for the Subrogation in this accordion.
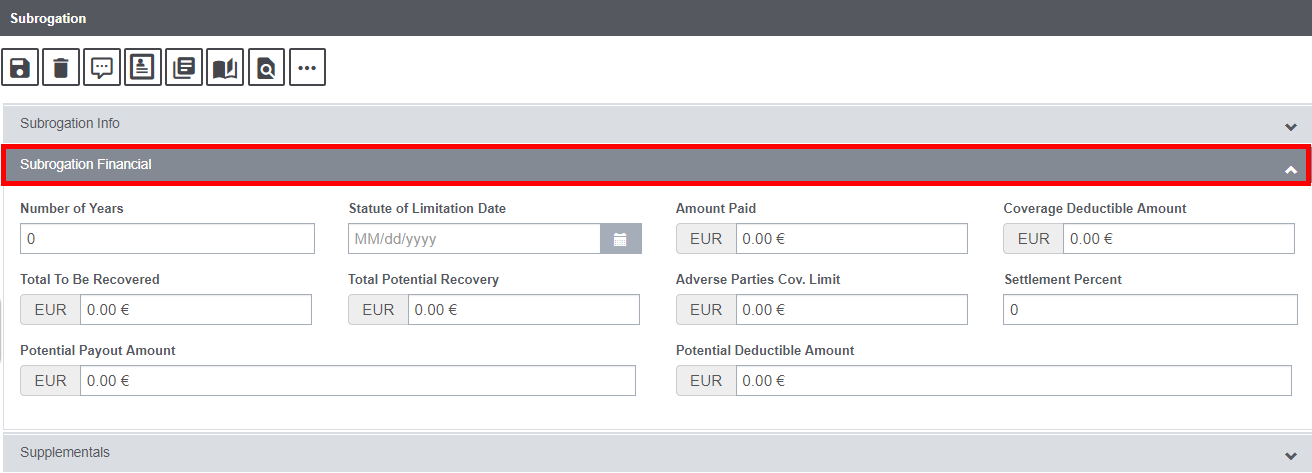
Field Definition:
Number of Years: Enter the number of years for which the amount is to be calculated.
Statute of Limitation Date: Select the calendar to enter the Statute of limitation date or the prescriptive duration of the respective event.
Amount Paid: Enter the amount that has already been paid. The currency in which the amount is entered can be selected by clicking on the adjacent Currency icon.
Coverage Deductible Amount: Enter the Coverage deductible amount in this field. This is the amount that a policy holder has to pay before the insurance company starts paying up.
Total to be Recovered: Enter the total amount that is to be recovered in this field.
Total Potential Recovery: Enter the projected recovery amount here.
Adverse Parties Cov. Limit: An adverse party refers to an opposing party in a lawsuit under an adversary system of law. In general, an adverse party is a party against whom judgment is sought or “a party interested in sustaining a judgment or decree.” Enter the coverage limit pertaining to the adverse parties in this field.
Settlement Percent: The settlement percent refers to the percentage amount of the total number of insurance claims paid out by an insurance company compared to the total number of received claims. Enter the relevant settlement percent in this field.
Potential Payout Amount: Payouts refer to the expected financial returns or monetary disbursements from investments or annuities. Enter the potential payout amount here.
Potential Deductible Amount: Enter the projected deductible amount here.
To know more, select the image below and read the detailed document.