How Can We Help?
Mail Merge
Mail Merge Overview
DXC Assure Claims offers an option to create Mail Merge templates, that enables creating similar documents based on data from the DXC Assure Claims. Setting up a Mail Merge template is necessary to create Mail Merge documents or customized letters in DXC Assure Claims. Use the Merge Form Letters Designer to create mail merge templates in Utilities zone.
Open the mail merge template from a record and create a mail merge document. You can use an existing mail merge template to create a mail merge document for an existing record.
You can save the preference options setting on the Use Merge Letter window, when ever you open the Mail Merge, the setting by default is set to the previous time setting by that particular user.
For example, to send a letter of acknowledgement to claimants for each new claim entered, you can create a mail merge template using the claimant name and address fields. You can also use MS Word merge fields to add salutations, titles, current date and time, and so on to the mail merge template.
After you create a template, you can open it from a claim. DXC Assure Claims automatically fills claim data into the merge fields and creates a letter of acknowledgement. If a claim is associated with multiple claimants, DXC Assure Claims creates a letter, from the mail merge template, for each claimant and person involved.
You can include any DXC Assure Claims fields, including supplemental fields in your mail merge template. You can also limit user or a group access to a particular mail merge document, from the Utilities zone.
Note: If you are using a SQL database for DXC Assure Claims, the title of a mail merge cannot exceed 25 characters.
Create a Mail Merge Document
You can open a mail merge template from a record and insert record data into the template to create a mail merge document.
To create a mail merge document, follow the steps mentioned below:
In the Claim zone, open the Claim record screen. From the toolbar, select the Mail Merge ![]() button to open the Filter Merge Letter window.
button to open the Filter Merge Letter window.
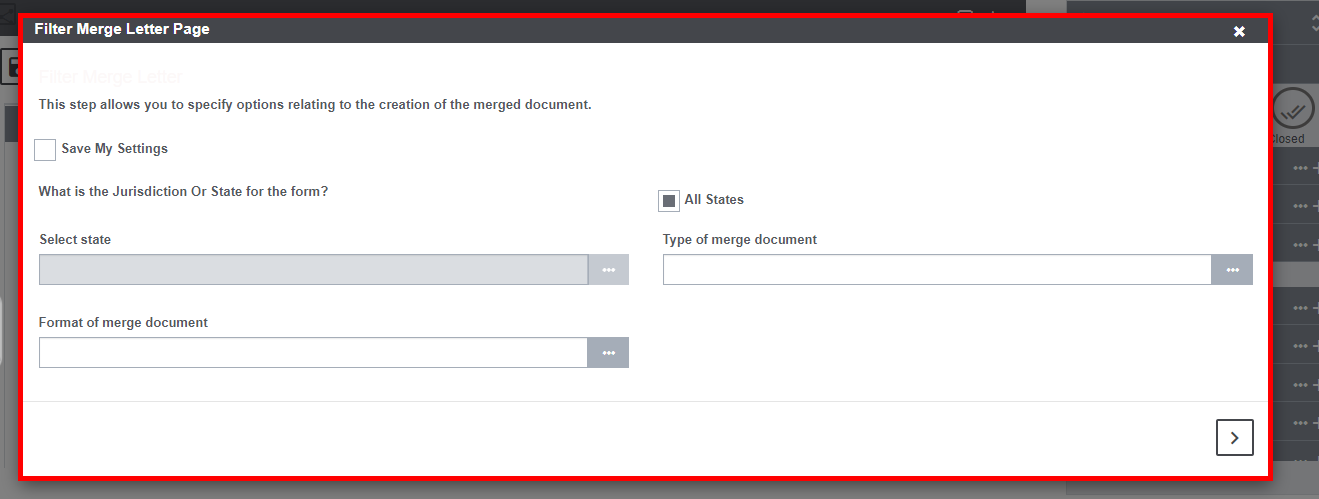
Field Description:
Save My Settings: Select the check if you want to keep the setting saved for future use.
What is the Jurisdiction Or State for the form?: Select All States checkbox, if all the states are to be considered for the form. In case, this checkbox is disabled, then, the select State field will get enabled.
Select State: Select the ![]() button to choose the states from the lookup table that is to be considered for the form.
button to choose the states from the lookup table that is to be considered for the form.
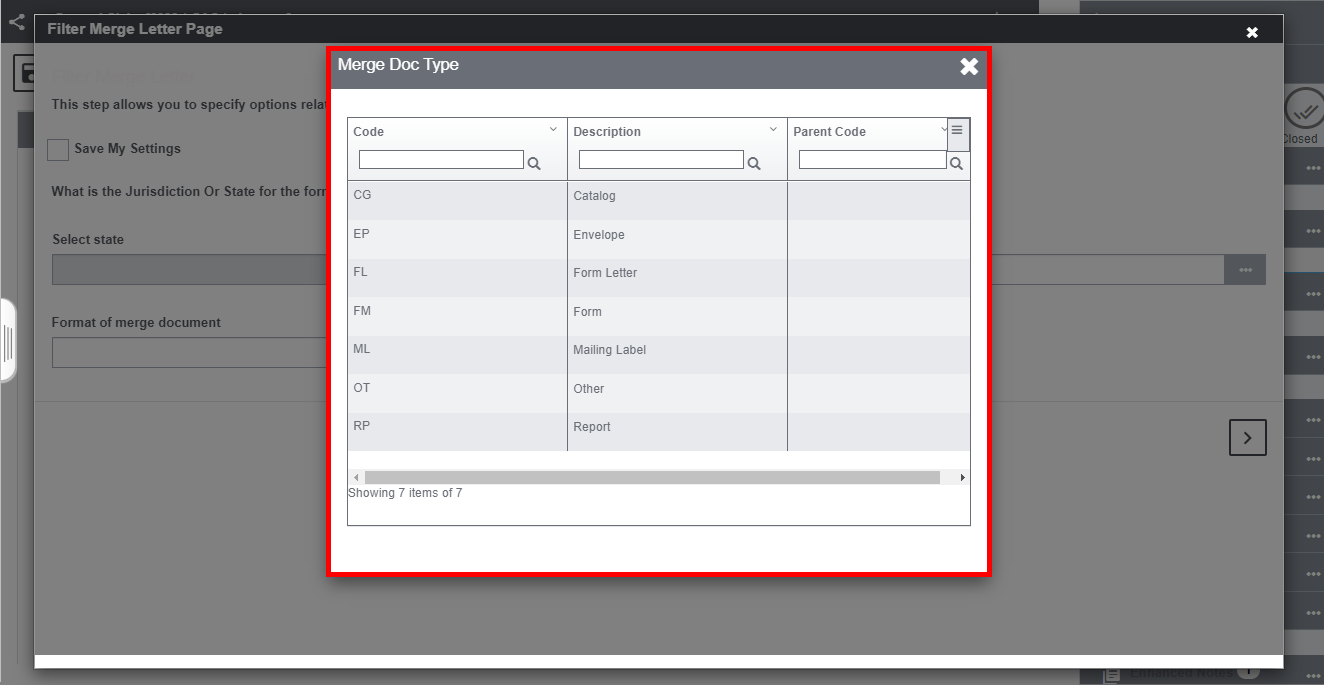
Type of Merge Document: To specify the type of mail merge document you want to create, select the ![]() button to select the same from the Merge Doc Type lookup table.
button to select the same from the Merge Doc Type lookup table.
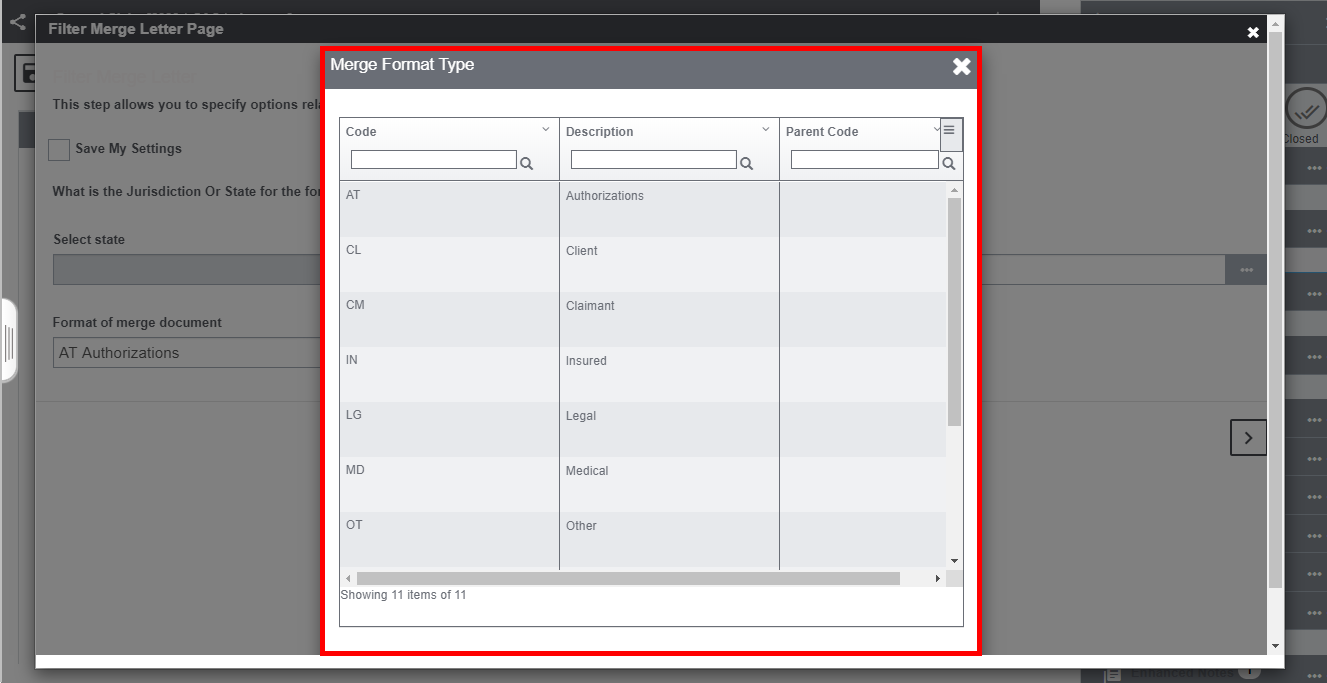
Format of Merge Document: Select the format of Mail Merge document from the pre-defined format by selecting the ![]() button to pop open Merge Format Type window.
button to pop open Merge Format Type window.
Select Next to get redirected to the Basic Merge Options window.
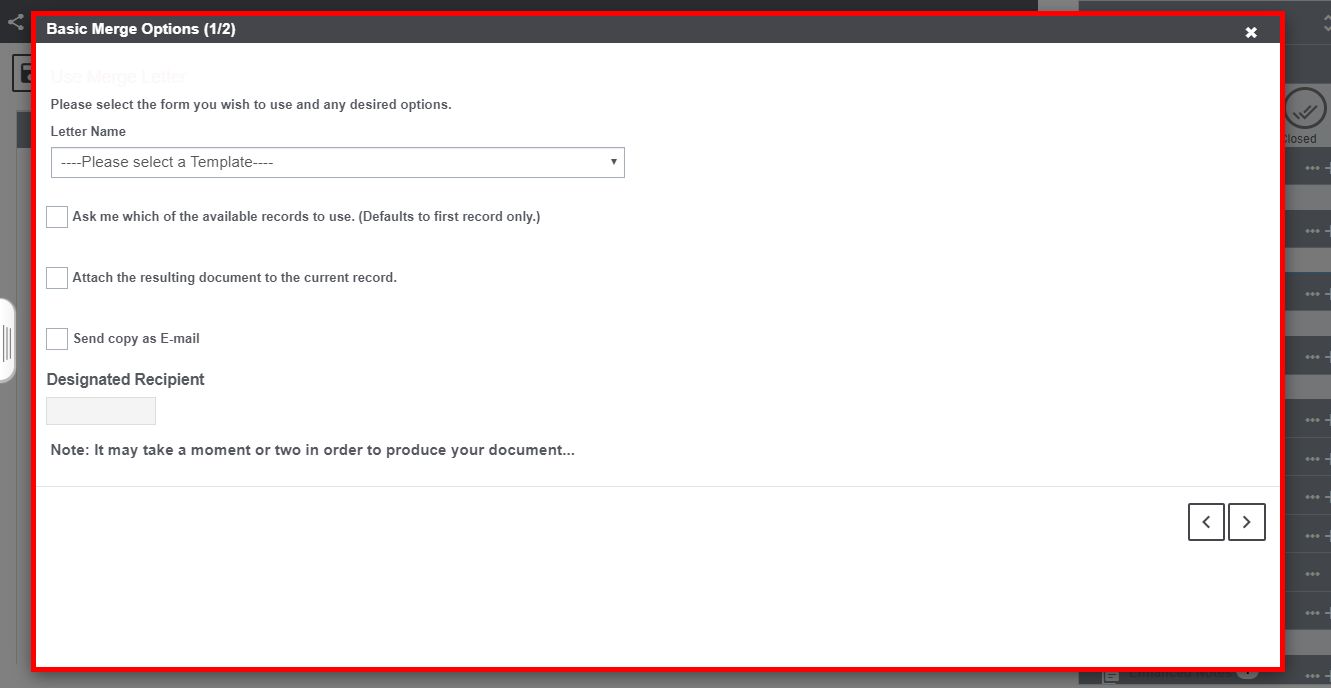
Letter Name: Letter Name drop down list, select the mail merge form letter template you want to use
Select other checkbox options as per the requirement.
The Merge Template Document Attachment window opens. Select the Launch Merge button.
Set Up a Merge Form Letter Template
In DXC Assure Claims you must first create a mail merge template before you can open the mail merge template from a record and create a mail merge document.
From the main menu, select User Documents followed by Word Merge Setup. The Available Merge Form Letters window opens and a Word Merge Setup link displays under the User Documents node in the left navigation tree.
Step 1: Basic Letter Information Window
From the Available Merge Form Letters window, select the Add New ![]() button. The Basic Letter Information window opens.
button. The Basic Letter Information window opens.
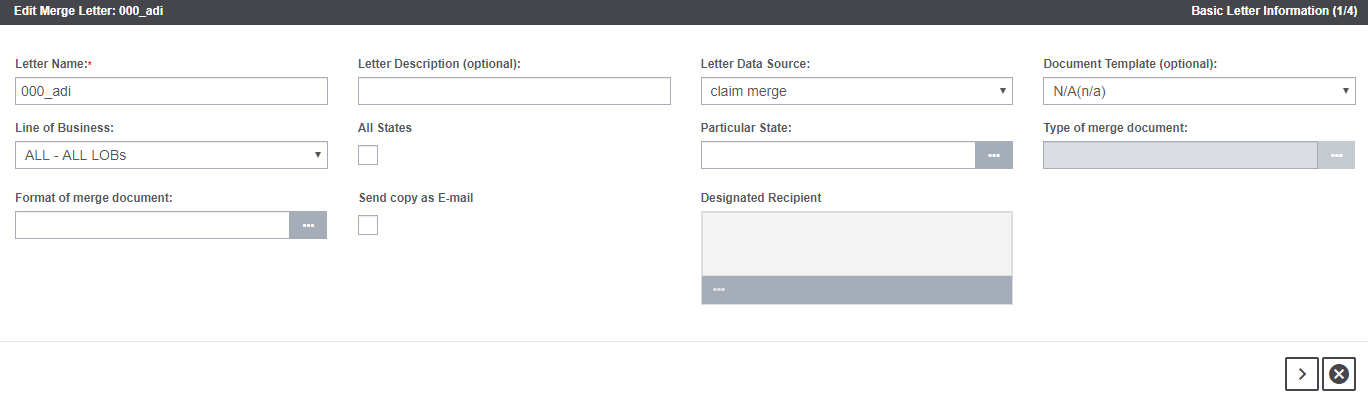
In Basic Letter Information window, respond to the questions and enter options into the fields.
Field Description:
Letter Name: Enter the name of the letter.
Letter Description: Enter the text that describes the letter in the best possible way.
Letter Data Source: Select the data source of the letter from the available option by selecting the lookup button.
Document Template: Select the template for the document by selecting the button
Line of Business: Select the relevant line of business from the dropdown list to which the document is to be merged.
All States: Select the checkbox if all the states are to be considered for the current letter.
Particular State: This field remain disabled if the All States field is checked. In case any particular state is to be considered, then, select the same from the table by selecting the button.
Type of Merge Document: Select the type of document that is to be merged by selecting the button.
Format of Merge Document: Select the format of the Merge document from the lookup table by selecting the button.
Send Copy as Email: Select the checkbox of the field if the copy of the letter is to be send as an Email.
Designated Recipient: In case, the letter is sent via email, then, select the recipient of the mail in this field.
Note: The Next button automatically displays when you complete the required fields.
Step 2: Data Fields Used Window
Select the Next button on the Edit Merge Letter wizard to open the Data Fields Used window.
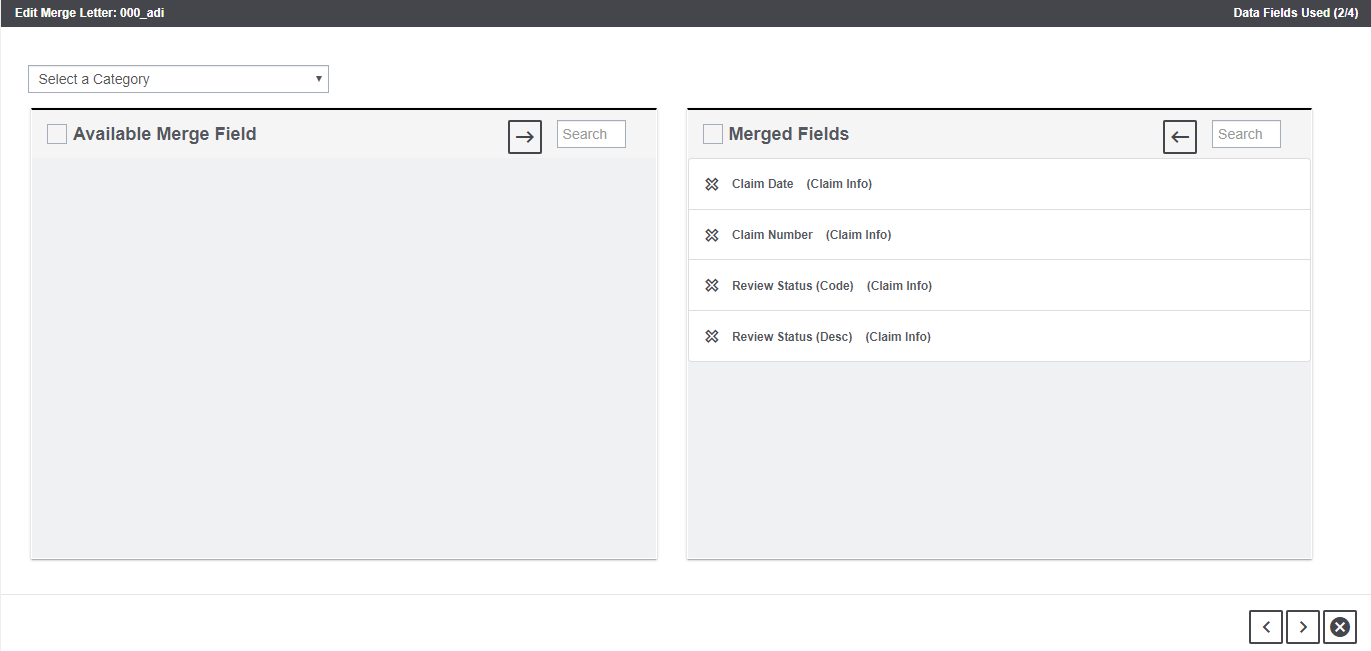
The Available Merge Fields are listed on the left hand side as shown above. Select the fields that are to be merged followed by the arrow ![]() . The respective fields will be listed in the Merged Field column.
. The respective fields will be listed in the Merged Field column.
Step 3: Permission to Use Merge Letter Window
Select the Next button to get redirected to the Permission to Use Merge Letter window on the Edit Merge Letter wizard.

Select the Allow All Users To Access This Merge Letter checkbox if the access is to be provided to all the users. If this field is unchecked, then, Allow Only To Selected Users/Groups field will be enabled. You can choose the users from the lookup table by selecting the button.
Step 4: Edit Merge Template Window
Select the Next button to get redirected to the Edit Merge Template window on the Edit Merge Letter wizard.
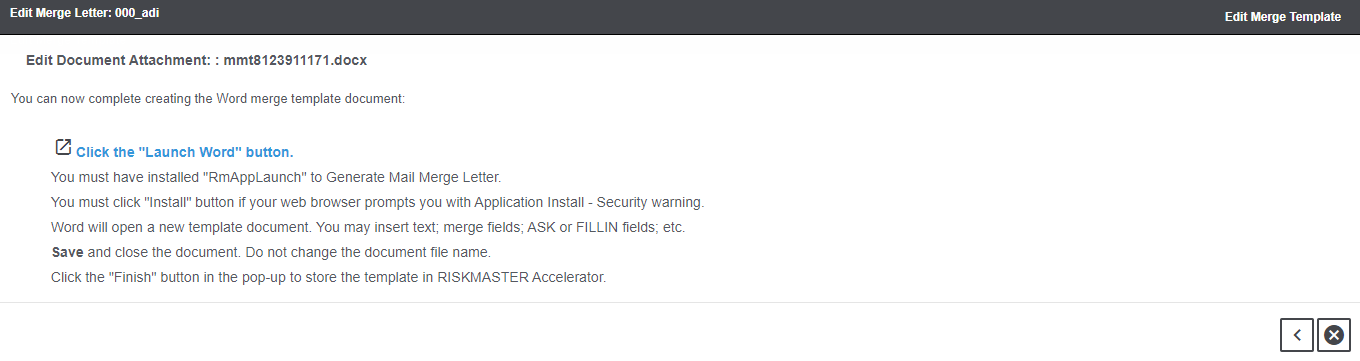
You can now complete creating the Word merge template document. Click on the Launch Word button for the same. The RISKMASTER Launch App is required for some functionalities in DXC Assure Claims like Printing
Checks & Attachments, Mail Merge, Word Merge, for sending emails using Outlook and others. In case, the RISKMASTER app launcher is not installed at the users’ end, then, an error message will now be displayed whenever attempts are made to use any of the above-mentioned functionalities
Attach a Mail Merge Document to a Claim
You can automatically attach a mail merge document to a record when the mail merge document is created. You can also attach an existing mail merge document if you know the location of the mail merge document.
To attach the mail merge document when you create a mail merge document:
- Open the record you want to attach the mail merge document to.
- From the toolbar, select the Mail Merge button. The Filter Merge Letter window opens.
- To specify the type of mail merge document you want to create, complete the fields on the Filter Merge Letter window as necessary.
- Select the Next button.
- The Use Merge Letter window opens.
- From the letter Name field drop down list, select the mail merge form letter template you want to use.
- Select the Attach the resulting document to the current record check box.
- Select Next. The Merge Template Document Attachment window opens.
- Select the Launch Merge button. Your mail merge document opens in Microsoft Word.
- Add, edit or review the contents of the mail merge document.
- You can save and print this document. DXC Assure Claims automatically attaches the document to the associated record.
Set Up Auto Mail Merge Letters
This feature helps you to automatically generate documents for multiple claims at a time by specifying parameters without the need for a user to manually initiate the document creation process. Using the Mail Merge feature, you can generate batches of documents based on pre-defined conditions. Using the Auto Mail Merge Setup feature you can set up a mail merge and then schedule the task to run automatically in Task Manager.
In the Auto Mail Merge process you cannot select specific records. Instead of by default including only the information in the first record found, the Auto Mail Merge process will create a document for each record.
From the main menu, select Utilities> Tools and Designers> Auto Mail Merge Setup to open the Auto Mail Merge Setup window.
On the Auto Mail Merge window, select Create a New Mail Merge ![]() button. The Auto Mail Merge Creation- Step 1 of 5 (Introduction) window opens.
button. The Auto Mail Merge Creation- Step 1 of 5 (Introduction) window opens.
Step 1: Best Practice Scenario
Enter the best practice scenario for the setting up auto mail merge letter in this window.
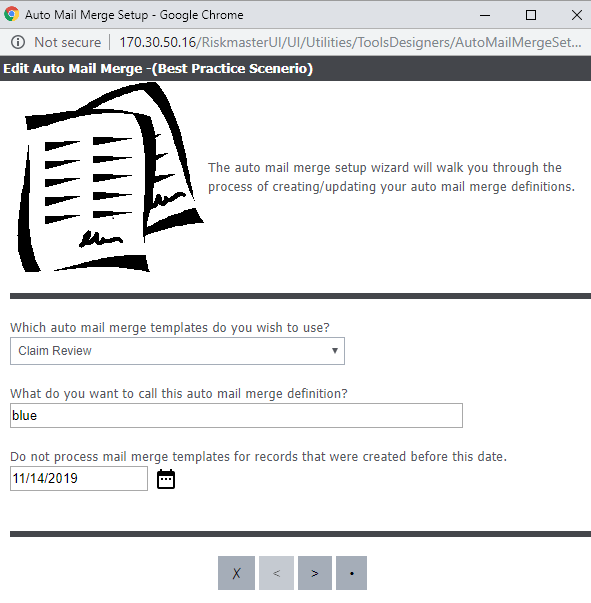
Field Description:
Which auto mail merge templates do you wish to use?: Select the auto mail merge templates you want to use from the dropdown list.
What do you want to call this auto mail merge definition?: Enter a name for the definition.
Do not process mail merge templates for records that were created before this date.: Select the required date after which the mail merge templates are to be processed.
Select the Next button.
Step 2: Business Rule Definition
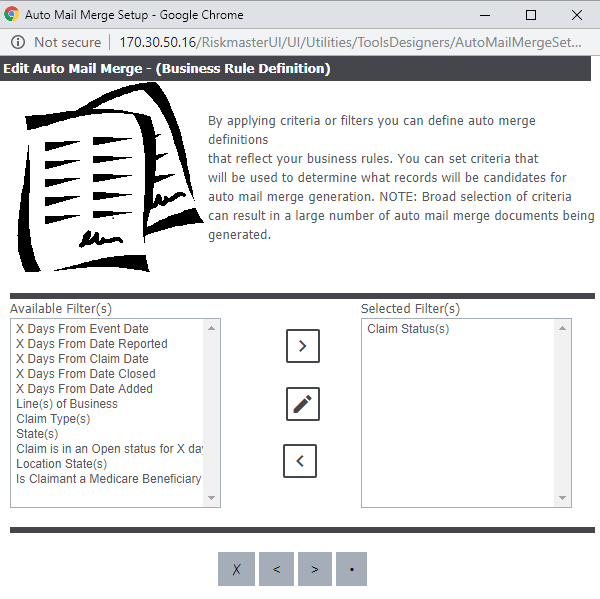
From the Available Filter field, select the filters based on which you want to select the records for creating mail merge.
Select the Add button to include the records in the Selected Filter field. The Add Auto Diary window opens based on the selected filter, on this window you can specify the parameters for the filter.
Select the Next button.
Step 3: Select one or multiple days for sending follow up letters
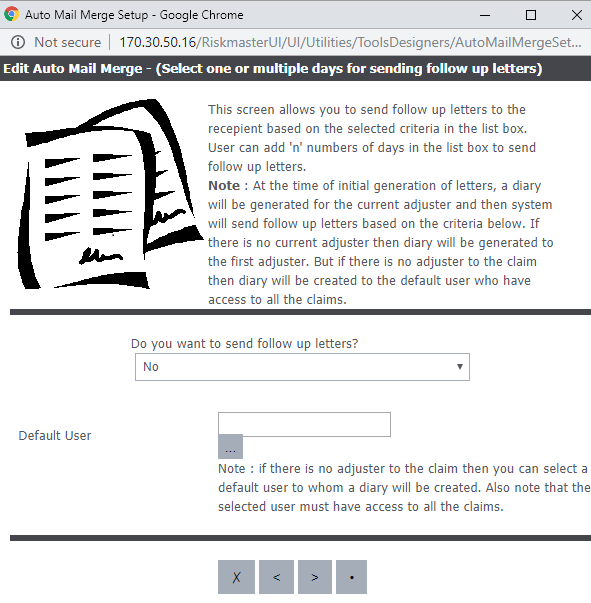
This screen allows you to send follow up letters to the recipient based on the selected criteria in the list box. User can add ‘n’ numbers of days in the list box to send follow up letters.
Note: At the time of initial generation of letters, a diary will be generated for the current adjuster and then system will send follow up letters based on the criteria below. If there is no current adjuster then diary will be generated to the first adjuster. But if there is no adjuster to the claim then diary will be created to the default user who have access to all the claims.
Field Description:
Do you want to send follow up letters?: Select whether you want to send follow up letters or not.
Default User: Select a default user from the list.
Note: If there is no adjuster to the claim then you can select a default user to whom a diary will be created. Also note that the selected user must have access to all the claims.
Step 4: Select default template & default interval
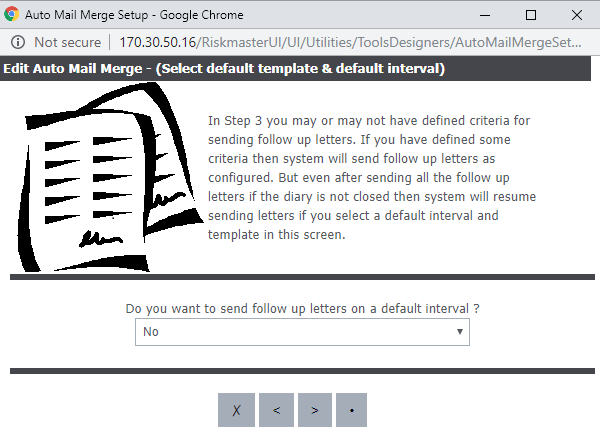
In Step 3 you may or may not have defined criteria for sending follow up letters. If you have defined some criteria then system will send follow up letters as configured. But even after sending all the follow up letters if the diary is not closed then system will resume sending letters if you select a default interval and template in this screen.
Step 5: Select Template & Apply Additional Business Rule
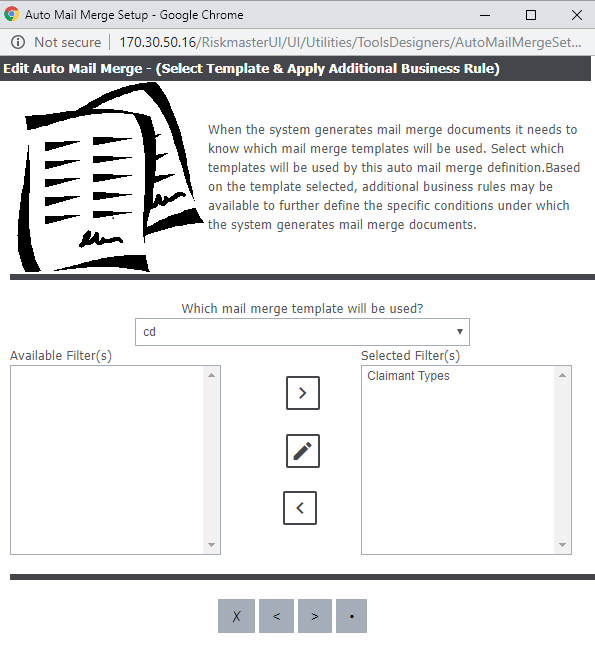
Field Description:
Which mail merge template will be used?: Select which templates will be used by this auto mail merge definition. Based on the template selected, additional business rules may be available to further define the specific conditions under which the system generates mail merge documents.
Select the filter options that are to be included and select the Finish button.
Schedule a Auto Mail Merge Task
To schedule a Auto Mail Merge task, go to Utilities followed by View Scheduled Task under Tools and Designers. From the View Scheduled Tasks window, select the ![]() button. The View Scheduled Task window opens.
button. The View Scheduled Task window opens.
Field Description:

Task Type: From the Task Type drop down list, select the type of task as Auto Mail Merge.
Task Name: Enter the name of the task.
Schedule Type: From the Schedule Type drop down list, select the type of schedule as required.
Complete the fields on the Schedule a DDS Task: One Time, as shown below:
Enter the Date and Time you would like to Run the Task on:
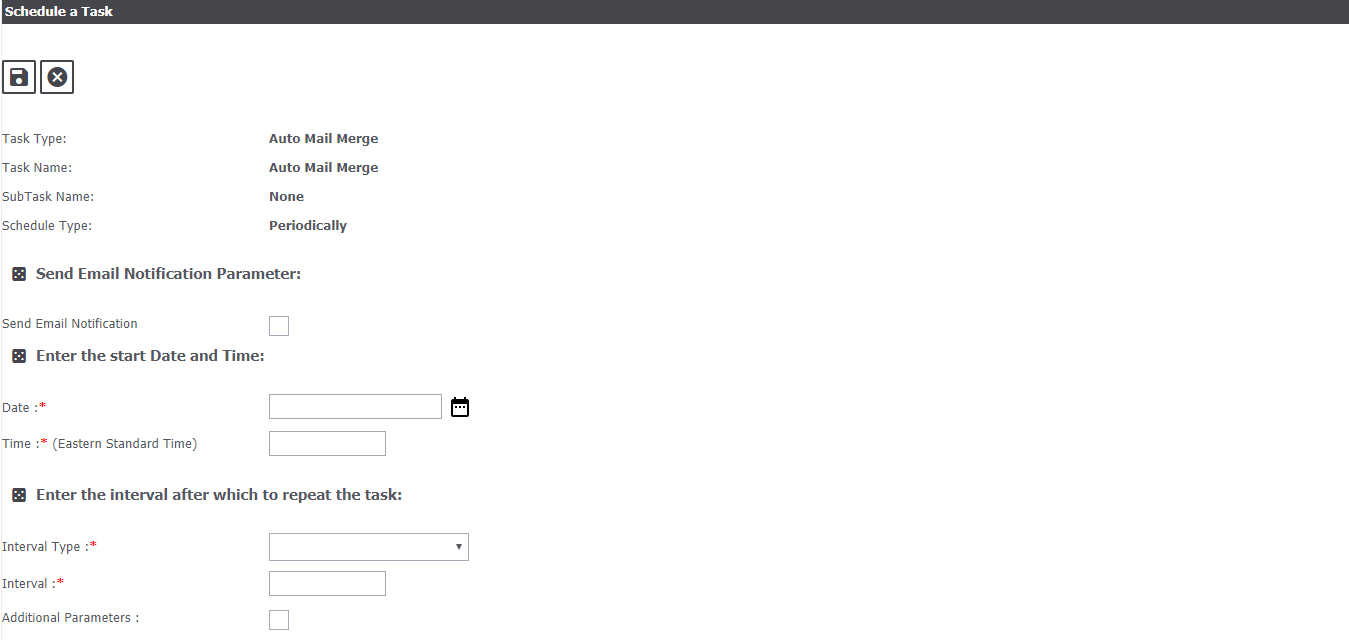
Date: Enter the start date of the scheduled task or select the date from the calendar.
Time: Enter the start time of the scheduled task.
Cancel: Select the button to close the window without saving the changes.
Select the Save button.
The task is scheduled to run as per selected parameters.
Setting Merge Letter Details
From the main menu, select User Documents. From the User Documents menu, select Word Merge Email Details. The Word Merge Email Details window opens.

Select the ![]() button to create a new mail merge email setup. The Word merge Email Detail Setup window opens.
button to create a new mail merge email setup. The Word merge Email Detail Setup window opens.
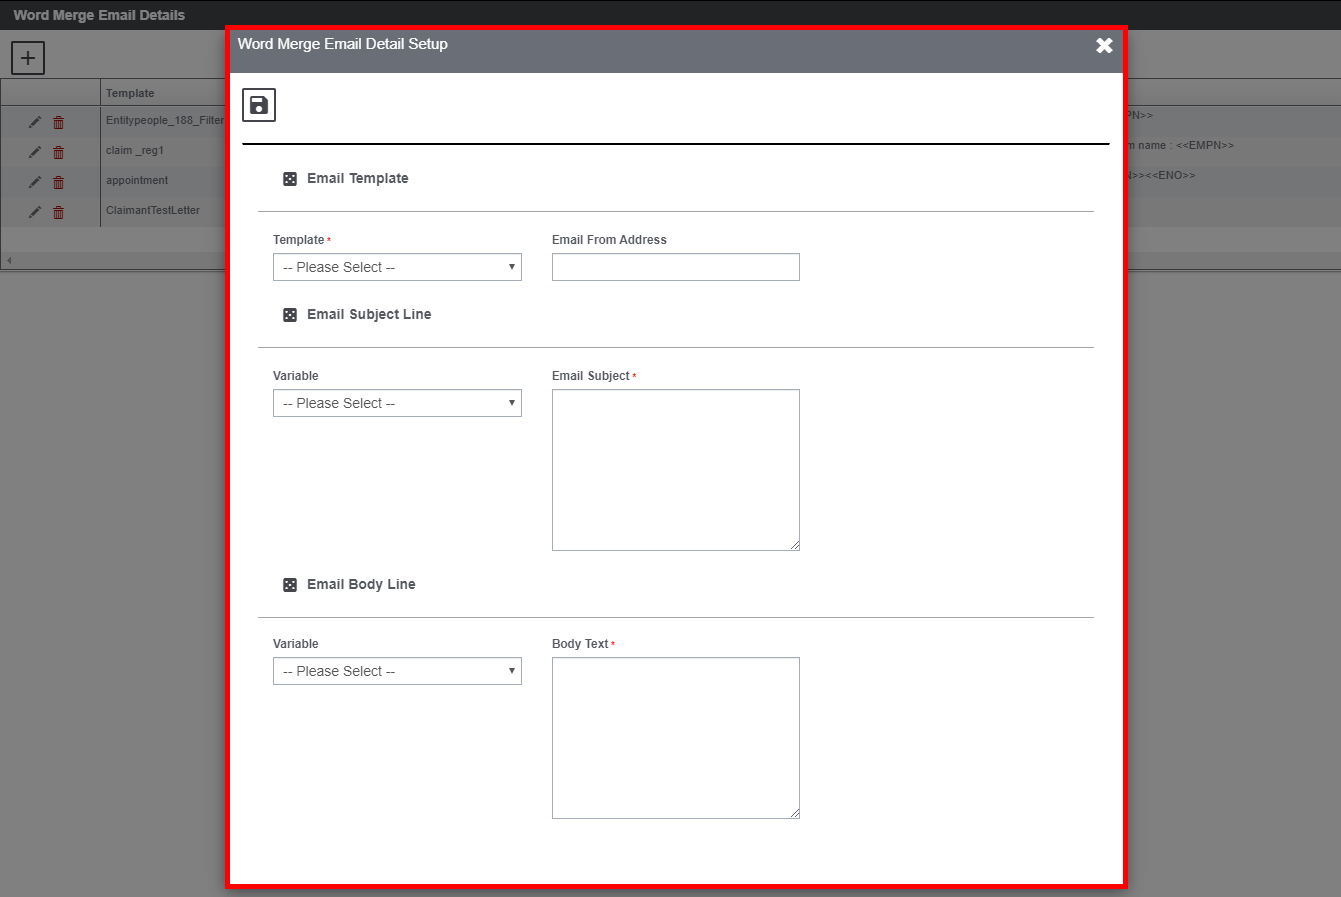
Email Template
- Template (Dropdown): On selecting the ‘Template’ dropdown, the user can check whether Word Merge Email setup is available or not. If the setup is present, then, alert message “The selected template already has email details. Select a different template or edit the existing email detail entry” is displayed, else the user can make a new one.
- Email from Address: This is the sender’s email address.
Email Subject Line
- Variable (Dropdown): The user can choose variables such as Claim Number, Claim Status etc. as defined in “MERGE_FROM_EMAIL_DICTIONARY”.
- Email Subject: The user can define this by adding Variable.
Note: Subject length should be less than or equal to 250 characters.
Email Body
- Variable (Dropdown): The user can choose variables such as Employee Name, Employee Number etc. as defined in “MERGE_FROM_EMAIL_DICTIONARY”.
- Body Text: The user can define this by adding variables besides the message that needs to be conveyed.
Use the ‘Save’ and ‘Cancel’ buttons to either save the Word Merge Email Setup Details or select ‘Cancel’ to start all over again.
One the record is saved; the user’s newly added details will be displayed in the grid.
Note: Word Merge Email Details screen is now Multilingual.
Auto Mail Merge Document
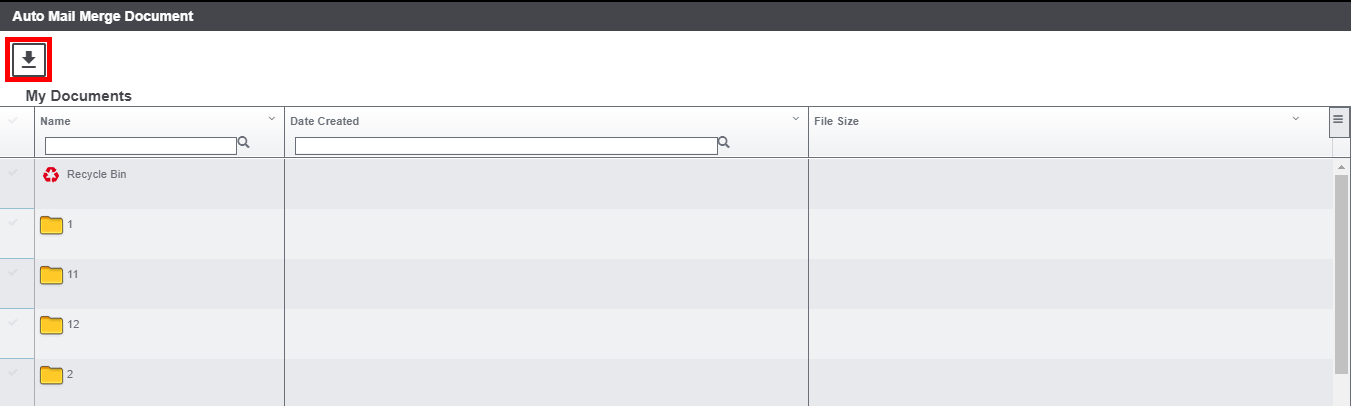
The Auto Mail Merge Document screen can be accessed under Claims > Reports > Auto Mail Merge Document. This screen shows list of documents which are attached through Auto Mail merge (from Utilities) process.
To download the attached documents select the file and hit the Download Selected File(s) ![]() button.
button.
Mail Merge Installation Instructions
The installation steps of Mail Merge are mentioned in the document below.
Click here to download the document