How Can We Help?
User Document
User Documents and Attachments Overview
User Documents
A user document is any document assigned to you in DXC Assure Claims. To create a user document, you can attach existing files, such as text files and sound files, on a local or network drive, to your list of documents. You can also create a user document by scanning printed materials and saving images as files. You can view, print, or detach user documents.
When you attach a file to a record, DXC Assure Claims saves a copy of the file in the documents directory for your database and records it as a user document assigned to you. When you open the User Documents window, it displays all user documents assigned to you. If you transfer a user document to another user, the document does not display when you open the User Documents window.
You can use command buttons to print, delete, view the properties of and open user documents.
Attachments
An attachment is any document that is attached to at least one record in DXC Assure Claims. When you attach a file to a record, DXC Assure Claims saves a copy of the file in the documents directory for your database and records it as a user document assigned to you. When you display a record, you can list all files attached to that record.
Note: If you cannot attach a file or create a user document, contact your system administrator. Your system administrator may need to re-configure your permissions.
You can use command buttons to print, delete, view the properties of and open attachments.
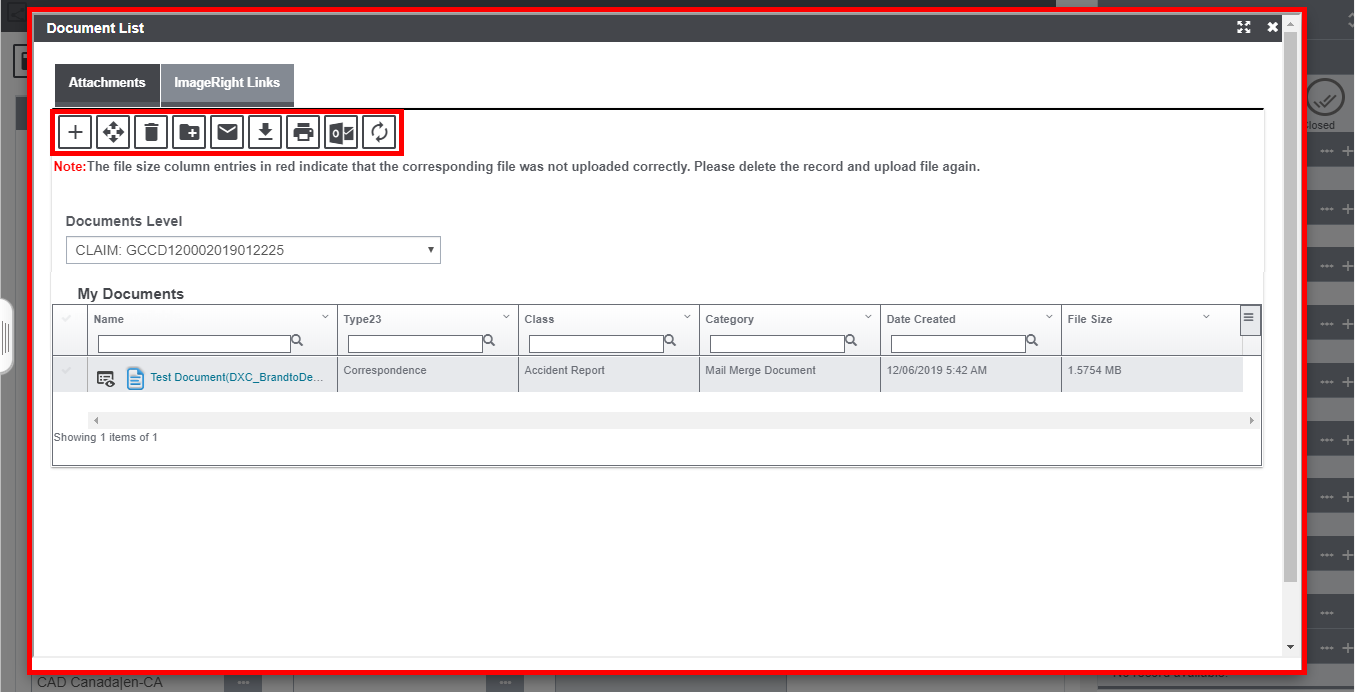
Document List window
Use the My Documents window to display your user documents and to add new documents to your user documents. Login with your User ID to display your user documents in this window.
To open the Document List Window, from the main menu, select User Documents followed by Documents List.
Field Description:
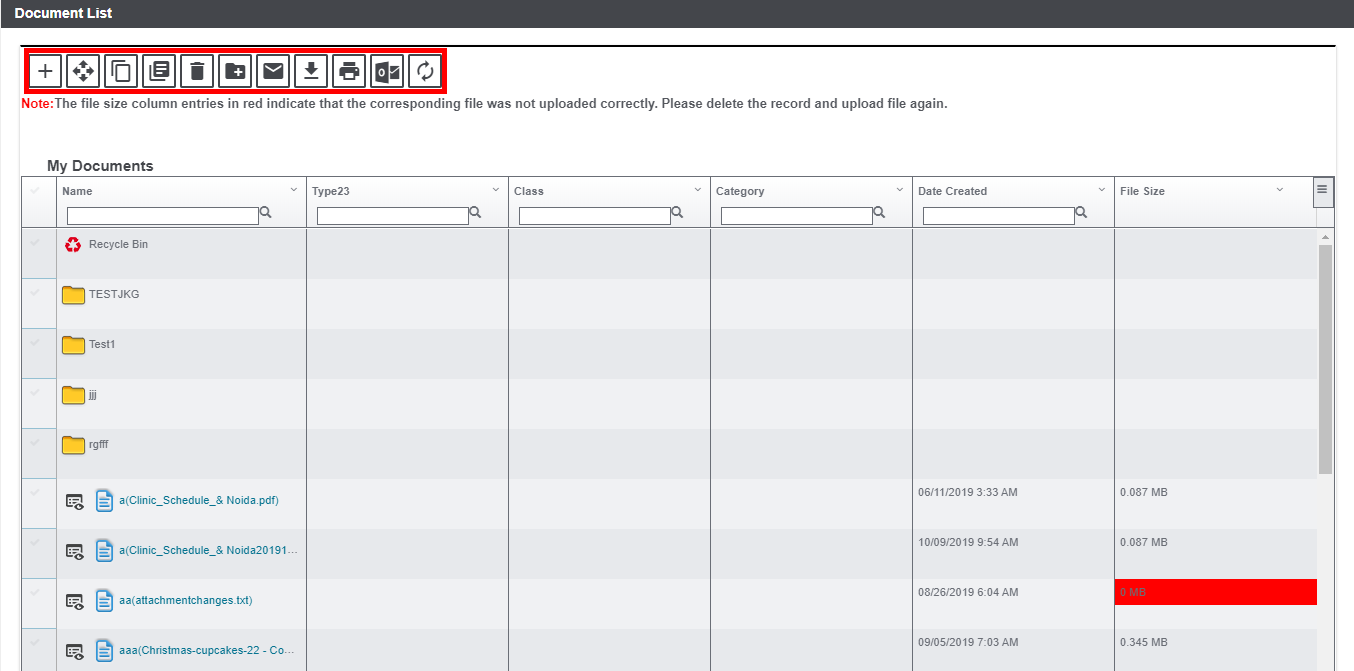
Add New: Select ![]() to open the Add New Document window.
to open the Add New Document window.
Move: Select the checkbox for a document and select the ![]() button to open the Move Folders window and select a folder to which you want to move the document.
button to open the Move Folders window and select a folder to which you want to move the document.
To move a document from one folder to another, select the check box for the document and select the Move button.
Note: You can select multiple documents.
The Move Documents window opens.
Select the folder to which you want to move the document and select the Move button. The My Documents window displays the folder name and documents in the folder.
Copy: Select the check box for a document and select the ![]() button to open the Copy Documents window and select a user/s to whom you want to mark a copy of the document.
button to open the Copy Documents window and select a user/s to whom you want to mark a copy of the document.
Note: RISKMASTER displays the document on the My Documents window of the user to whom you marked a copy of the document.
To mark a copy of a document to another user, select the check box for the document and select the Copy button.
The Copy Documents window opens.
Select the user/users to whom you want to mark a copy of the document and select the Copy button.
DXC Assure Claims displays a copy of the document on the My Documents window of the user to whom you marked a copy of the document.
Transfer: Select the check box for a document and select the ![]() button to open the Transfer Documents window and select a user/s to whom you want to move the document.
button to open the Transfer Documents window and select a user/s to whom you want to move the document.
Note: DXC Assure Claims removes the document from your user documents and displays on the My Documents window of the user to whom you transferred the document.
To transfer a document from one user to another, select the check box for the document and select the Transfer button.
The Transfer Documents window opens.
Select the user/users to whom you want to transfer the document and select the Transfer button.
DXC Assure Claims removes the document from your user documents and displays on the My Documents window of the user to whom you transferred the document.
Delete: Select the check box for a document and select the ![]() button to delete the document.
button to delete the document.
Create Folder: Select the ![]() button to create the folder.
button to create the folder.
E-mail: Select the checkbox for a document and select the ![]() button to open the E-mail Documents window and select a user/s to whom you want to email the document.
button to open the E-mail Documents window and select a user/s to whom you want to email the document.
You can also enter additional email IDs and a message for the recipients.
To email a document, select the check box for the document and select the E-mail button. The E-mail Documents window opens.
Select the user/s to whom you want to email the selected document.
In the E-Mail document(s) to following additional recipient(s) field, enter the email IDs of any other recipients.
In the Message for the Recipients field, enter a message or subject for your email.
Select the E-Mail button. DXC Assure Claims e-mails the document to the selected recipients.
Download Selected File(s): Select the document that is to be downloaded and select the ![]() button. This will download the selected document.
button. This will download the selected document.
Print Selected File(s): Select the ![]() button to print the selected file.
button to print the selected file.
Send Using Oulook: To the mail the selected file via Outlook, select the ![]() button.
button.
Reload: Select the ![]() button to display the most recent documents.
button to display the most recent documents.
Add New Document Window
Use the Add New Document window to enter details about a file that you are attaching to a record, a file that you are assigning as a user document , or a new mail merge document.
To open the window, from the My Documents window opens, select the Add New button.
Field Definitions:
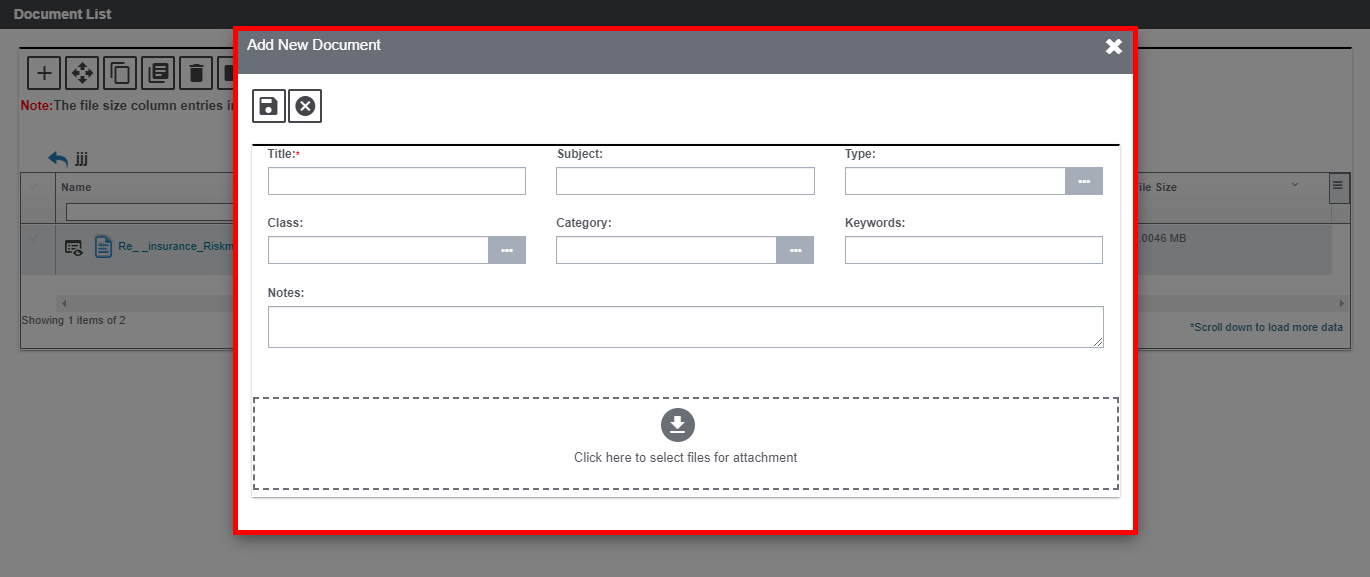
Title: Enter a name for the document. This name can be up to 32 characters long.
Subject: Enter a subject for the document.
Type: Enter the code that best describes the document type you want to create, or select the ![]() button to select from the Code Selection window.
button to select from the Code Selection window.
Class: Enter the code that best describes the document class you want to create, or select the ![]() button to select from the Code Selection window.
button to select from the Code Selection window.
Category: Enter the code that best describes the document category you want to create, or select the ![]() button to select from the Code Selection window.
button to select from the Code Selection window.
Keywords: Enter keywords is used to find this document when you search for the document.
Notes: Enter any additional comments about the document.
Once the fields are filled, select the “Click here to select files for attachment” option and upload the documents from the system.
The documents can even be uploaded by dragging them from the system folder and dropping them on the attachment window. In that case, the name of the files will be taken up as the Document Name.
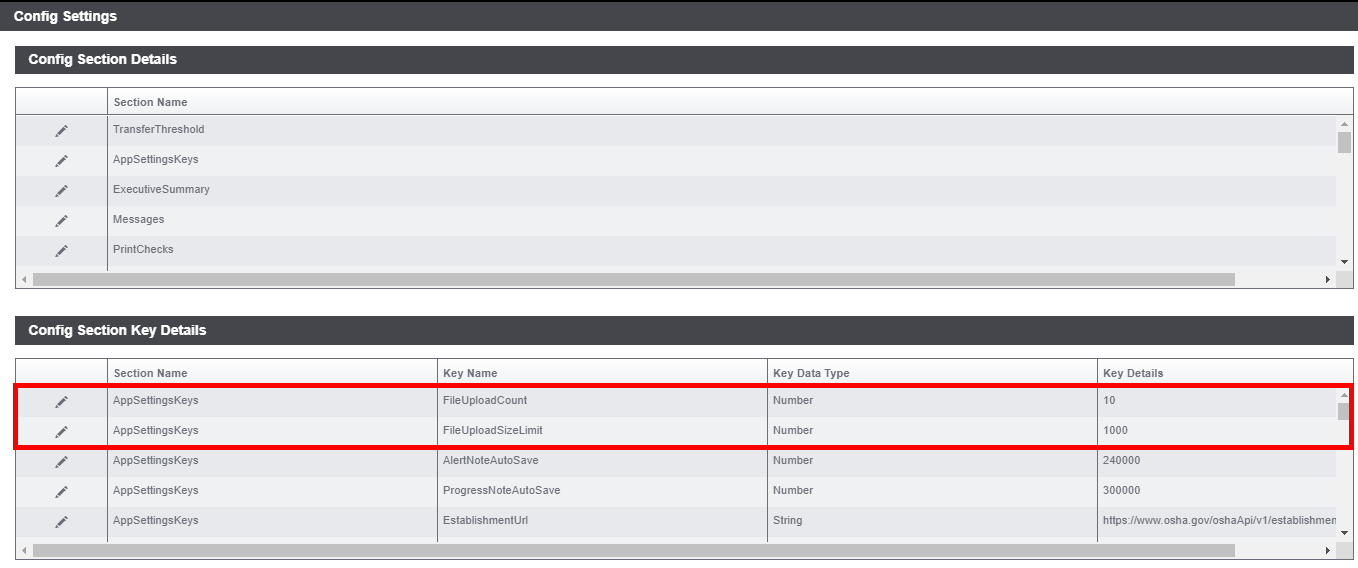
You can even configure the maximum number and size of files that can be attached using this drag-and-drop feature. In order to configure the maximum number and size of file upload, follow the steps mentioned below:
Go to Utilities -> Config Settings -> Config Section Key Details
In the Key Name column of Config Section Key Details, search FileUpload. The FileUploadedCount and FileUploadedSizeLimit will appear as shown in the image below:
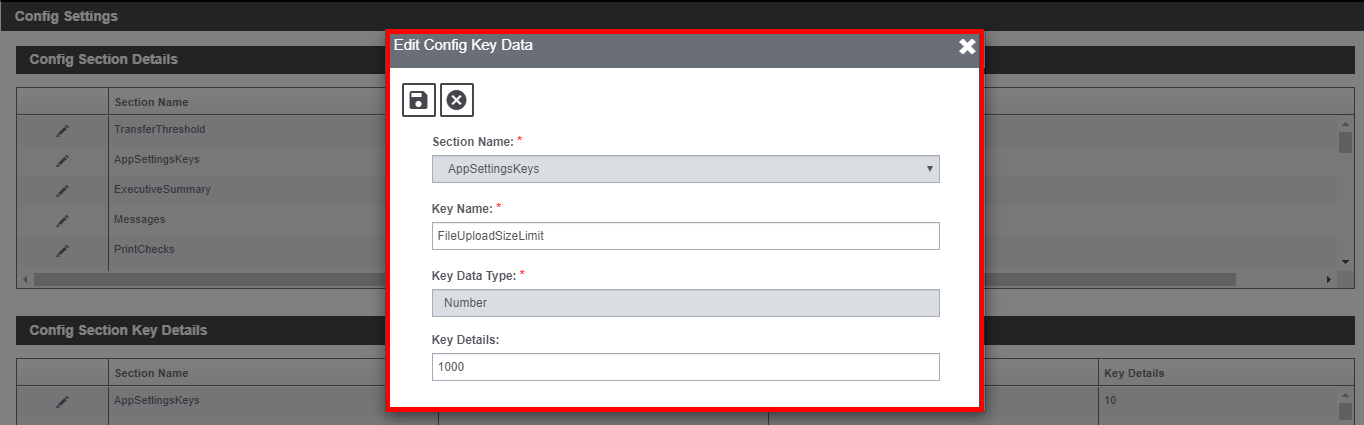
Click on the Edit button corresponding to FileUploadedCount option. The “Edit Config Key Data” popup will appear. Enter the maximum number of files allowed for upload in the “Key Details” field.
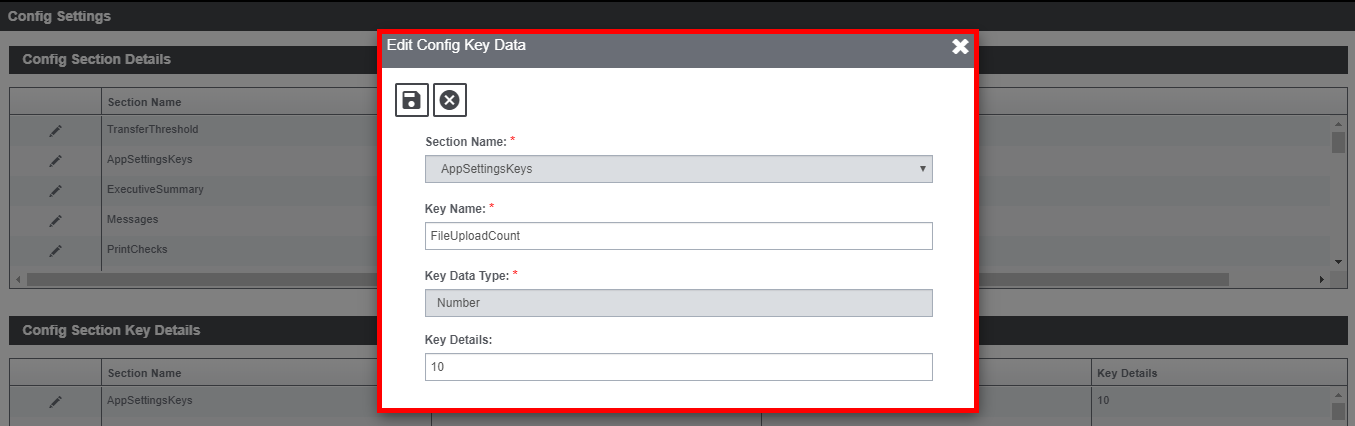
Similarly, click on the Edit button corresponding to FileUploadedSizeLimit option and set the maximum file size that is to be allowed for the upload.
In case, the user tries to upload the documents more than the permissible limit, then, an error message will be displayed. Similarly, in case the maximum allowed file size is 10MB and the user tries to upload a file of higher size, then, a similar error message will be flashed.
Attachments Window
Use the Attachments window to display documents attached to the open record, and to attach new documents to records. You must open the Attachments window with a record open to display or add attachments to that record.
To open the Attachment window, search for the event or claim you want to attach the file to. From the toolbar, select the ![]() button.
button.
Create Folder
To know the workflow of the folder support functionality, watch the video below: