How Can We Help?
Reserves
Overview
DXC Assure Claims enables working with Reserves, Payments, and Collections in a logical sequence that follows the life cycle of a Claim . When you first record a Claim, you create the opening Reserve. You can subdivide this Reserve into multiple categories, including Expense and Indemnity.
You can increase or decrease Reserves whenever necessary. When you make a payment , the payment amount is subtracted from the reserve balance. When you close a claim, you can set Insurance RISKMASTER up to either reset the reserve balance to zero, the reserve amount to zero, or to leave it unchanged.
Note: DXC recommends that you set up reserves for a claim before processing payments. Insurance RISKMASTER does not include claims without reserves in financial reports.
Reserve Categories
Insurance RISKMASTER uses different reserve categories for each line of business and for claimants. Your system administrator creates the categories when Insurance RISKMASTER is installed. In general, all user reserves are linked to two reserve categories:
Expense: The reserves for expenses defined by your organization. This includes all reserves that are not considered indemnity reserves.
Indemnity: The amount needed to indemnify your organization against the claim. The indemnity reserve can change over time for many reasons specified by your legal counsel and actuary.
Reserve Calculations
RISKMASTER calculates reserve balance and related data as shown next:
|
For Open Claims |
For Closed Claims | |
| Reserve Balance |
When Collections are not taken into account: Reserve Amount – Paid Reserve Amount – Paid + Collections (if Collections are less than or equal to Paid) |
May be 0, or left unchanged based on the settings in Utilities |
| Total Incurred |
When Collections are not taken into account: Greater of the Reserve Amount or Paid Balance Greater of the (Reserve Amount – Collections) or Paid Balance Greater of the (Reserve Amount – Collections) or Paid Balance |
When Collections are not taken into account: Greater of the Reserve Amount or Paid Balance When Collections are taken into account: Greater of the (Reserve Amount – Collections) or Paid Balance |
| Paid Balance | Payments – Collections (if the difference is less than 0), then the Paid Balance will be 0 | Payments – Collections (if the difference is less than 0), then the Paid Balance will be 0 |
Reserve Tracking Methods
Your system administrator can configure RISKMASTER to track reserves in either one of two ways:
Claim-level Tracking: Also called “gross-level” tracking. You can enter reserves and payments when entering or working with claims. Select this option to track reserves by claim only. This option is available for all four lines of business. You cannot track individual reserves for each claimant if you select this option.
Detail-level Tracking: Also called “claimant-level” or “unit-level” tracking. You can only record reserves and payments at the claimant or unit level. Detail-level tracking is designed for organizations that allocate costs at the most detailed level. This option is only available for General and Vehicle Accident claims.
- When using detail-level tracking for General claims, the Financials tab in the Claim window displays an aggregate of the claimant financials and is read-only.
- When using detail-level tracking for Vehicle Accident Claims, the Financials tab in the Claim window displays an aggregate of the claimant and the unit financials and is read-only.
Note: DXC strongly recommends that you do not change your reserve tracking method once you start recording claims. If you have to change your reserve tracking method, do it at the start of your organizations fiscal year.
Auto Adjusting Reserves
Your system administrator specifies how reserves are maintained for open and closed claims. This influences the reserve reports you generate. Your system administrator can set your system to Auto Adjust Negative Reserves to Zero so that when you enter a payment that is greater than the Reserve Balance, Insurance RISKMASTER automatically raises the Reserve amount and maintains a zero balance and processes the payment. If your reserve history reports show many automatic adjustments to Reserves, consider raising your opening Reserve levels. You should also review your claims more frequently to manually raise the Reserve levels before an automatic adjustment is necessary.
Closed Claim Reserves
When setting up Insurance RISKMASTER, your organization can define the following settings for claim reserves when a claim’s status is set to “Closed”.
Set Reserve Balance to Zero: Automatically adjusts the reserve balance to zero for any reserve amount
Set Reserve Amount to Zero: Automatically adjusts the reserve amount to zero.
Set Negative Reserve Balance to Zero: Automatically adjusts any negative reserve balance to zero.
Do Nothing: Makes no change to the reserve amount or the reserve balance.
The method your organization selects will have a significant effect on your reserve reports.
How to View Reserve History?
Follow the steps mentioned below to view reserve history:
- Search for the claim with the reserve for which you want to view a history. Select Financials/Reserves button from the toolbar at the top of the Claim screen to open the Reserves window.
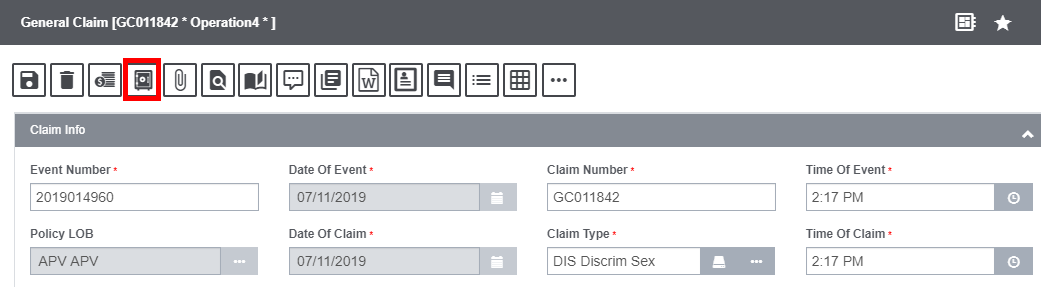
- Or else, you can open the Reserves window by clicking on the Reserves button in the right-hand pane of the Claim screen.
- From the list of current Reserves displayed in the Reserves window, select the reserve for which you want to view a history.
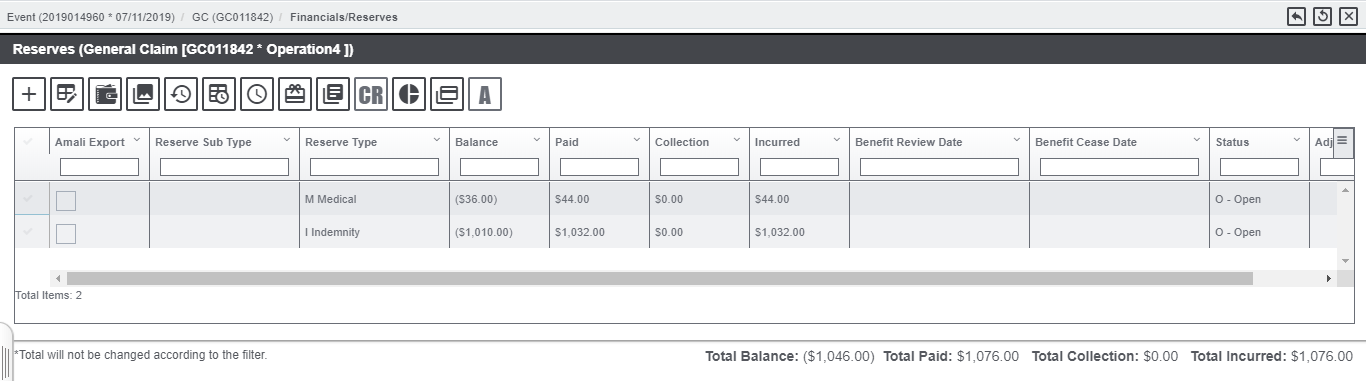
- The Compensation Reserve for claim window opens and displays the history of the reserve you selected.
How to Create a Reserve?
1. Select the + sign at the top left section of the Reserves window to open the reserve for claim window.
2. Complete the fields in the Reserve for claim window. The various fields are discussed below:
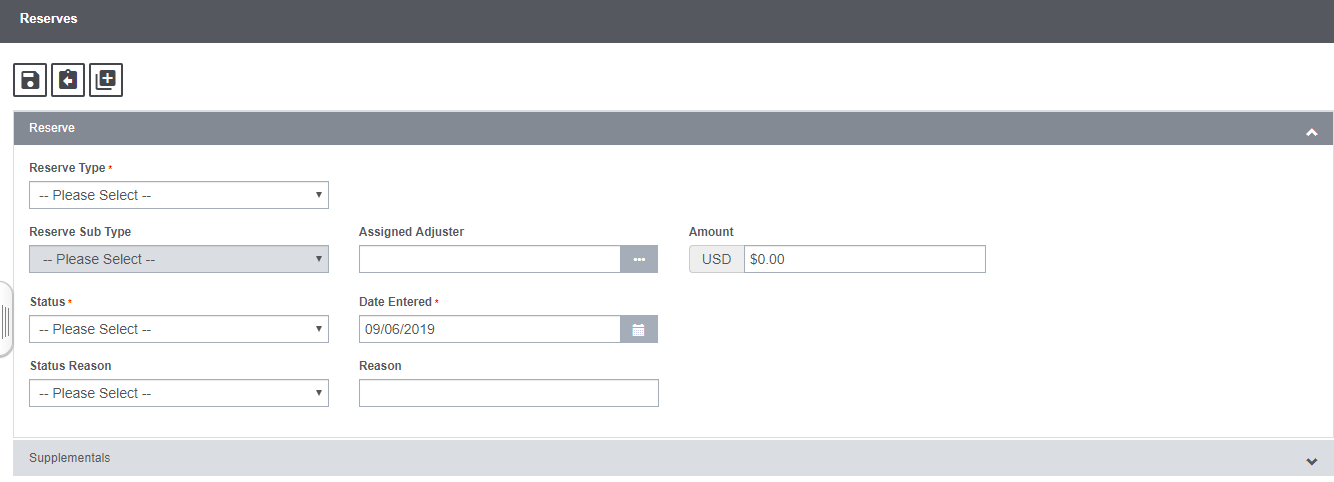
Reserve Type: Select the Reserve type from the dropdown list.
Reserve Sub-type: The options for reserve sub-type will be displayed in the dropdown list as per the reserve type selected.
Assigned Adjuster: Select the adjuster assigned to the particular reserve from the lookup table by selecting the ![]() button.
button.
Amount: Enter the new reserve amount.
Status: From the drop down list, select the status of the claim.
Date Entered : Enter the date on which the new reserve takes effect or select the ![]() button to select from a calendar. Usually this is the current date.
button to select from a calendar. Usually this is the current date.
Status Reason: From the drop down list, select the reason for selecting the current status.
How to Edit an existing Reserve?
To edit a Reserve, follow the steps mentioned below:
- Search for the claim for which you want to edit the reserve .
- Select the Financials/Reserves link from the Toolbar. The Reserves History window opens.
- From the list of current reserves, select the reserve you want to edit.
- Select the Edit button from the toolbar to get redirected to the reserve window.
