How Can We Help?
Property Claims
Introduction
Use the Property Claims window to enter detailed information about the Claims related to property damages and liability. The Property Claims module enables you to add, edit, delete Property Claim information efficiently.
You can associate only one property per Claim . To attach multiple properties to an Event you must create multiple Property Claims.
Property Claims Window: Claim Info Accordion
Use the Claim Info accordion to enter general information about a Property Claim.
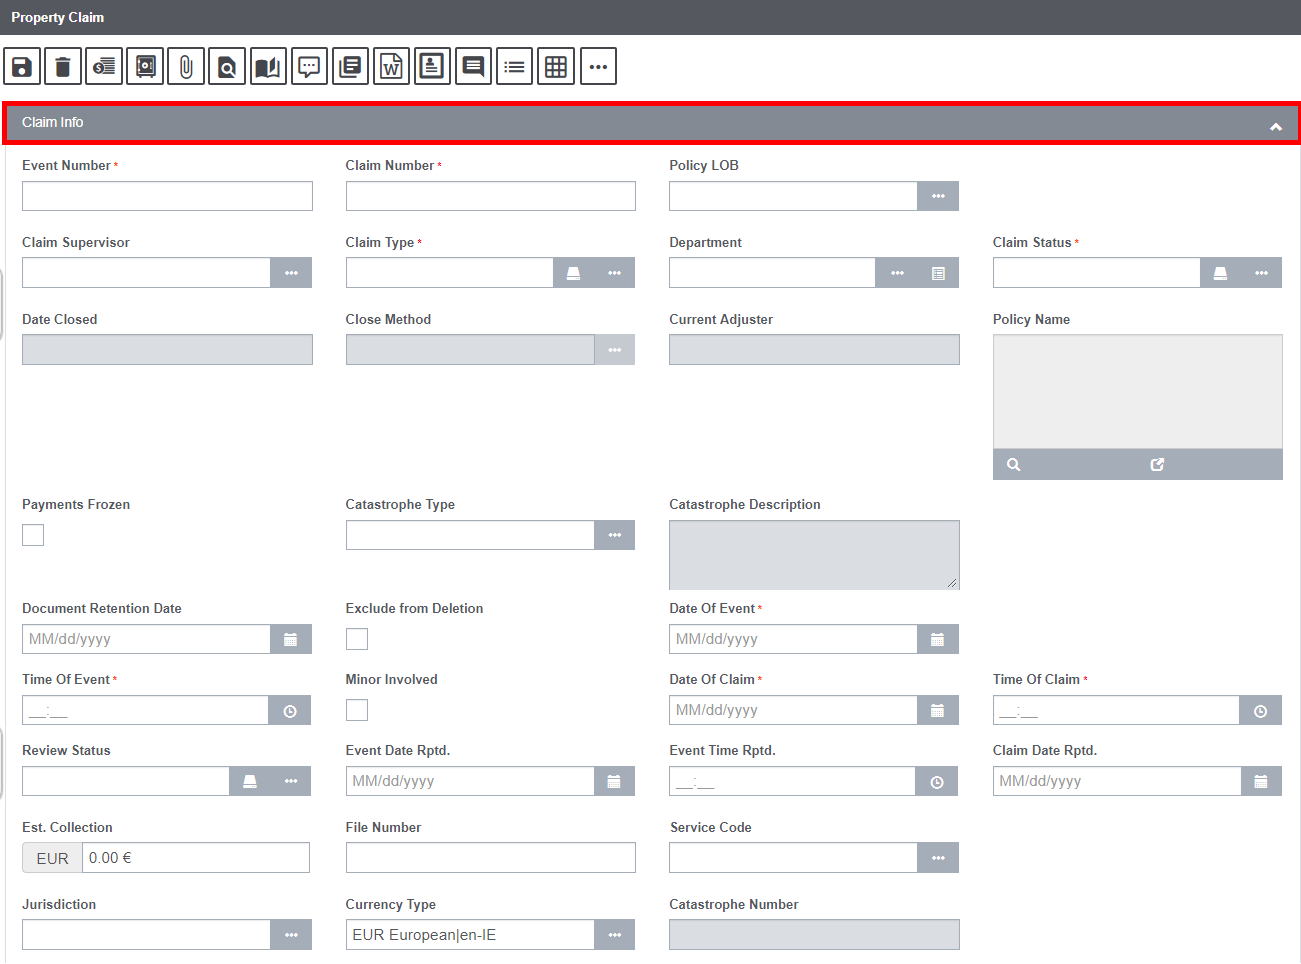
Field definitions:
Event Number: If you open the Property Claims window from the Event window, displays the Event Number.
If you open the Property Claims window directly, DXC Assure Claims will create a new event and add the Event Number to this field when you save the Claim.
Claim Number: Enter a unique identifying number for the Claim or leave blank and Assure Claims will generate a Claim Number when you select the Save button.
Policy LOB: Enter the code that best describes the insurance line of the Policy against which the Claim is made or select the ![]() button to select from the code lookup window.
button to select from the code lookup window.
Note: The Policy LOB field is visible only when the Use Carrier Claims checkbox is selected on the General System Parameter Setup > Carrier Claim Settings (tab).
Claim Supervisor: Select the Claim Supervisor from the lookup table. Select the icon ![]() to open the lookup table.
to open the lookup table.
Claim Type: Enter the code that best describes the Claim. The Claim Type field has two icons ![]() , Status Details and Claim Type. Select the Status Detail button
, Status Details and Claim Type. Select the Status Detail button ![]() to conveniently change the Claim Type and view all previous changes made to it.
to conveniently change the Claim Type and view all previous changes made to it.
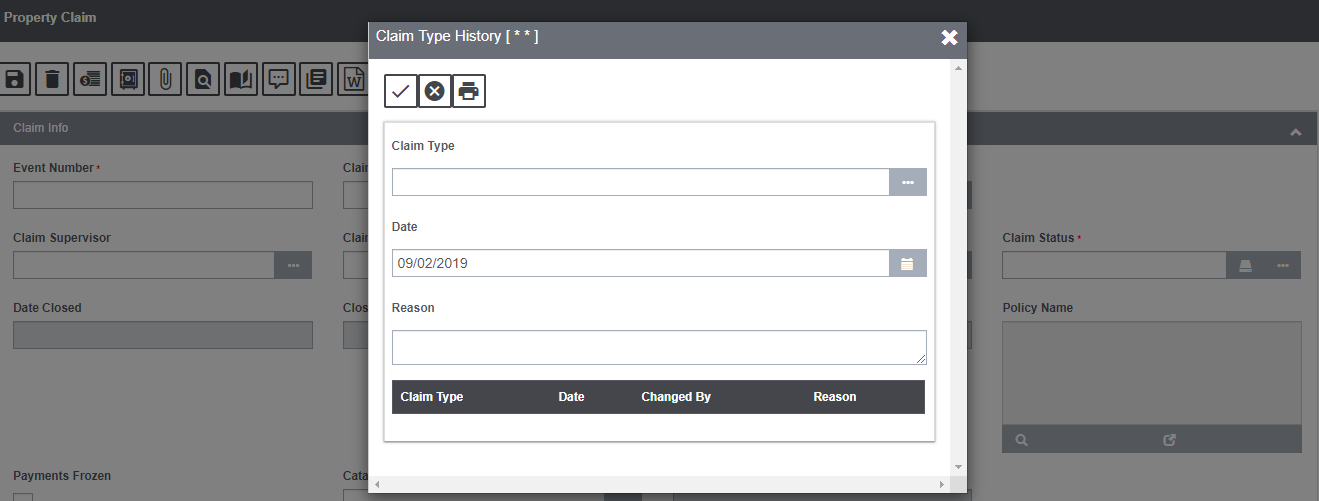
Select the Claim Type button ![]() to get redirected to the Claim Type Code Selection window.
to get redirected to the Claim Type Code Selection window.
Department: Enter the Department, the individual or equipment involved in the Event. Select the ![]() button to get redirected to the Department Hierarchy window.
button to get redirected to the Department Hierarchy window.
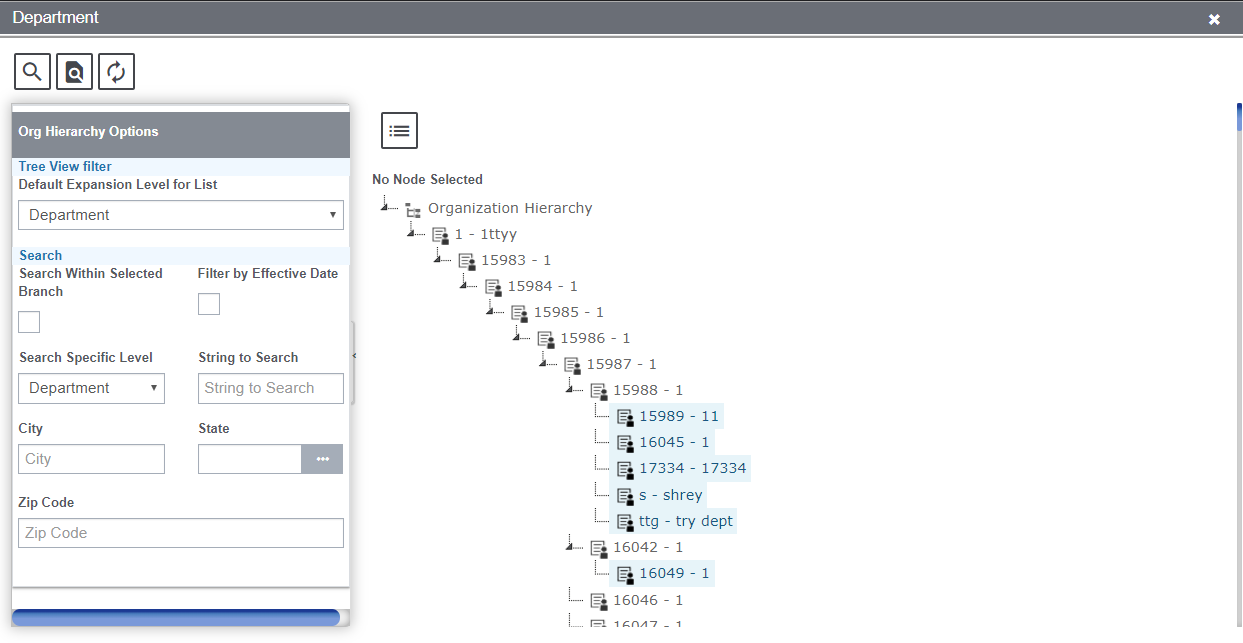
Select from the Org. Hierarchy window. Click on the icon ![]() to view the instruction corresponding to the Organization Hierarchy.
to view the instruction corresponding to the Organization Hierarchy.
Claim Status: Enter the code that best describes the Claim Status. Select the ![]() button to select from the Claim Status Code selection window. Additionally, the
button to select from the Claim Status Code selection window. Additionally, the ![]() Claim Status Detail button allows you to change the Claim Status and view all previous changes made to it.
Claim Status Detail button allows you to change the Claim Status and view all previous changes made to it.
Date Closed: For a closed Claim, displays the date when the Claim was closed.
Close Method: When you close a Claim, enter the code that best describes how the Claim was closed or select ![]() the button to select from the Code Selection window.
the button to select from the Code Selection window.
Current Adjuster: The current adjuster of the Claim is entered here.
Policy Name: Enter a Policy name that you want to attach to the Claim or select the button to select from the Policies window.
Payments Frozen: Select the checkbox to stop all payments on this Claim.
Note: The Claim remains open but no payments are made until you clear this checkbox. You can only use this checkbox if you have the appropriate permissions.
Catastrophe Type: Select the button to select the required Catastrophe Type associated with the Claim.
Note: The Catastrophe can be of various types:
- Death
- Ice
- Earthquake
- Multiple Vehicle Accident
- Fire
- Theft
- Flood
- Tornado
- Hail
- Workers Compensation Accident
- Hurricane
- Windstorm
Note: From the Catastrophe Type field when you select a type of Catastrophe. The Catastrophes window opens and lists all the Catastrophes present in the database based on chosen type. Select ‘Yes’ and then choose a Catastrophe record. The Catastrophe Number of the selected record is displayed in the Catastrophe Number field.
Document Retention Date: Click on the calendar icon to select the retention date of the document.
Exclude from Deletion: Select this checkbox to exclude the Claim from deletion. If checked, the user will not be allowed to delete the Claim.
Date of Event: Enter the date on which the Event occurred or select ![]() button to select from a calendar.
button to select from a calendar.
Time of Event: Enter the time when the Event occurred.
Note: You must enter time in the format xx:xx, with a colon : between the hours and minutes. The time you enter defaults to AM.
Minor Involved: Select this checkbox if a minor is involved in the Claim.
Date of Claim: Enter the date on which your organization learned of the Claim or click on the ![]() button to select from a calendar.
button to select from a calendar.
Time of Claim: Enter the time when your organization was informed of the Claim or click on the icon ![]() to select the relevant time.
to select the relevant time.
Review Status: Review Status allows any changes made to the Review Status field. Selecting the Review Status History ![]() will display a
will display a
popup showing the review status history. The Claim Review Status ![]() popup window displays the Review Statuses created in the Maintenance Table.
popup window displays the Review Statuses created in the Maintenance Table.
Event Date Rptd: Enter date on which the Event was reported or select the ![]() button to select from a calendar.
button to select from a calendar.
Event Time Rptd: Enter the time when the Event was reported. Click on the Calendar icon ![]() to select the relevant Event time reported.
to select the relevant Event time reported.
Claim Date Rptd: Enter the date when Claim was reported or select the button to select from a calendar.
Est. Collect: Enter the dollar amount that you expect to collect on this Claim.
File Number: Enter any special identification number that your organization uses such as the box number or the insurance company’s case number.
Service Code: Enter the code that best describes who is responsible for processing the Claim or select the search button to select from the Code Selection window.
Jurisdiction: Enter the state in which you must file OSHA reports for the Claim or select the button to select from the States window.
Currency Type: Enter the currency type or select the icon ![]() to open the lookup table and select the currency code.
to open the lookup table and select the currency code.
Note: By default the Claim currency will be displayed in the Currency Type field. If the payment is not associated with a Claim, the currency type will default to the Base Currency.
Catastrophe Number: Displays the number of the Catastrophe record attached to the Claim.
Note: The number is displayed based on selection made in Catastrophe Type field.
Property Claims Window: Event Info Accordion
Use the Event Detail tab to enter general information about the Event related to the particular Claim. DXC Assure Claims automatically updates this accordion, if you open the Claim window from the Event window.
If you enter a Claim before entering an Event, then Assure Claims uses the information on this tab to create a new Event for this Claim.
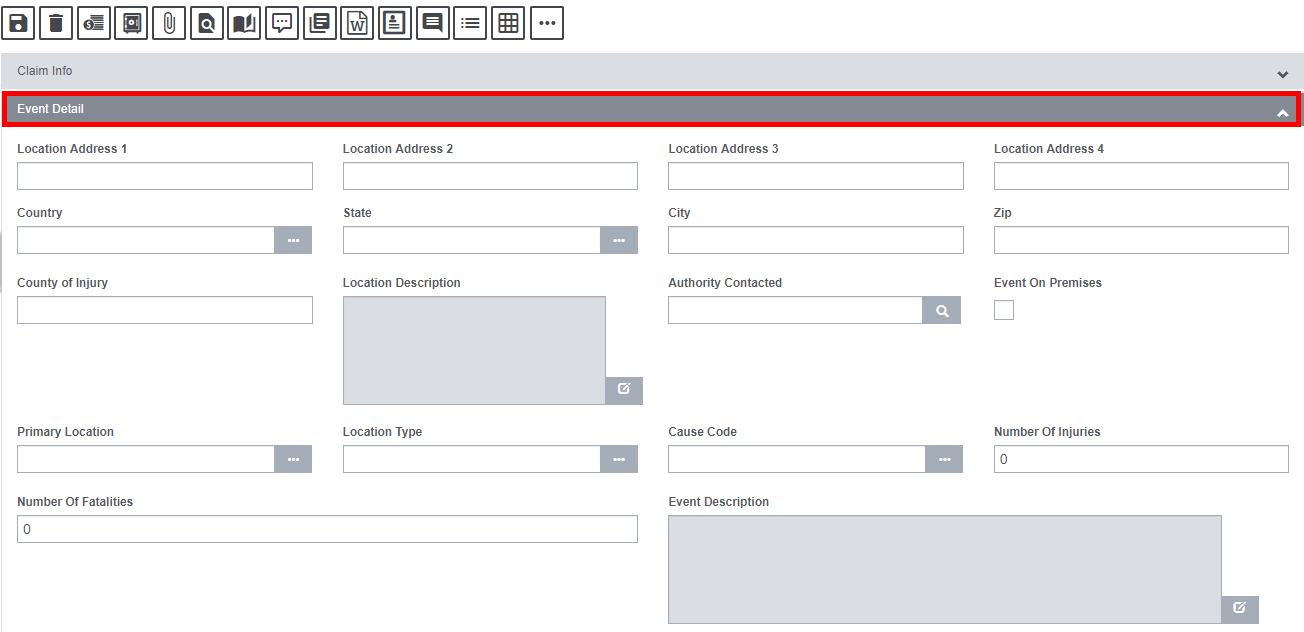
Field definitions:
Location Address: Enter the address where the Event occurred. Enter the City, State, Zip, and Country in the appropriate fields.
County of Injury: Enter the county where the Event occurred.
Location Description: Enter a description for the location where the Event occurred or select the button to open the Assure Claims Editor. In the Assure Claims Editor ![]() , enter the description and then select OK
, enter the description and then select OK ![]() .
.
Authority Contacted: Enter the person who was informed of the Event, or select the button to open the Standard Entity Search window and search for the authority contacted.
Event On Premise: Select the checkbox if the Event occurred,
- on your organization’s property (if you are self-insured).
- on the insured organization’s property (if you are a TPA).
Primary Location: Enter the code that best describes the exact location where the event occurred or select the button to select from the Code Selection window.
Location Type: Enter the code that best describes the Location Type where the Event occurred or select the button to select from the Code Selection window.
Cause Code: Enter the code that best describes the Event’s cause or select the button to select from the Code Selection window.
Number of Injuries: Enter the number of persons injured as result of the Event.
Number of Fatalities: Enter the number of deaths that resulted from the Event.
Event Description: Enter a description for the Event or select the button to open the Assure Claims Editor and enter the description followed by the OK button.
Property Claims Window: Property Info Accordion
Use the Property Info tab to add a property to a Claim. You can add only one Property to one Claim. If you need to attach multiple Properties to an Event, you need to create multiple Claims.
When you select a property from the database, this accordion is automatically populated. You can modify and save the Property Claim. However, the property entity in the database is not changed when you make changes on this accordion.
When using the Policy Management System, if the checkbox “Filter Property for Selected Property” is selected under Utilities, then modifying the policy on the Claim clears the Property Info accordion.
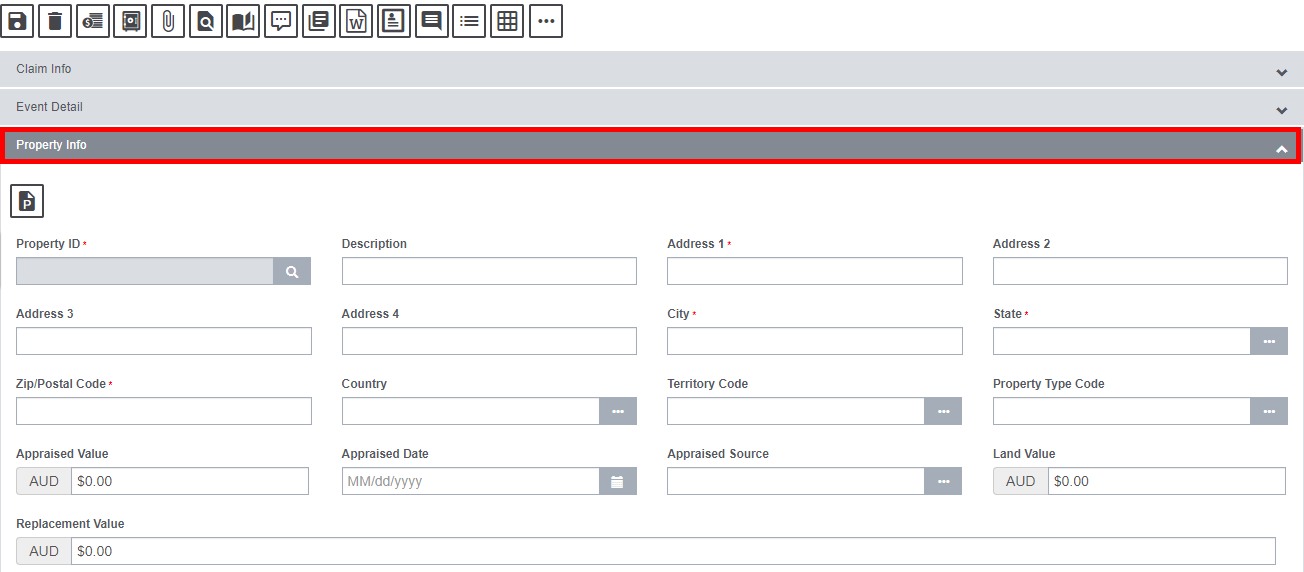
Field Description:
Property ID: Select the Search button ![]() to select a Property from the database.
to select a Property from the database.
If you do not have Policy Management System turned on:
There is no validation for Properties based on Policy. You can select any Property from the database.
Once you select a Property, the fields on this accordion, the COPE Data accordion, and the Optional COPE Date accordion, are automatically populated and the Schedule accordion is blank.
- If you have the Policy Management System turned on:
- If in Utilities, on the Line of Business Parameters window, Claim Options tab, the ‘Filter Property for Selected Policy’ check box selected, then you can select a Property on this tab based on the Policy you selected on the Claim Info tab.
- If the Property you want to select is not on the list you will need to add the Property to the Policy before you can create the Property Claim.
- Once you select a Property, the fields on this tab, the COPE Data accordion, the Optional COPE Data accordion, and the Schedule accordion are automatically populated.
- If in Utilities, on the Line of Business Parameters window, Claim Options tab, the ‘Filter Property for Selected Policy’ checkbox is not selected, there is no validation for Properties based on Policy.
- You can select any Property from the database. Once you select a Property, the fields on this tab, the COPE Data accordion, and the Optional COPE Data accordion, are automatically populated and the Schedule accordion is blank.
In this case the Adjuster is responsible to verify Coverage.
Description: Enter a brief description about the Property.
Address: Enter the address of the Property. Enter the City, State and Zip in the appropriate fields.
Territory Code: Enter the territory code of the Property or select the ![]() button to select from the Code Selection window.
button to select from the Code Selection window.
Property Type Code: Enter the type code of the Property or select ![]() button to select from the Code Selection window.
button to select from the Code Selection window.
Appraised Value: Enter the appraised value of the Property in dollars.
Appraised Date: Enter the date when the value of the Property is appraised or select the ![]() button to select from the calendar.
button to select from the calendar.
Appraisal Source: Enter the source of appraisal of the Property or select ![]() button to select from the Code Selection window.
button to select from the Code Selection window.
Land Value: Enter the land value of the Property in dollars.
Replacement Value: Enter the replacement value of the Property.
Property Claims Window: COPE Data Accordion
Select and complete the fields in the COPE Data accordion , as shown below.
When you select a Property from the database on the Property Info accordion, the COPE Data accordion is automatically populated. You can modify and save the data on this accordion. However, the Property Entity in the database is not changed when you make changes on this accordion.
If you use the Policy Management System and the ‘Filter Property for Selected Policy’ checkbox is selected in Utilities, when you modify the policy on the claim, this tab will be cleared.
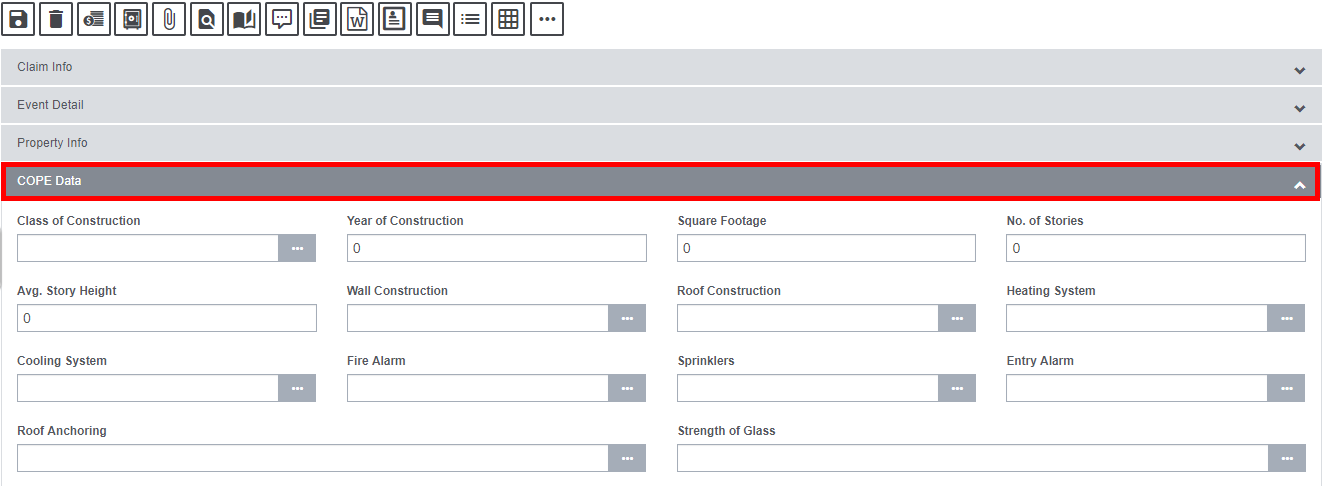
Field Description:
Class of Construction: Enter the Property construction class.
Year of Construction: Enter the year when the Property was constructed.
Square Footage: Enter the square footage of the constructed Property.
No. of Stories: Enter the total number of stories build on the Property.
Avg. Story Height: Enter the average height of a story.
Wall Construction: Enter the wall construction code of the Property or select the ![]() button to select it from the Code Selection window.
button to select it from the Code Selection window.
Roof Construction: Enter the roof construction code of the Property or select the ![]() button to select it from the Code Selection window.
button to select it from the Code Selection window.
Heating System: Enter the code for heating system of the Property or select the ![]() button to select it from the Code Selection window.
button to select it from the Code Selection window.
Cooling System: Enter the code for cooling system of the Property or select ![]() button to select it from the Code Selection window.
button to select it from the Code Selection window.
Fire Alarm: Enter the code for fire alarm or select ![]() button to select it from the Code Selection window.
button to select it from the Code Selection window.
Sprinklers: Enter the code for sprinkler system or select the ![]() button to select it from the Code Selection window.
button to select it from the Code Selection window.
Entry Alarm: Enter the code for entry alarm or select ![]() button to select it from the Code Selection window.
button to select it from the Code Selection window.
Roof Anchoring: Enter the code for roof anchoring or select ![]() button to select it from the Code Selection window.
button to select it from the Code Selection window.
Strength of Glass: Enter the code for strength of glass or select the ![]() button to select it from the Code Selection window.
button to select it from the Code Selection window.
Property Claims Window: Optional COPE Data Accordion
Select and complete the fields in the Optional COPE Data accordion, as shown below:
When you select a Property from the database on the Property Info accordion, the Optional COPE Data accordion is automatically populated. You can modify and save the data on this tab. However, the Property Entity in the database is not changed when you make changes on this accordion.
If you use the Policy Management System and the ‘Filter Property for Selected Policy’ checkbox is selected in Utilities, when you modify the Policy on the Claim, this accordion will be cleared.
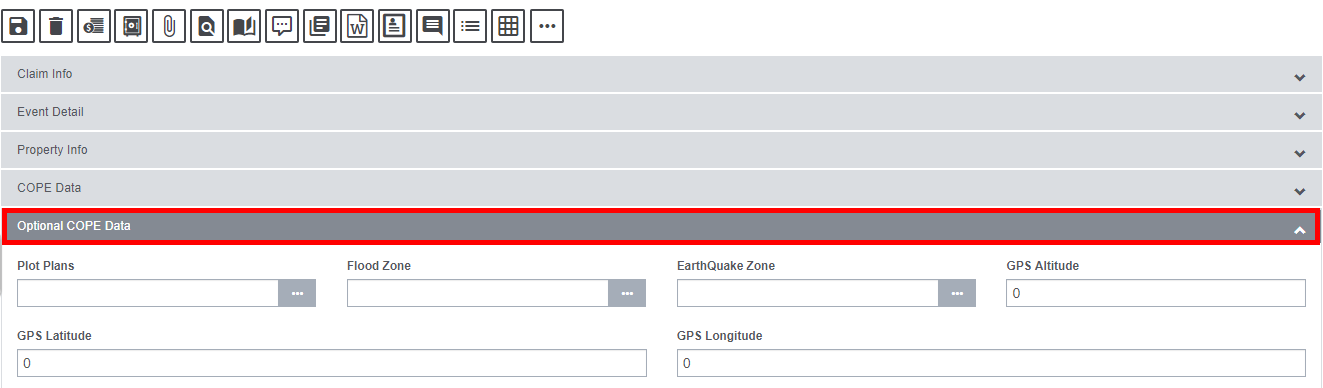
Field Description:
Plot Plans: Enter the plan for the plot or select the ![]() button to select it from the Code Selection window.
button to select it from the Code Selection window.
Flood Zone: Enter the flood zone certification details of the Property or select ![]() button to select it from the Code Selection window.
button to select it from the Code Selection window.
EarthQuake Zone: Enter the EarthQuake Zone information of the Property or select ![]() button to select it from the Code Selection window.
button to select it from the Code Selection window.
GPS Altitude: Enter the Global Positioning System altitude of the Property.
GPS Latitude: Enter the Global Positioning System latitude of the property.
GPS Longitude: Enter the Global Positioning System longitude of the Property.