How Can We Help?
Health Claims
Introduction
This type of Claim involves incidents resulting in disability, death or a severe accident.
A Health Liability Claim must be associated with an Event. A Health Claim encompasses several Claims:
- Disability Claims
- Policy Supplemental Claims
- Accident Claim
Note: It is supported for Carrier clients.
Health Claim Screen: Claim Info Accordion
Use the Claim Info accordion to enter general information about a Health Claim.
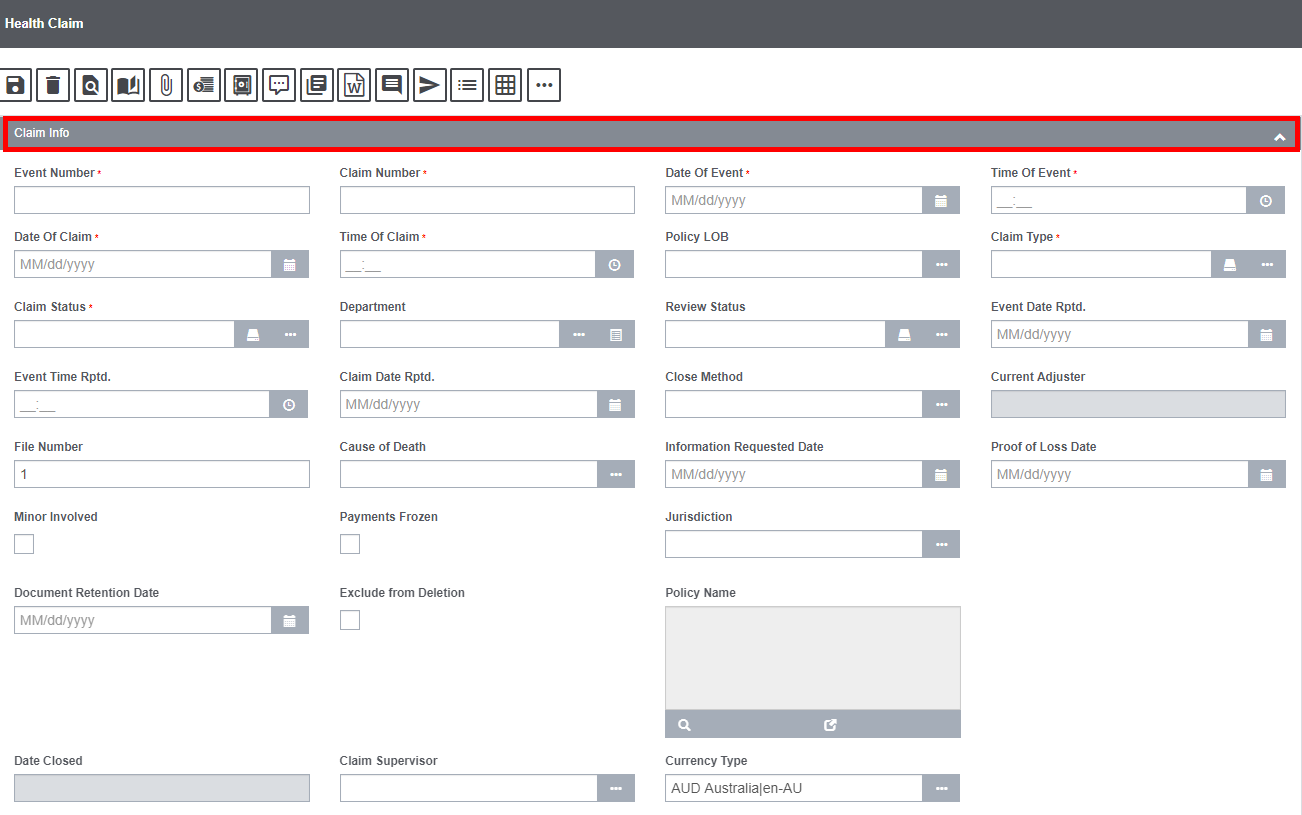
Field Description:
Event Number: The Event Number will be displayed if you open the Health Claims window from the Event window.
If you open the Claims window directly, DXC Assure Claims will create a new Event and add the Event Number to this field when you save the Claim.
Claim Number: Enter a unique identifying number for the Claim or leave blank and DXC Assure Claims will auto-generate a Claim Number when you save.
Date of Event: Enter the date on which the Event occurred or select ![]() button to select from a calendar.
button to select from a calendar.
Time of Event: Enter the time when the Event occurred.
Date of Claim: Enter the date on which your organization learned of the Claim or click on the ![]() button to select from a calendar.
button to select from a calendar.
Time of Claim: Enter the time when your organization was informed of the Claim or click on the icon ![]() to select the relevant time.
to select the relevant time.
Policy LOB: Enter the code that best describes the insurance line of the policy against which the Claim is made or select the ![]() button to select from the code lookup window.
button to select from the code lookup window.
Claim Type: Enter the code that best describes the Claim. The Claim Type field has two icons ![]() , Status Details and Claim Type. Select the Status Detail button
, Status Details and Claim Type. Select the Status Detail button ![]() to conveniently change the Claim Type and view all previous changes made to it.
to conveniently change the Claim Type and view all previous changes made to it.
Claim Status: Enter the code that best describes the Claim Status. Select the ![]() button to select from the Claim Status Code selection window. Additionally, the
button to select from the Claim Status Code selection window. Additionally, the ![]() Claim Status Detail button allows you to change the Claim Status and view all previous changes made to it.
Claim Status Detail button allows you to change the Claim Status and view all previous changes made to it.
Department: Enter the department, the individual or equipment involved in the Event. Select the ![]() button to get redirected to the Department Hierarchy window.
button to get redirected to the Department Hierarchy window.
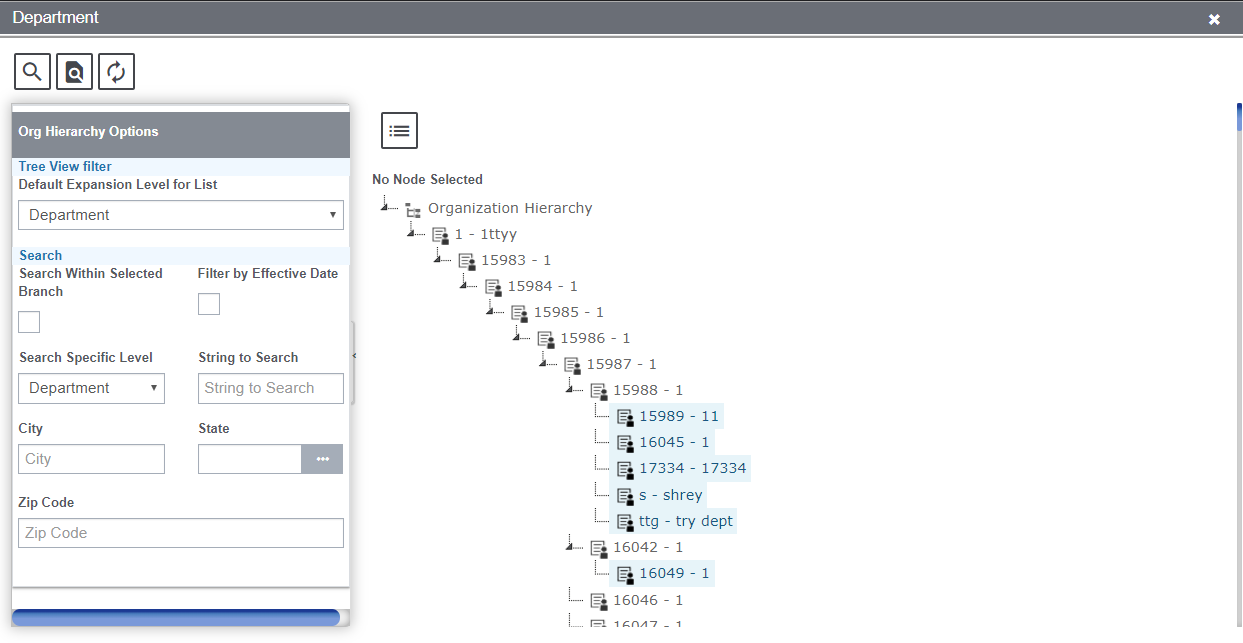
Select from the Org Hierarchy window. Click on the icon ![]() to view the instruction corresponding to the Organization Hierarchy.
to view the instruction corresponding to the Organization Hierarchy.
Review Status: Review Status allows any changes made to the Review Status field. Selecting the Review Status History ![]() will display a
will display a
popup showing the review status history. The Claim Review Status ![]() popup window displays the Review Statuses created in the Maintenance Table.
popup window displays the Review Statuses created in the Maintenance Table.
Event Date Rptd: Enter date on which the event was reported or select the ![]() button to select from a calendar.
button to select from a calendar.
Event Time Rptd: Enter the time when the event was reported. Click on the icon ![]() to select the relevant event time reported.
to select the relevant event time reported.
Claim Date Rptd: Enter the date when claim was reported or select the button to select from a calendar.
Close Method: When you close a claim, enter the code that best describes how the claim was closed or select ![]() the button to select from the Code Selection window.
the button to select from the Code Selection window.
Current Adjuster: The Current Adjuster of the Claim is entered here.
File Number: Enter any special identification number that your organization uses such as the box number or the insurance company’s case number.
Cause of Death: Select the cause of death from the lookup table by selecting the button ![]() .
.
Information Requested Date: Select the date from the calendar ![]() when the information request was raised.
when the information request was raised.
Proof of Loss Date: Select the date from the calendar ![]() when the Proof of Loss was received.
when the Proof of Loss was received.
Minor Involved: Select the checkbox if any minor is involved in the claim.
Payments Frozen: Select the checkbox to stop all payments on this claim.
Note: The claim remains open but no payments are made until you clear this check box. You can only use this check box if you have the appropriate permissions.
Jurisdiction: Enter the state in which you must file OSHA reports for the claim or select the ![]() button to select from the States window.
button to select from the States window.
Document Retention Date: Click on the calendar icon to select the retention date of the document.
Exclude from Deletion: Select the checkbox to exclude the Claim from deletion. If checked, the user will not be allowed to delete the Claim.
Policy Name: Enter a Policy Name that you want to attach to the Claim or select the button to select from the Policies window.
Date Closed: For a closed Claim, displays when the Claim was closed.
Claim Supervisor: Select the Claim Supervisor from the lookup table. Select the icon ![]() to open the lookup table.
to open the lookup table.
Health Claim Screen: Event Info Accordion
Event Info accordion enables you to enter general information about the Event related to the particular Claim. DXC Assure Claims automatically updates this accordion, if you open the Claim window from the Event window.
If the Claim is entered before an Event, DXC Assure Claims uses the information on this accordion to create a new Event for this Claim.
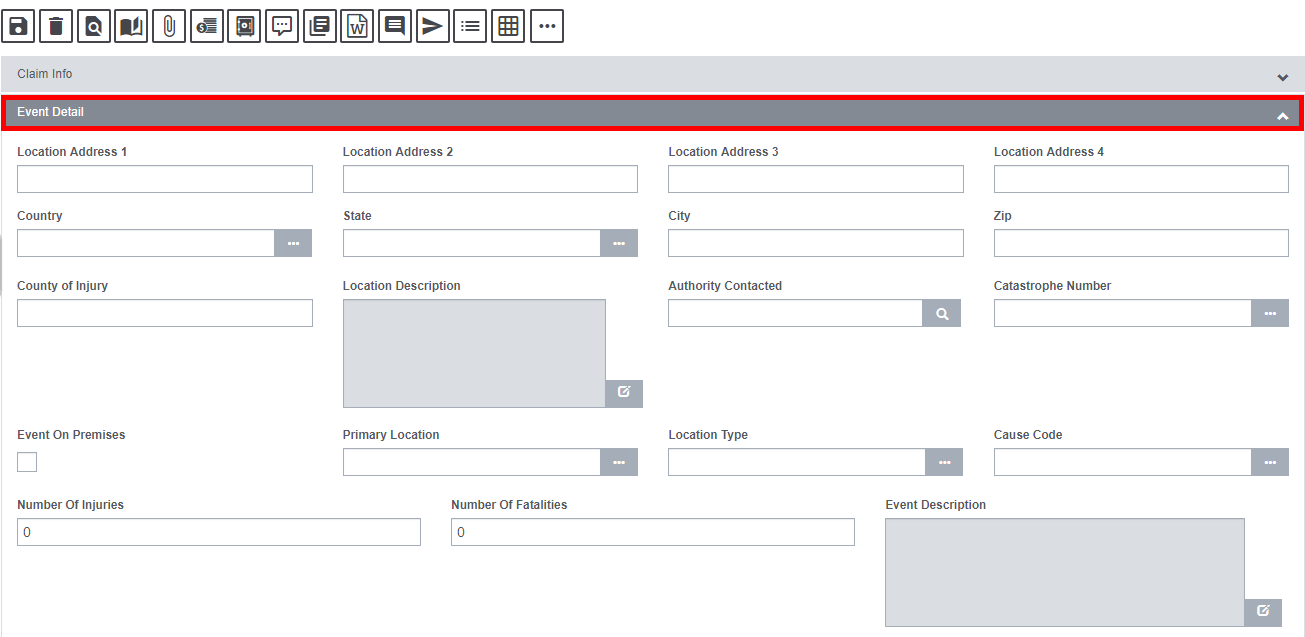
Field Description:
Location Address: Enter the address where the event occurred. Enter the City, State, Zip, and Country in the appropriate fields.
County of Injury: Enter the county where the event occurred.
Location Description: Enter a description for the location where the event occurred or select the button to open the DXC Assure Claims Editor. In the DXC Assure Claims Editor ![]() , enter the description and then select OK
, enter the description and then select OK ![]() .
.
Authority Contacted:
Catastrophe Number: Displays the number of the Catastrophe record attached to the Claim.
Note: The number displays based on selection made in Catastrophe Type field.
Event Number: The Event Number will be displayed if you open the Worker’s Compensation Claims window from the Event window.
If you open the Claims window directly, DXC Assure Claims will create a new Event and add the Event Number to this field when you save the Claim.
Primary Location: Enter the code that best describes the exact location where the event occurred or select the button to select from the Code Selection window.
Location Type: Enter the code that best describes the Location Type where the Event occurred or select the button to select from the Code Selection window.
Cause Code: Enter the code that best describes the Event cause or select the button to select from the Code Selection window.
Number of Injuries: Enter the number of persons injured as a result of the Event.
Number of Fatalities: Enter the number of deaths that resulted from the Event.
Event Description: Enter a description for the event or select the button to open the DXC Assure Claims Editor. In the DXC Assure Claims Editor, enter the description and then select OK.
Health Claim Screen: Loss Information Accordion
Use the Loss Information accordion to enter loss information of the Health Claim.
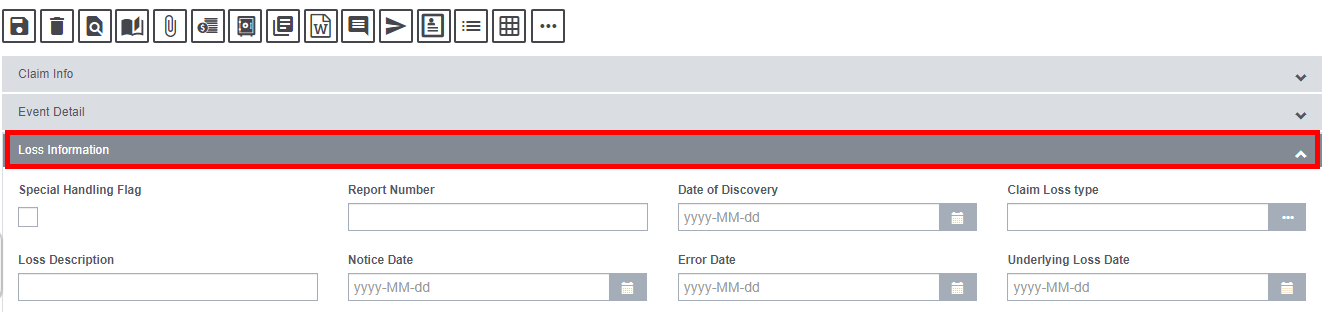
Field definitions:
Special Handling Flag: Select the checkbox to flag the Claim for special handling.
Report Number: Enter the reference number given to the official report by the Authority Contacted.
Date of Discovery: Enter the date on which the theft of property was first discovered missing or select the button to select from a calendar.
Claim Loss Type: Select the Claim Loss Type from the lookup table.
Loss Description: Enter the details of the loss in this field.
Notice Date: Enter the date on which the insured was given a notice of the Claim.
Error Date: Enter the date on which the error was made that caused the Claimant to sustain a loss. Ex: date on which insurer failed to renew customer’s flood policy prior to hurricane season.
Underlying Loss Date:Enter the date of customer’s loss event. An underlying loss date can be within retro & tail date ranges, not just within the normal effective and expiration dates of a policy.