How Can We Help?
General System Parameter Setup
General System Parameter window
The General System Parameter Setup window includes an amalgamation of a number of key functionality, features, and modules of DXC Assure Claims. Select the settings offered on the screen to enable/disable the various features offered by the application.
As a part of the ongoing Angular and .NET-based upgrade, the General System Parameter screen can be accessed via the Configuration Manager zone. The legacy Utilities zone has now been deprecated and will eventually be removed from the Assure Claims system in a forthcoming release. As all administrative settings and controls previously available in the Utilities zone are now available in the Configuration Manager zone, DXC recommends using the latter for all administrative purposes.
Based on the SMS permission, the General System Parameter option will be displayed in the Configuration Manager under System Parameter Setup section as shown below:
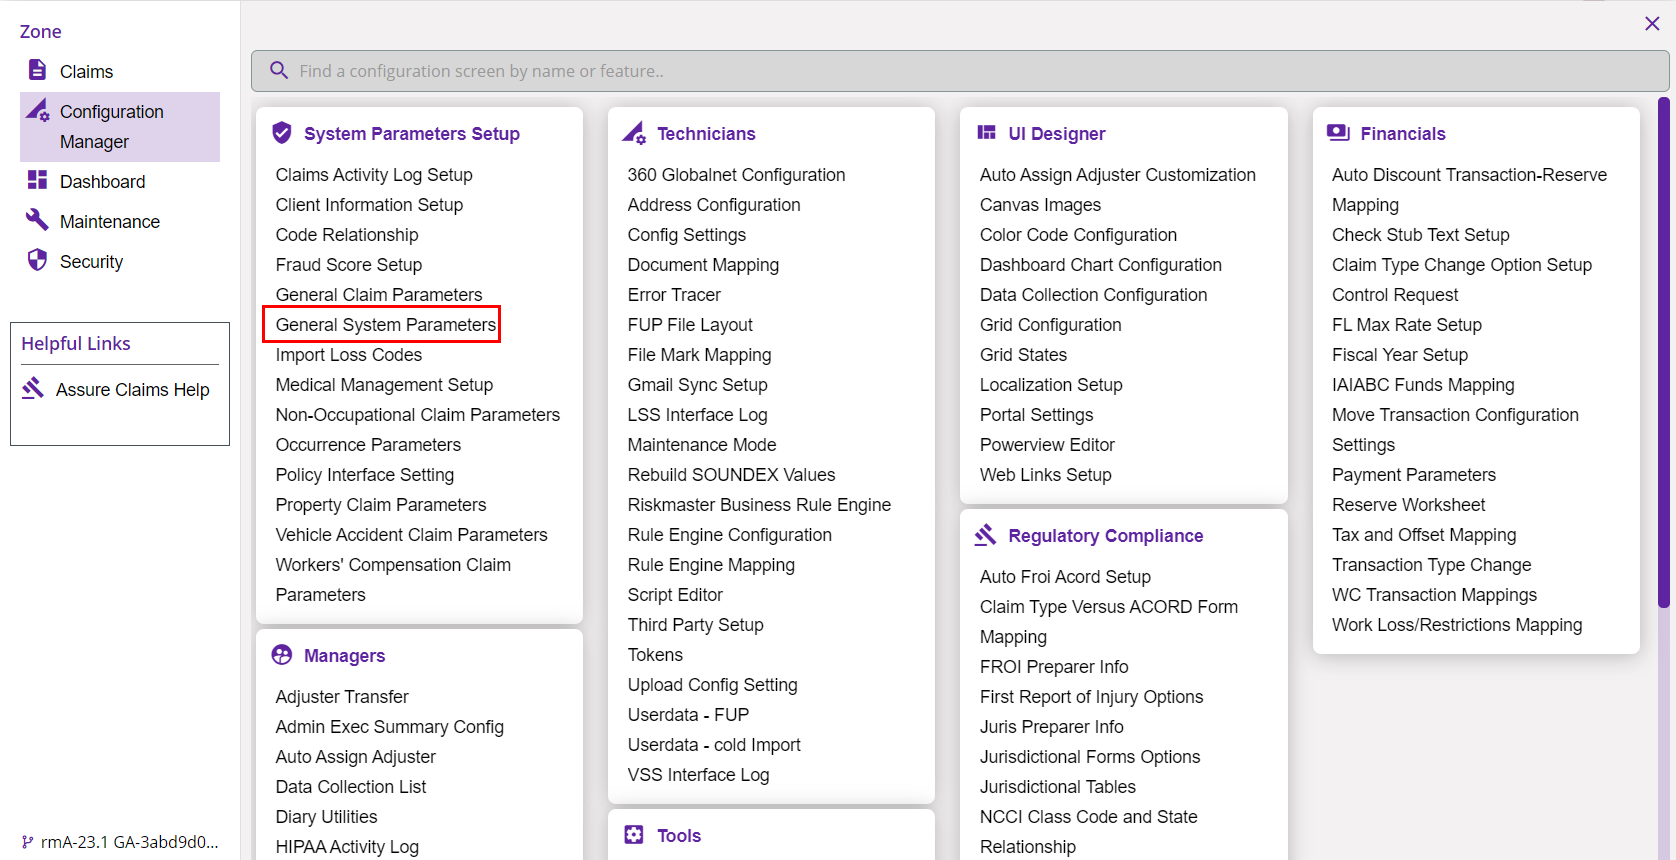
Along with some design changes, as per the concept of logical grouping, the settings of this window have been rearranged in Configuration Manager, the functionalities, however, remain the same.
Select the General System Parameter Setup setting tab
The General System Parameter Setup window includes a number of sections/tabs. The various setting tabs are listed in the dropdown. In order to know more about any particular tab, select the same from the dropdown list to get redirected to the corresponding section.
1.0 System Section
In the Configuration Manager zone, the same settings are displayed based on logical reasoning under various sub-sections. The settings are discussed below.
1.1 Claims
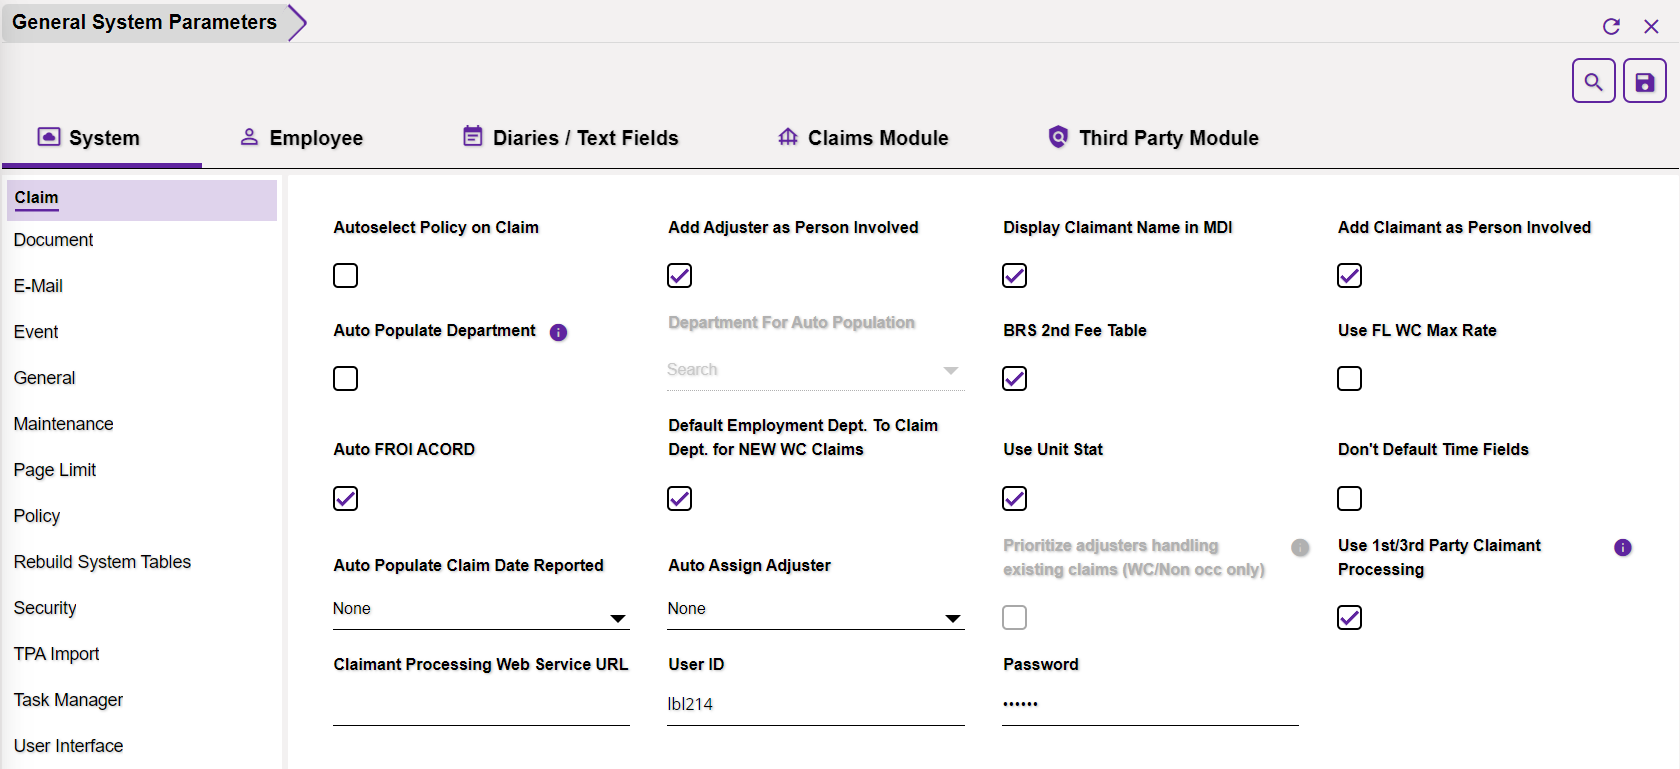
Autoselect Policy on Claim: Policy will be auto-selected and attached to the Claim when it is saved if this option is selected.
Add Adjuster as Person Involved: If this setting is selected, then, the Adjusters will be added as one of the Person Involved.
Display Claimant Name in MDI: Select the check box to view the Claimant Name along with LOB and Claim Number in the navigation tree of the existing Claim record. It is recommended to search for information in existing records before you enter new data. This prevents duplicate entries in the database.
Add Claimant as Person Involved: If this option is selected, then, Claimant will be included as a Person Involved.
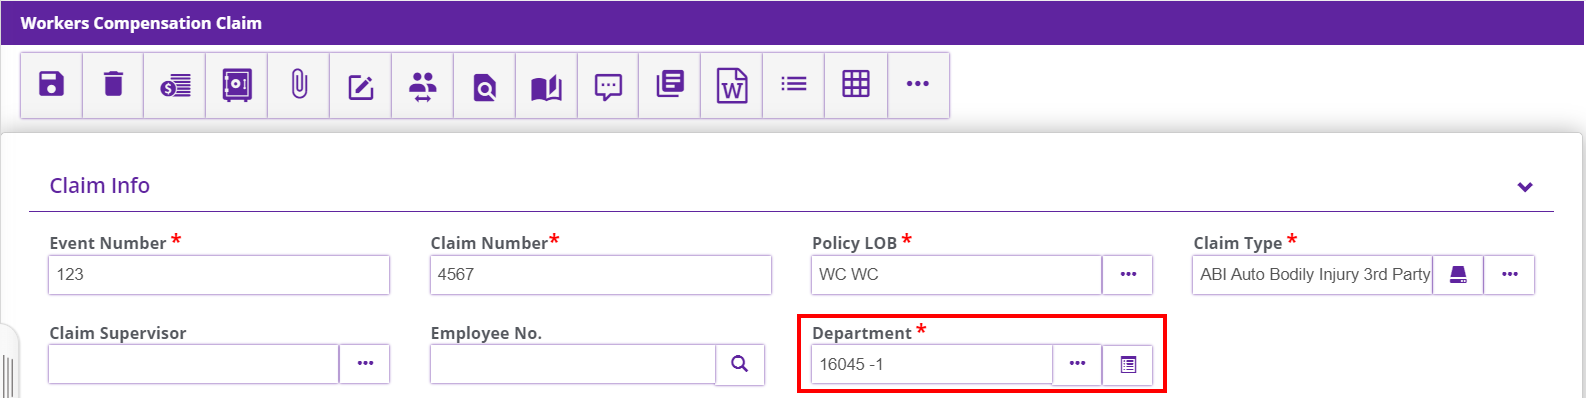
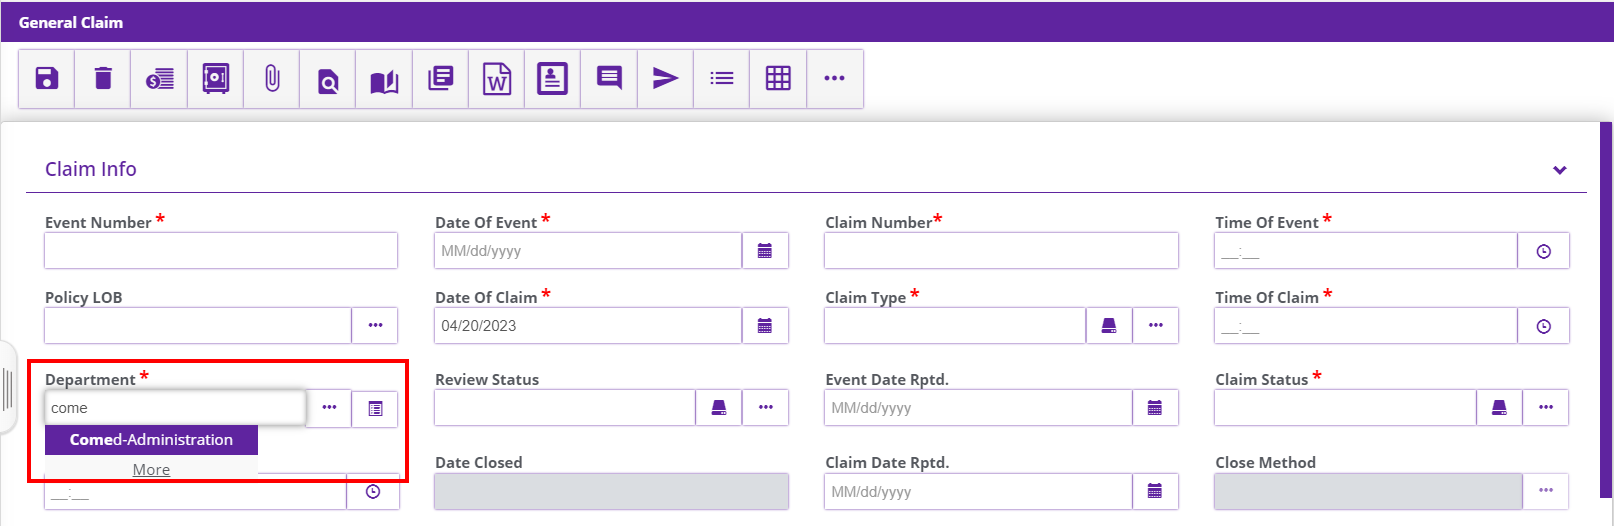
Auto Populate Department: Select the check box to auto-populate the data in the Department field.
Note: When the check box is selected, then, the Department field on the Claim window becomes optional and the selected department auto-populates on the Claim window. When the checkbox is unchecked the Department filed on the Claim window becomes mandatory.
Department For Auto Population: Enter the department you want to automatically populate on the Claim window or select the same from the Code Selection window. To open the Code Selection window select the ![]() icon.
icon.
BRS 2nd Fee Table: Select the checkbox to enable BRS 2nd Fee Table.
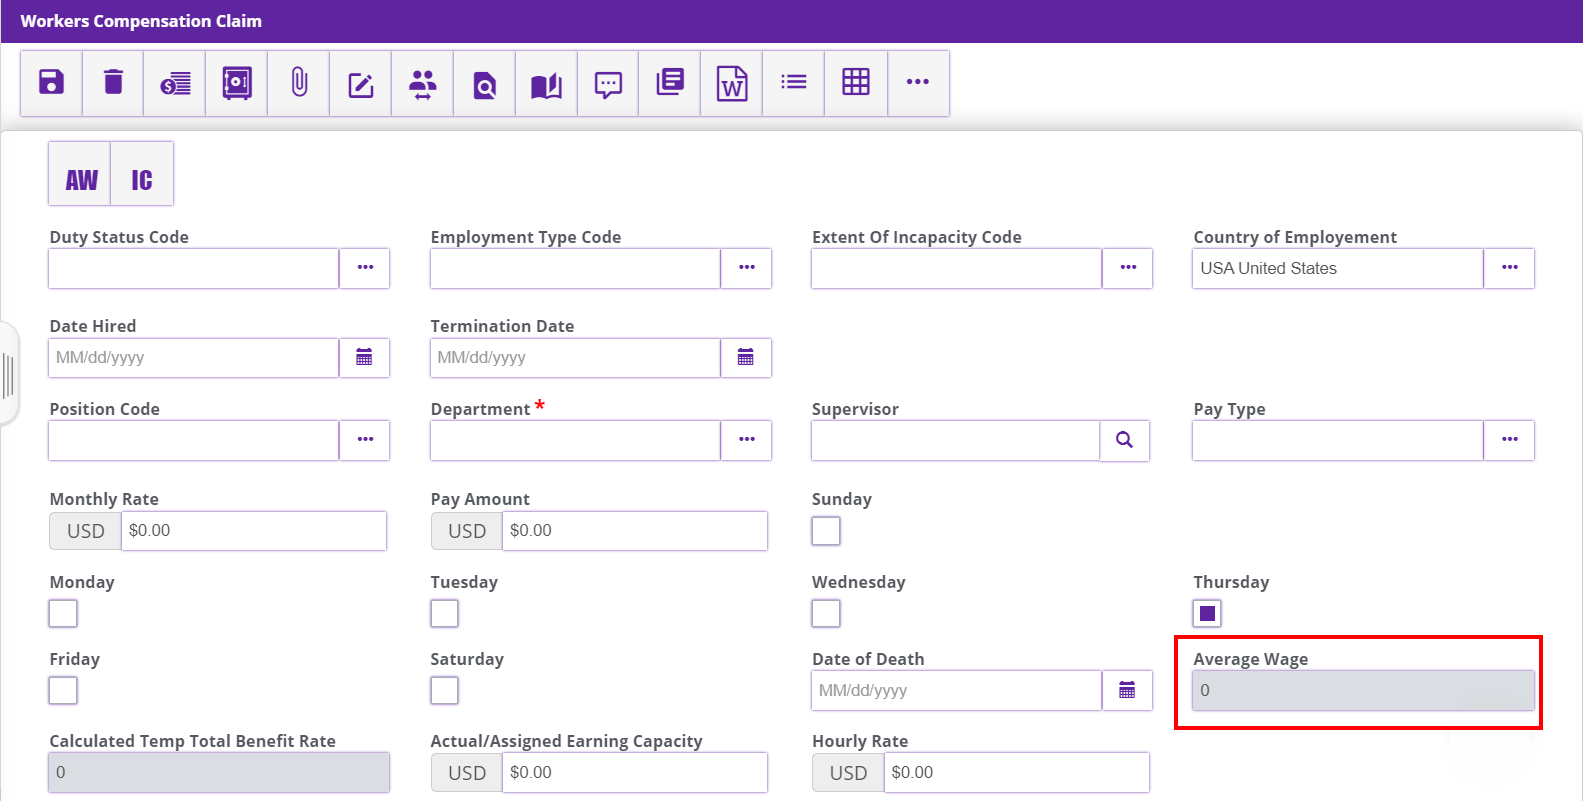
Use FL WC Max Rate: Once this setting is checked, then, the Average Wage field will be displayed on the Workers’ Compensation and Non-occupational Claims.
Auto FROI ACORD: Auto FROI ACORD forms will get generated and attached to the claim if this option is selected.
Default Employment Dept. To Claim Dept. for NEW WC Claims: If this checkbox is selected, then, the Employment Department will be the default Department for a New Worker’s Compensation Claim. You can change the Department, if required.
Use Unit Stat: Select the check box to activate Unit Stat Detail tab on workers compensation claim window.
Note: The check box is checked to capture additional Unit Statistical reporting information not defined on the previous Workers Compensation folders.
Don’t Default Time Fields: Time Field will not be defaulted while creating Event if this field is selected.
Auto Populate Claim Date Reported: Select the field and the Claim Date Reported will be automatically populated. Following two options are available if this is selected:
- Populate Claim Date Reported with Date of Claim: If this radio button is selected, then, the Claim Date Reported will be as per the Date when the Claim was created.
- Populate Claim Date Reported with Date of System: If this radio button is selected, then, the Claim Date Reported will be as per the Date of the system.
Auto Assign Adjuster: If this setting is enabled, then, the system will allow the user to save the Utilities setting for Auto Assign Adjuster.
Prioritize adjusters handling existing Claims (WC/Non-occ only): If selected, the option to prioritize adjusters handling the existing claims will be enabled. This setting is only applicable for Workers’ Compensation and Non-occupational Claims.
Use 1st/3rd Party Claimant Processing: Select the checkbox to enable 1st/3rd Party Claimant processing. If enabled, following fields will get enabled.
Claimant Processing Web Service URL: Enter the Claimant Processing Web Service URL in this field.
User ID: Enter the User ID for Claimant Processing in this field.
Password: Enter the password for Claimant Processing in this field.
1.2 Document

Canvas Document Type: Canvas Document Type field allows you to select the document type for the canvas of the Annotate an Image feature.
Acknowledgement/Closed Claim Letter: Acknowledgement/Closed Claim Letter will get generated in the claim if this option is selected.
1.3 E-Mail
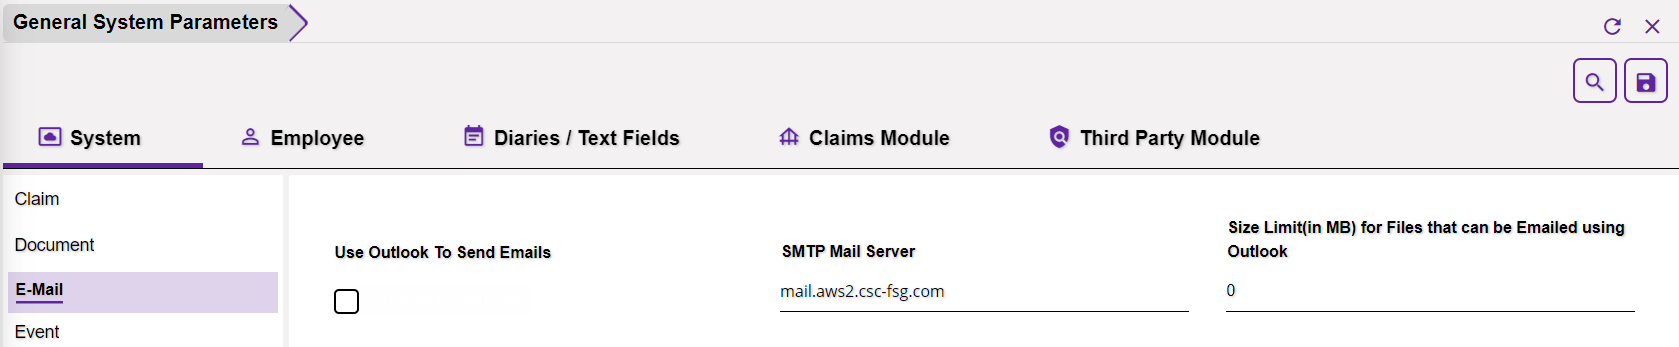
Use Outlook To Send Email: Select this checkbox to enable the Microsoft Outlook feature in DXC Assure Claims. The Outlook Integrated feature offers a two-way interaction between Microsoft Outlook and the application. With this, you can attach e-mails and files to the claims directly in Assure Claims. When you send e-mails via Outlook, the recipient will be able to open the mail with the pre-loaded attachments.
Note: The size of the attachment can be fixed from the System Settings section of this tab. Enter the size in the Size Limit (in MB) for Files that can be emailed using Outlook field (mentioned in detail below).
SMTP Mail Server: Enter the SMTP Mail Server in this field.
Size Limit(in MB) for Files: Enter the maximum allowed size limit of the file that can be attached in the Outlook feature. If the attachment size is greater than the allowed size, an error message, “The file size is too large” will be displayed.
Note: The minimum size limit can be 1 and the maximum can be 35 in this field.
1.4 Event
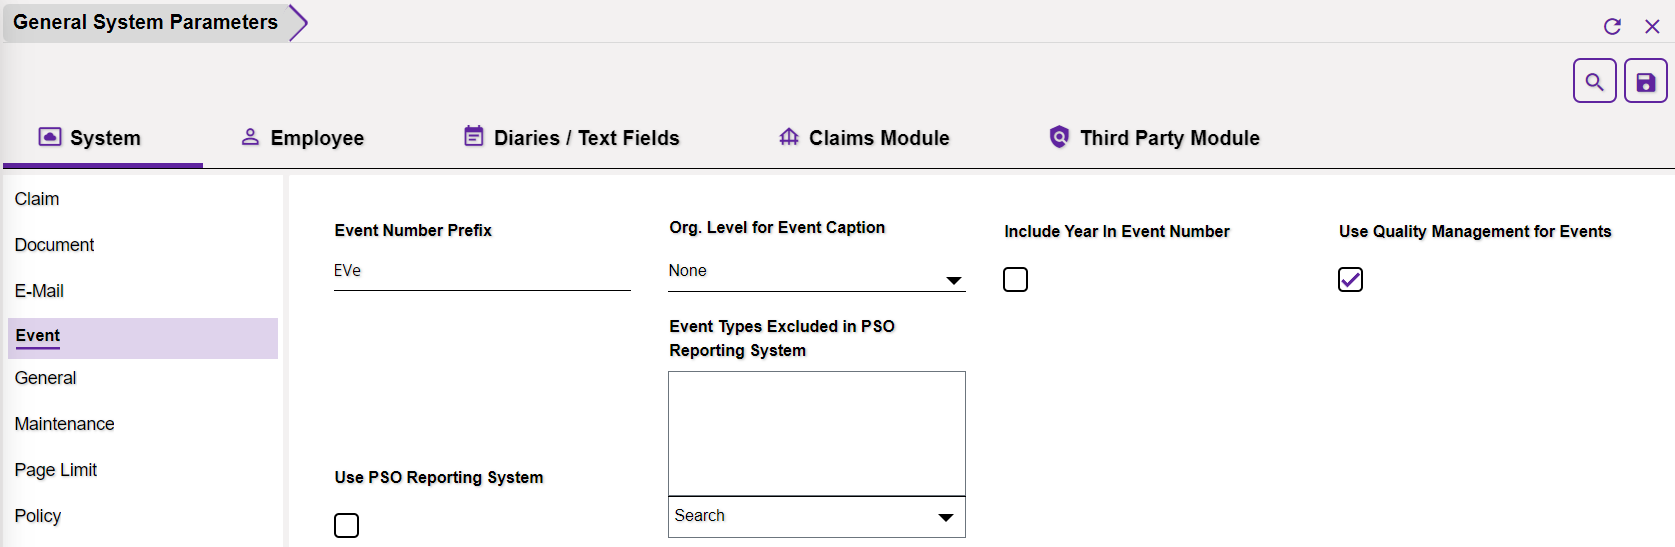
Event Number Prefix: Enter the prefix that is to be included in all the Event Numbers in this field. For instance, if EV is entered as the prefix in this field, then, the Events will be numbered as EV2020015342 etc.
Org. Level for Event Caption: Selected Org. Level in this field will be visible in the Event Caption.
Include Year in Event Number: If this field is selected, then, the year in which the Event is created will be included in the Event Number as shown below:

Use Quality Management for Events: Select the option and Quality Management will be enabled for Events. Once it is enabled, the Quality Management accordion will be displayed on the Event window.
Use PSO Reporting System: Select the “Use PSO Reporting System” check box to activate PSO reporting utility. Once this field is enabled, on the Event window, PSO button displays in the toolbar. Use the button to open the Patient Safety Event Report window and enter patient safety data.
Event Types Excluded in PSO Reporting System: Select the Event Type that is to be excluded from PSO Reporting System in this field. Select the ![]() button to open the lookup table for the same and choose the relevant Event Type from the table.
button to open the lookup table for the same and choose the relevant Event Type from the table.
1.5 General

Search on Short Code & Code Description: With the introduction of Typeahead or Text Autosuggest feature for Entity and Non-entity type fields, the suggestions based on the text input in the said fields will get displayed automatically. If this field is enabled, then, the search will be carried out in the Short Code as well as the Code Description and the suggestion will be displayed accordingly.
Lookup Typeahead Min Length (Entity): DXC Assure Claims offers a new Typeahead or Text Autosuggest feature for Entity and Non-entity type fields. The minimum number of input characters required to trigger the Lookup Typeahead feature can be configured from this field. Enter the minimum number of characters required to trigger Text Autosuggest for Entity Fields here.
For instance, if the minimum number of characters fixed here is 4, then, the suggestions based on the text input in the said fields will get displayed automatically after entering 4 characters as shown below:
Lookup Typeahead Min Length (Others): Enter the minimum number of characters required to trigger Text Autosuggest for non-entity Fields here.
Financial History Evaluation Date: Financial History Evaluation in the Claim zone will be done as per the option selected in this section. The following two option is offered:
- Transaction Date
- Date of Check
Select the relevant option as per the requirement and the Financial History evaluation will be done accordingly.
Use NMVTIS Reported Fields: NMVTIS stands for National Motor Vehicle Title Information System. If the field is checked, the NMVTIS Reported Fields will be enabled.
1.6 Maintenance
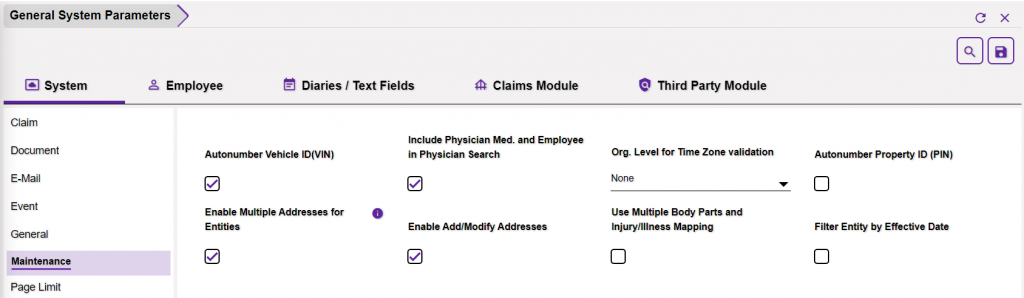
Autonumber Vehicle ID: If this setting is enabled, the Autonumber Vehicle ID (VIN) will get generated while saving a new Vehicle in the Vehicle Maintenance Table.
Include Physician Med. and Employee in Physician Search: If enabled, the Medication prescribed by a Physician and Employee in the Physician Search option.
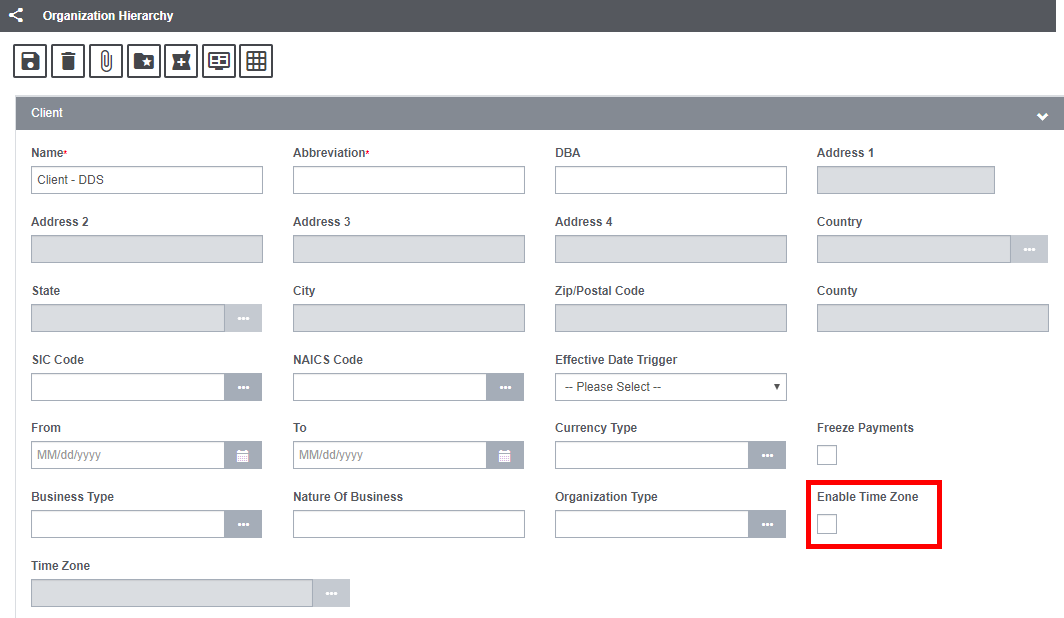
Org. Level for Time Zone validation: The Enable Time Zone check box will be displayed in the corresponding organizational hierarchy level that is selected in this field of the zone.
For instance, if the ‘Client’ organizational hierarchy level is selected from the dropdown list, then, the Enable Time Zone check box will be displayed in that hierarchy level of the Organization Hierarchy window as shown below:
Autonumber Property ID (PIN): If the checkbox is selected, then, the Property ID will get generated automatically while saving the claim.
Enable Multiple Addresses for Entities: If this option is selected, the user will be able to enter multiple addresses for a single entity.
Enable Add/Modify Addresses: If this setting is enabled, then, the Address option will be displayed under the Maintenance section of the Maintenance zone. The address can be added or modified from the Address window of the Maintenance zone.
Use Multiple Body Parts and Injury/Illness Mapping: If this setting is enabled, then, multiple Body Parts and Injury/Illness will be allowed to be mapped in the Claims. If not selected, only one Body Part and Injury/Illness will be allowed to be mapped.
Filter Entity by Effective Date: If this setting is enabled, then, the Entities can be filtered by Effective Date as well.
1.7 Page Limit

Enter the number of records that are to be displayed on the pages listed below. The number entered adjacent to each field will be considered the default number of records displayed on each page.
- Code List
- Search Results and Look Ups
- Enhanced Notes
- Quick Look Ups
- Payee Check Review
- Document Attachment List
- Payment history limit
- Diary List
- Recent Events limit
- Adjuster Transfer
- Recent Conversation Enhanced Notes limit
- Recent Conversation Attachments limit
1.8 Policy

Filter Policy based on LOB: If enabled, the Policies can be filtered with respect to the Line of Business.
Enable Insured Department: Select the checkbox to enable the Insured department.
Show Jurisdiction in Policy Tracking: If the setting is enabled, then, the Jurisdiction details will be displayed in the Policy Tracking.
Multiple Insurers for Policy: If this option is selected, then, multiple insurers will be added to a Policy in the Policy Tracking screen.
Multiple Re-Insurers for Policy: If this option is selected, then, multiple re-insurers will be added to a Policy in the Policy Tracking screen.
Maximum No of Discount Tiers for a State and LOB: Enter the maximum number of discount tiers for a State and Line of Business.
Maximum No of Discounts Associated For a State and LOB: Enter the maximum number of discounts associated to a State and Line of Business.
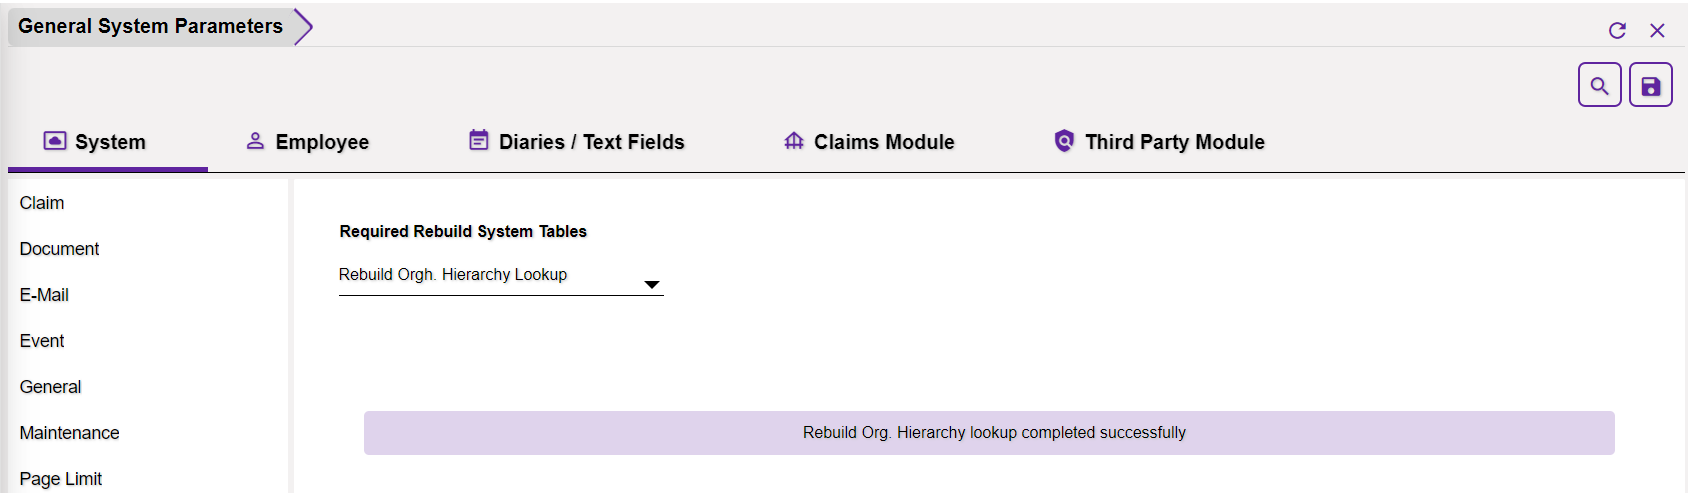
1.9 Rebuild System Tables
the Legacy Utilities zone of the Assure Claims featured two separate screens for Rebuild Glossary Table Values and Rebuild Org. Hierarchy Lookup. With an aim to achieve logical grouping, both features has now been confined to a single screen, labeled, Rebuild System Tables.
The Required Rebuild System Tables dropdown field features two options, namely Rebuild Glossary Table Values and Rebuild Org. Hierarchy Lookup.

Rebuild Glossary Table Values: A glossary aims at collecting common terminology used in the database community and also provides definitions as well as context to help the user gain more knowledge & clarity. Select this dropdown option, followed by Save to rebuild the Glossary Table values. Once the change is saved, a success message will be displayed.
Rebuild Org. Hierarchy Lookup: Similarly, select this dropdown option to rebuild the values of Org, Hierarchy lookup. Once the change is saved, a success message will be displayed, as shown below.
1.10 Security

Broker Firm in BES: Select the checkbox to enable broker firm in BES (Business Entity System).
Use Single Sign On: Select the option to enable auto-generate Self-signed Certificate feature.
Jurisdictions Implementing SSN Privacy (Comma separated State Codes): For the Privacy setting, enter the Jurisdictions code that implements the SSN Privacy. You can enter multiple State codes. Separate the code with the help of commas.
1.11 TPA Import

Use TPA Import: Select the checkbox to enable TPA Import.
1.12 Task Manager

Send Task Manager Email Notification: If this field is checked, then, an email notification will be sent to the user for all the tasks/jobs that are executed via the Claims Scheduler screen. The email notification will be sent as per the options selected below:
- For tasks executed with error: If this radio button is selected, then, an email notification will be sent for all the tasks or jobs that were executed with an error.
- For all Task Status: If this is selected, then, a notification will be sent to the users notifying them about the status of the task.
Select users to send email Notification for task manager jobs: This field will remain disabled, by default. It will be enabled only when the Send Task Manager Email Notification option is selected. Once enabled, the users can be selected to send the email notification for the Task Manager job. Only the selected users will get the notification.
Do Not Send Job Files in Email: If selected, job files will not be sent with the email.
Task Manager Auto Diary: If this field is checked, then an auto diary notification will be sent to the user for all the tasks or jobs executed via the Claims Scheduler screen of the Configuration Manager zone.
1.13 User Interface
This section of General System Parameter Setup enables you to change the user interface or color theme of the application.
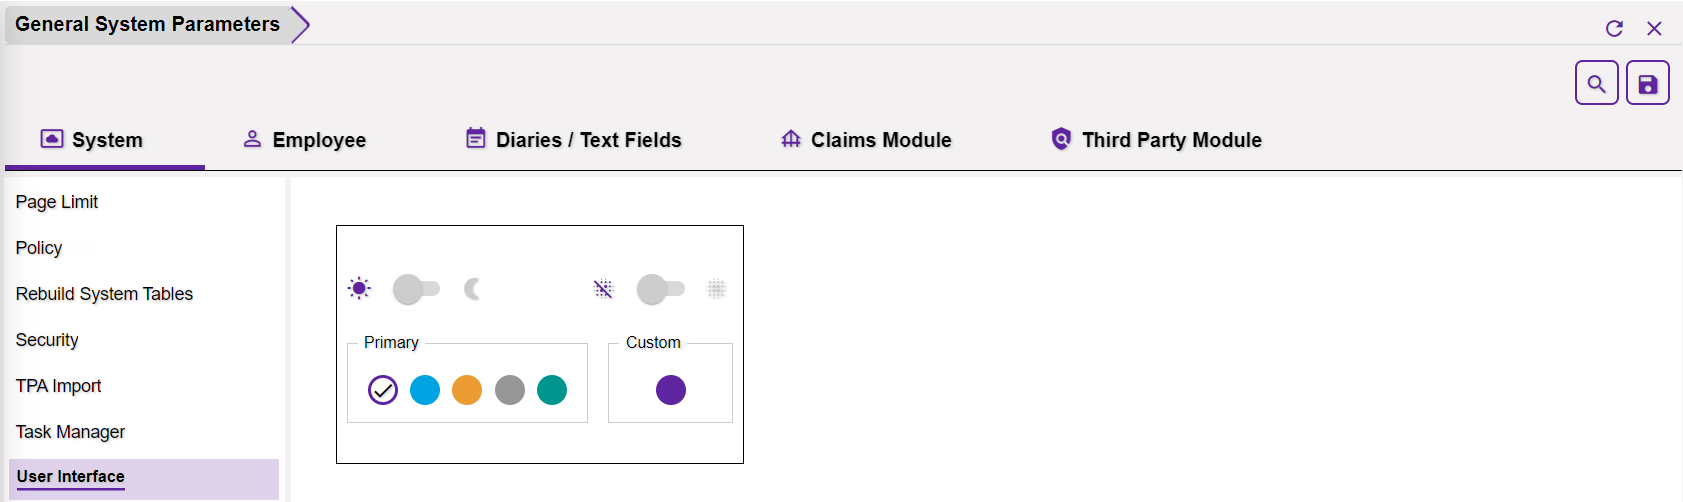
The theme and color scheme of the Assure Claims application can be changed from the User Interface section.
The Primary and Custom Color palette will enable you to choose any color theme of your choice that compliments your organization’s brand identity. Just select the desired color from the Primary or Custom color palette and the theme color of all the zones across the application will be updated accordingly. DXC Purple is the default theme of the application. This can be changed, as and when required.
This module offers two modes, Dark and Light. The Light mode is the being the default option. The top left corner of the window features a toggle button that can be used to change the modes. It is switched off, by default enabling the Light mode. Toggle the same to enable the Dark mode.
Furthermore, the toggle button is followed by a number of color palettes. Select the color by clicking on them. The change in the color theme will be reflected across the application as per the selected option.
Click here to watch the video demo for an overview of the User Interface changes and knowhow of the Primary and Custom Themes modules.
Please Note:
For a flawless functioning of the theme settings offered in the User Interface section, the Morzilla Firefox browser users must disable a checkbox labeled, delete cookies and site data when Firefox is closed, from the browser setting. This setting is checked by default.
2.0 Employee
The Employee settings will be displayed under various sub-heading in the Configuration Manager zone. The various settings are discussed in detail below.
2.1 General

WC Employee Number Prefix: Enter the Prefix of the Workers’ Compensation Claim Number in this field. The entered text here will be used as the prefix in the Employee number of the Workers’ Compensation Claims.
Autonumber Blank WC Employee Numbers (new employee entry only): When a new Workers’ Compensation Claim is created and saved, then, the Employee Number will be automatically populated in the respective field.
Exclude Holidays from Work Loss/Restricted Days Calculation: If this option is selected, then, the Holidays will be excluded from the Work Loss/Restriction days calculation.
Allow Edit of WC/DI Employee Numbers: If selected, then, the Employee Number on the Workers’ Compensation Claims will appear editable.
Ignore SSN Checking: If selected, then, the Claim will be saved even when no value is entered in the SSN field.
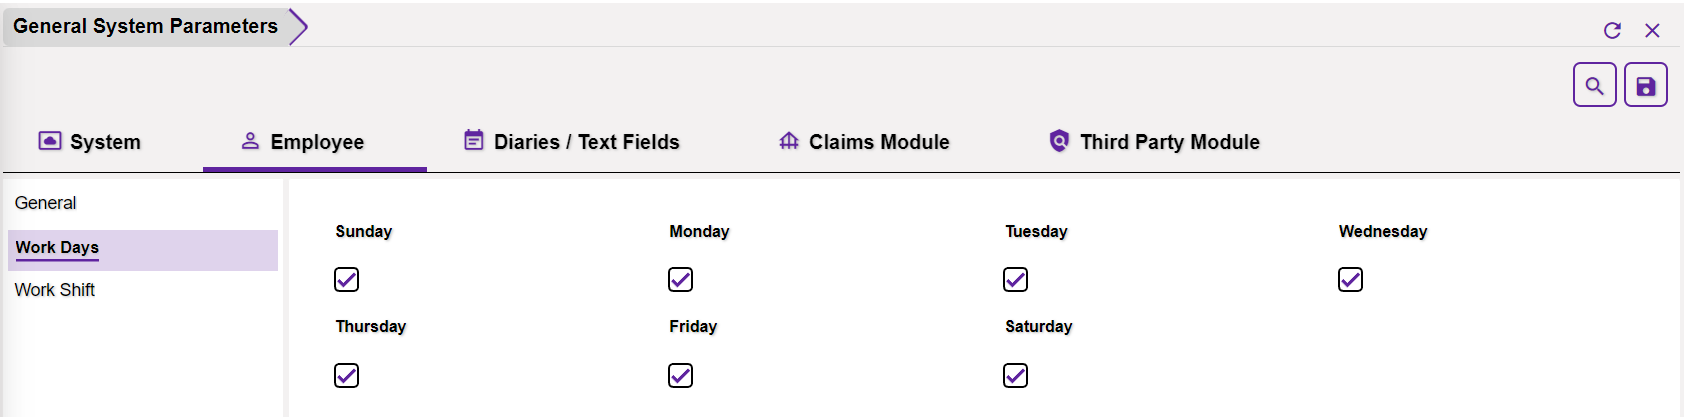
2.2 Work Days
This tab of the Employee section allows you to select the work days for the employees. The various days of the week are listed here. Select the adjacent checkbox of the days that are to be considered workdays. The options that are unchecked will be considered non-working days.
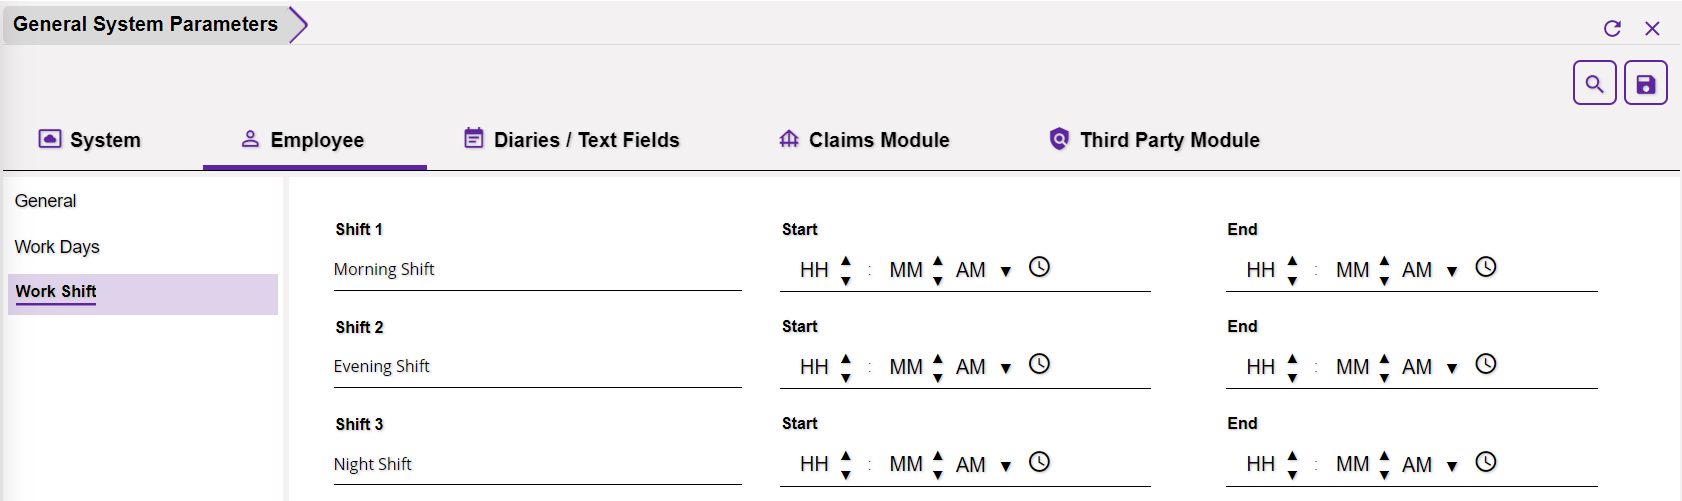
2.3 Work Shift
This tab of the Employee section enables you to select the Start and End time of each Work Shift of an employee. The widow features the option to add three shifts, Morning, Evening and Night Shifts. Enter the shift timing adjacent to each shift and Save.
3.0 Diaries/Text Fields
The settings pertaining to Diaries are displayed in the Configuration Manager zone as shown below.
3.1 Adjuster Settings
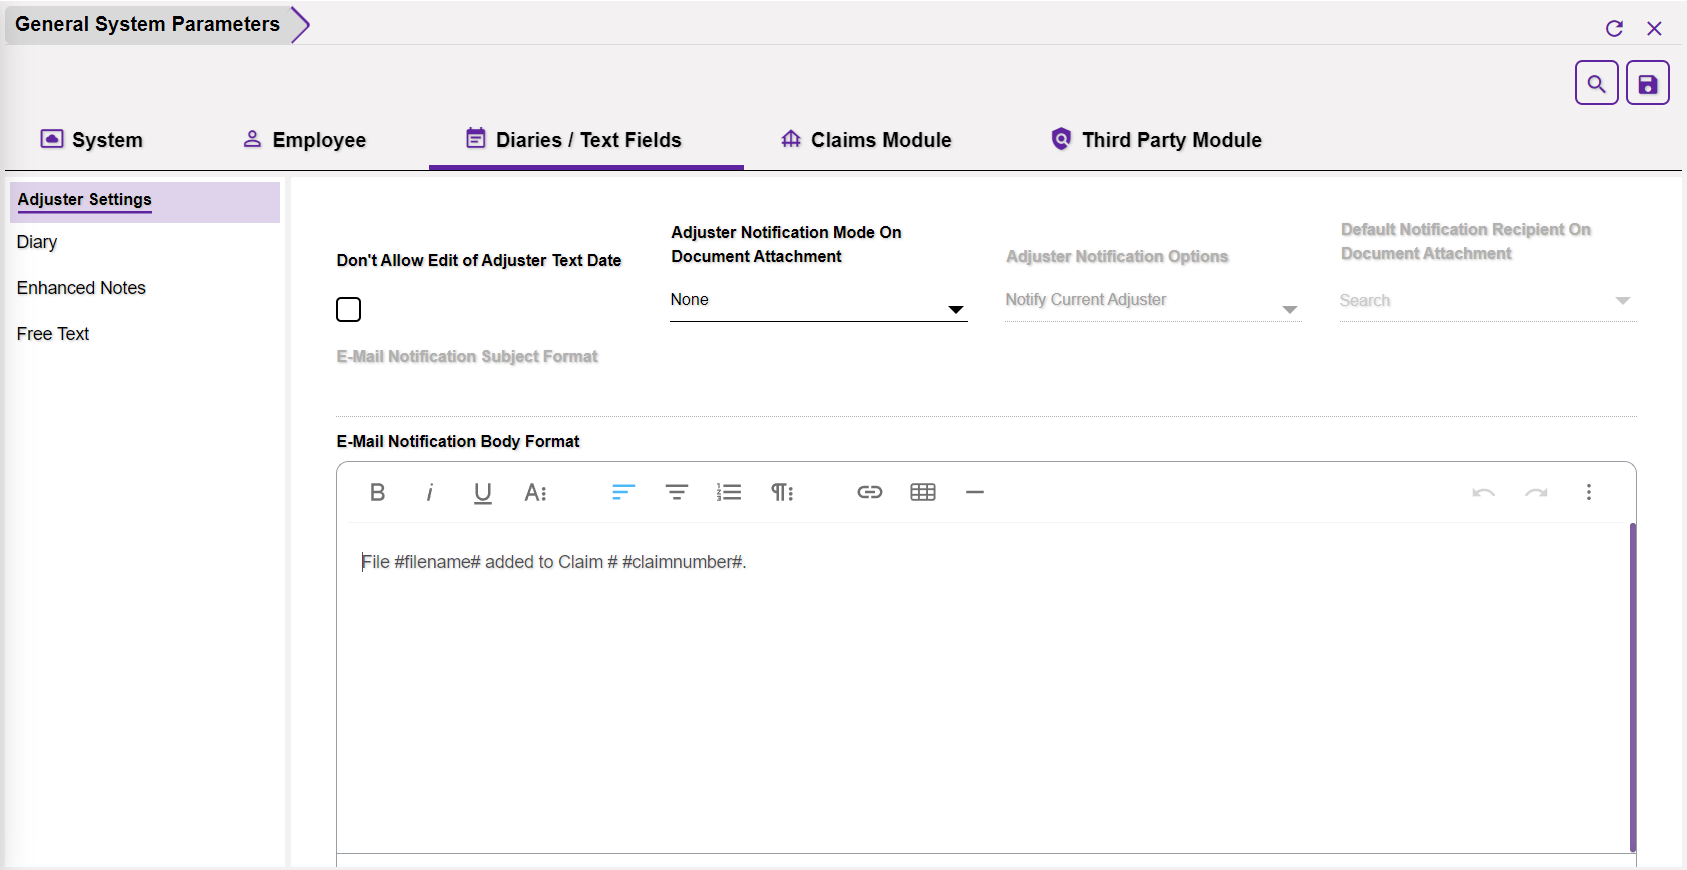
Don’t Allow Edit of Adjuster Text Date: Enable the setting and the system will not allow adjusters to change the date when adjusters enter adjuster-dated text. This prevents backdating of adjuster text. If the check box is selected, on the Adjuster Dated Text window, the Date/Time Entered fields will be inactive.
Adjuster Notification Mode On Document Attachment: Select the relevant option from the dropdown list of the field. The options include None, Diary, E-Mail and Both. Depending on the selection made here, a notification will be automatically sent to the adjuster whenever an attachment is made in the Claim.
- In case the option None is selected from the dropdown list, then, the option to send notification on the new attachment will be disabled.
- If Diary is selected as the notification option, then, a Diary notification will be sent to the adjuster. A task will be created in the Diary List window as shown.

- Similarly, if the Email notification option is selected, then, the adjusters will be notified via email. In this case, the fields, Email Notification Subject Format and Email Notification Body Format will be enabled. Enter the Email Subject and Email Body Content in the respective fields. Whenever an attachment is done on a Claim, an email notification will be sent to the adjuster in the same format as specified here.
- Alternately, both the Email and Diary notification option can be selected as per the requirement.
Adjuster Notification Options: The dropdown list includes two options, Notify Current Adjuster and Notify All Adjusters. The notification can be sent to all the Adjusters or to the current Adjuster of the Claim depending on the selection made in the Adjuster Notification Option field.
Default Notification Recipient On Document Attachment: If no adjuster is attached a Claim, then, the notification will be sent to the user selected in the Default Notification Recipient On Document Attach field.
Use Adjuster Tracking: If Select the checkbox to enable Adjuster Tracking. The ability to track Adjuster Assignment is an intuitive new feature that helps track the duration for which an Adjuster is assigned to a Claim.
3.2 Diary
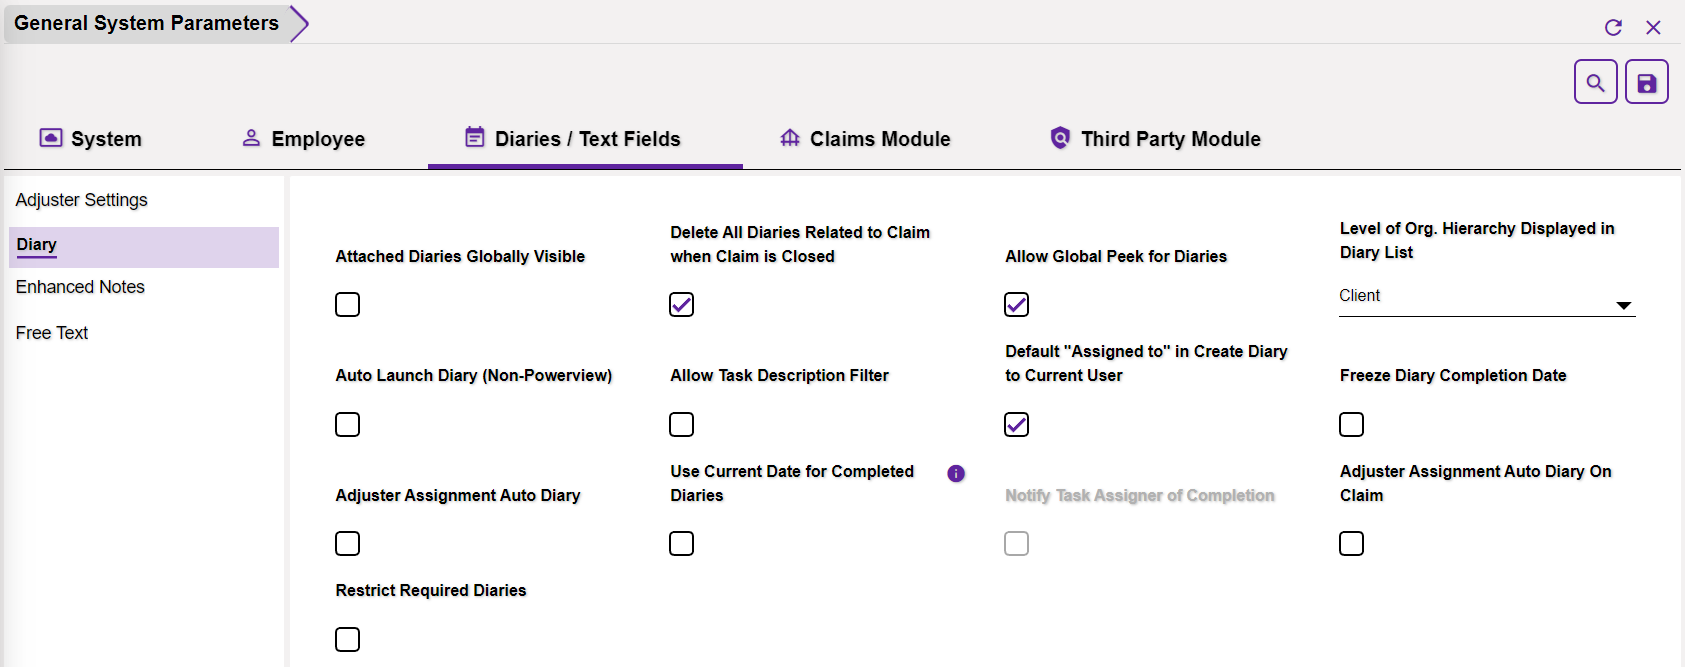
Attached Diaries Globally Visible: If this setting is enabled, then, users can see all diaries attached to a claim.
Delete All diaries Related to Claim when Claim is closed: If this setting is selected, then, the users will be allowed to delete all the diaries attached to a closed claim.
Allow Global Peek for Diaries: If this setting is enabled, then, the user can view diaries for all the other users.
Level of Org. Hierarchy Displayed in Diary List: If enabled, then, the Organization Hierarchy will be displayed in the diary list.
Auto Launch Diary (Non-Powerview): Select the check box to launch the diary automatically in non-Powerview, that is, in the default mode.
Allow Task Description Filter: Select the checkbox to enable the filter in the task description of the diaries.
Default “Assigned to” in Create Diary to Current User: Select the checkbox and the Current User will be the default option for the Assigned to field in the Create a New Diary screen.

Freeze Diary Completion Date: Enable this setting to freeze the Diary Completion Date. That is, the completion date of the diary cannot be edited if this checkbox is selected.
Adjuster Assignment Auto Diary: If this field is selected, then, the adjuster will be assigned an auto diary.
Use Current Date for Completed Diaries: If this checkbox is selected, then, the current date of the system will be displayed on the completed diaries.
Notify Task Assigner of Completion: If enabled, a notification will be sent to the user who assigned the task when the task is completed.
Adjuster Assignment Auto Diary On Claim: If this field is enabled, then, Adjuster will get an Auto Diary and the same diary will get attached to the corresponding claim.
Restrict Required Diaries: If this setting is enabled, then, the user will not be allowed to create a diary with Required Priority.
3.3 Enhanced Notes
The Enhanced Notes settings are displayed as shown below in the Configuration Manager zone.
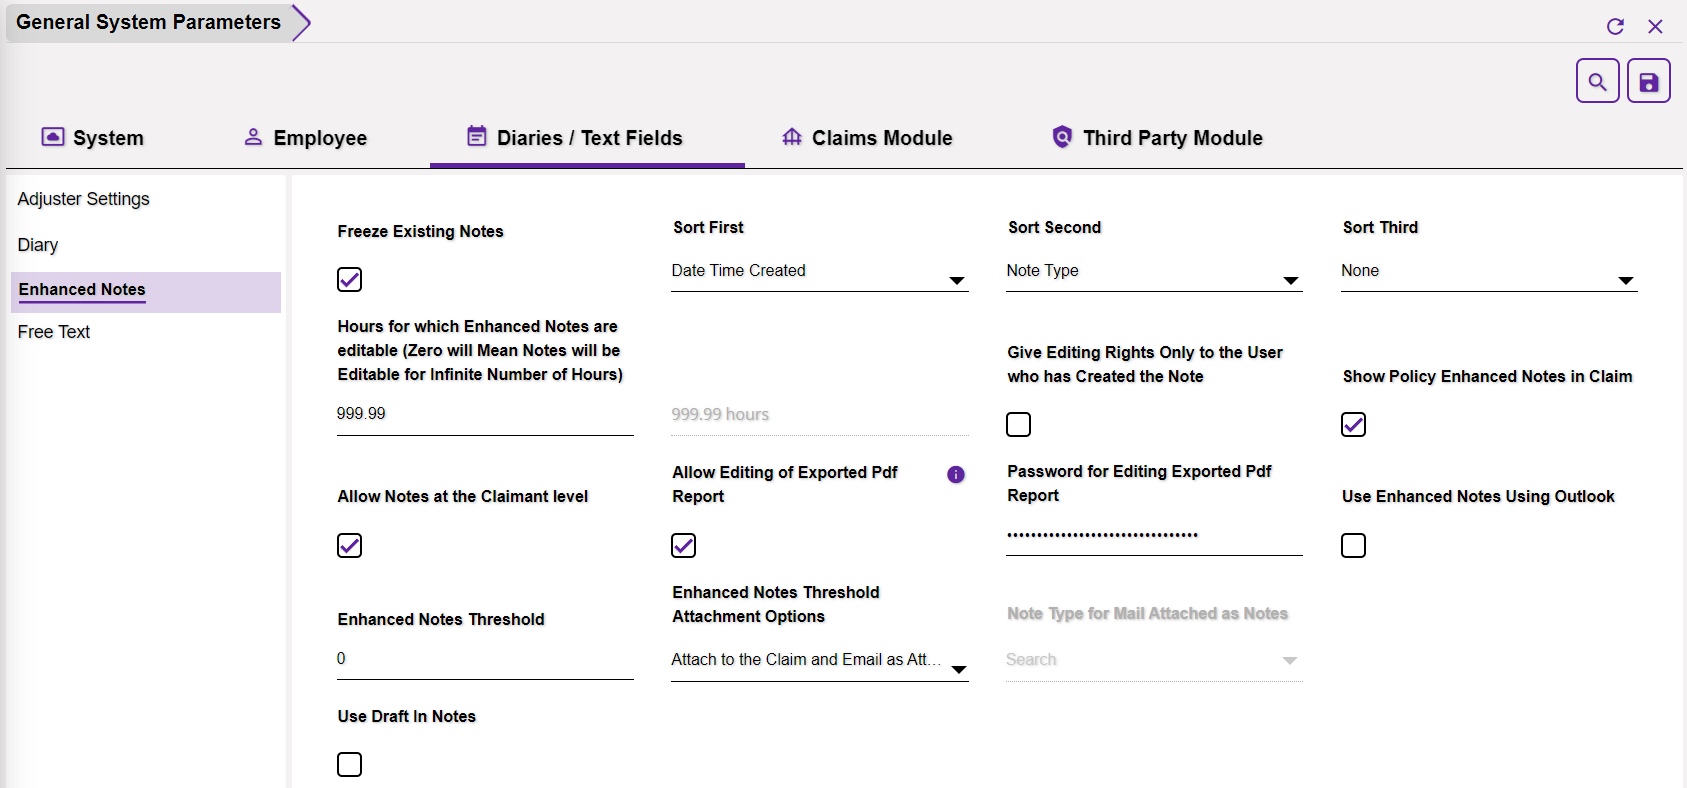
Freeze Existing Notes: If this field is enabled, then, the existing Enhanced Notes in the Claim zone will appear as read-only. That is, the user will not be able to edit them.
Sort First: Select the sorting option from the dropdown list of the field. Once it is done, the Enhanced Notes in the Enhanced Notes screen of the Claim zone will be sorted as per the first criteria selected in this field.
Sort Second: In case the enhanced notes on the Enhanced Notes window are sorted as per the first sorting criteria. However, if the criteria of two notes are the same, then, the data will be sorted and displayed as per the second sorting criteria selected in this field.
Sort Third: If the sorted data has the same criteria as the first and second sorting criteria, then, the third sorting criteria will be used.
Hours for which Enhanced Notes are editable (Zero will mean notes will be editable for infinite number of hours): Enter the number of hours in this field. The user will not be allowed to edit the enhance notes after the entered hours. By default, the field displays 0.00 hours which means that no time limit will be applied for editing the Enhanced Notes.
Give editing rights only to the user who has created the note: If this field is checked, then, editing rights of the enhanced notes will be reserved only to the user who has created the note.
Show Policy Enhanced Notes in Claim: The dropdown of Policy will be visible on the Enhanced Notes window of the Claim zone only when this setting is checked. Once enabled, the enhance note for the policy level will get displayed.
Allow Notes at the Claimant level: After this setting is checked, the user will be able to create notes at the Claimant level only.
Allow Editing of Exported Pdf Report: Once enabled, the exported PDF report of the enhanced notes will be editable. If this field is enabled, the field following “Password for Editing Exported Pdf Report” it will appear editable.
Password for Editing Exported Pdf Report: This field is non-editable by default. Once the previous field is enabled, this will become editable. Enter the password here and the same password will be required to edit the exported PDF report.
Use Enhanced Notes Using Outlook: If this setting is enabled, then, the Enhanced Notes can be used via Outlook mail.
Enhanced Notes Threshold: Enter the threshold value of Enhanced Notes in this field.
Enhanced Notes Threshold Attachment Options: This field includes two options to choose from, Attach to the Claim and Email as Attachment and Email as Attachment only.
- If the former option is selected, then, the Enhanced Notes will be attached as anattachment to the Claims and can be emailed as an attachment too.
- If Allow Email as Attachment only option is selected, the email will be sent as an attachment only.
Note Type for Mail Attached as Notes: Select the Note Type for the mail that is to be attached as Notes from the dropdown list of the field.
Use Draft in Notes: If this checkbox is selected, then, the option to save Notes as Draft will be enabled.
3.4 Free Text
The settings related to Free Text are displayed with some design changes in the Configuration Manager as shown and discussed below.

Date Stamp Free Text: If selected, the users will be able to add the date to the line above the free text you type.
Freeze Free Text Entries: Once this setting is enabled, the text entries will freeze. That is, the text entries will appear as read-only and the users will not be allowed to edit the same.
Don’t Allow Edit of Date Stamp in Free Text Areas: If enabled, the date in the Free Text Areas will be entered by the application and the user will not be allowed to edit it.
Freeze Event Description: Select this checkbox to freeze the Event Description field. Once it is enabled, the field will appear as read-only.
Date Stamp Event / Location Description: If this setting is enabled, then the users will be allowed to add the date to the line above the Event Description text.
Freeze Location Description: When the setting is enabled, then, the Location Description field will freeze and users will not be allowed to edit the same.
Use Legacy Comments: If enabled, the Legacy Comments will be available in diaries.
Freeze Supplemental Free Text Entries: If enabled, the Supplemental Free Text entries field will freeze and the user will not be able to edit the text.
Freeze Pay to the Order of: If enabled, the Pay to the Order Of field will appear as read-only and will not be editable.
Show Date Stamp on HTML Text: If enabled, Date Time Stamp will be visible on the textbox.
Set Memo Height: Select the lookup button of the field to pop open the height configuration window.

Enter the value of the Height in pixel and the textbox can be previewed in the adjacent field. The height changes implemented in the Utilities zone will be reflected across the application, both in the default view and PowerView. Additionally, the size of the field height fixed for default view can be overridden for any section in the PowerView.
4.0 Claims Module
4.1 BRS

Use Bill Review System (BRS): Bill Review System will be enabled if this setting is enabled.
4.2 Billing

Use Billing System: Select the Use Billing System check box to display the Policy Billing link, in the Maintenance navigation tree.
4.3 Case Management
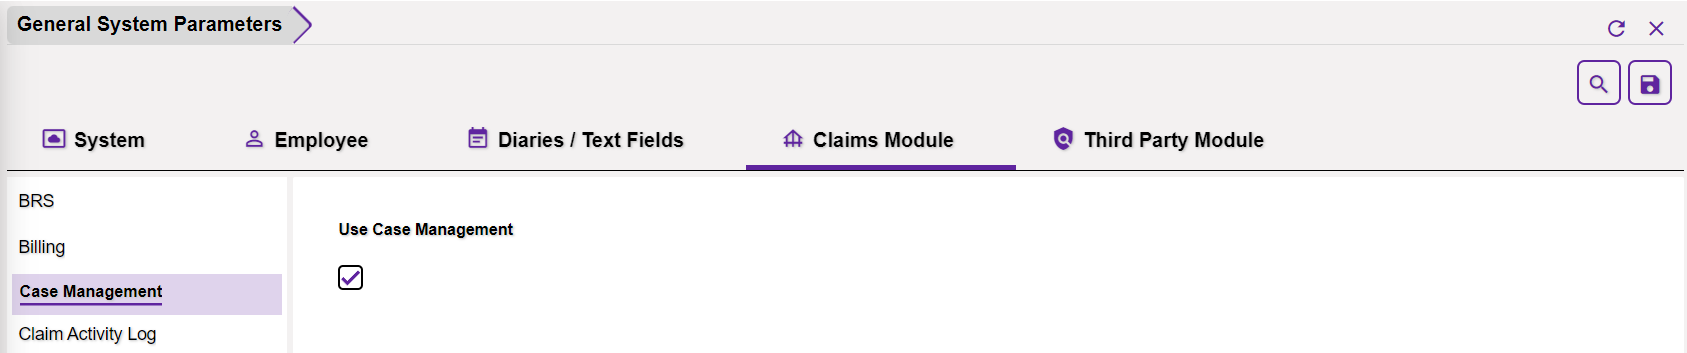
Use Case Management: Check the option and the Case Management button will be displayed on the toolbar of the Workers’ Compensation Claim screen.

4.4 Claim Activity Log
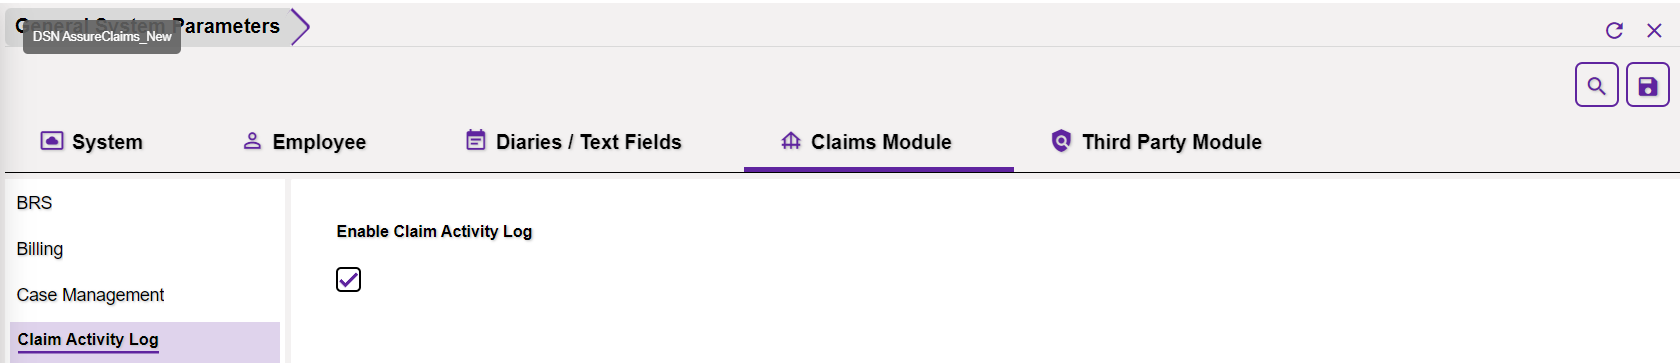
Enable Activity Log: Enable Activity Log check box to activate the Activity Log feature. The various changes done on the claim are displayed in the Activity Log window based on the activity log configuration in Utilities.
4.5 Claim Deletion

Use Claims Deletion Tool: Select the option to enable Claim Deletion Tool.
Claims Deletion Tool Users: Select the users for the Claim Deletion tool by selecting the lookup button. This will open up the User List window. Select the relevant users from the Available Users List followed by the adjacent + sign. The selected users will be displayed in the following field. Only the selected users will be allowed to use the Claim Deletion Tool.

4.6 Claims Desktop

Use Claims Desktop: Enabling the “Use Claims Desktop” field will enable the Claim Desktop URL and you can enter the claim URL.
Claims Desktop URL: Enter the Claim URL in this field. The user clicking on the Claims URL icon on the Claim screen will be redirected to the same URL.
4.7 Client Program

Use Client Program: A new checkbox labeled “Use Client Program” to enable the Client Program module. A license key must be entered at the time of selecting this checkbox and enabling this feature.
4.8 CLUE Reporting

Use CLUE Reporting: Select the field to enable Comprehensive Loss Underwriting Exchange (CLUE) Reporting.
4.9 Data Collection

Use Data Collection: The Data Collection feature allows on-field agents, third-party vendors, reporter, insurance agents, employees and supervisors etc. to file incident reports at the earliest, following the occurrence of an incident. These incidents are documented in customizable forms and shareable as URLs allowing for easy submission, transmission, processing and creation of Events securely in DXC Assure Claims.
There are 3 options offered in the dropdown menu of the field, that is, OFF, License and Evaluation. Select OFF to disable the feature.
- The Evaluation mode enables only a single-mode access to the functionality which is valid for 60 days.
- License mode requires you to key-in the activation key. Once this is done, the data collection module will be enabled and available for use.
- When the License or Evaluation option is selected, the Data Collection will be displayed under the Manager section of the Utilities zone.
Use Data Collection Templates: Select the setting and the Data Collection Configuration option will also be available under the UI Admin section of Utilities.
4.10 Document Search
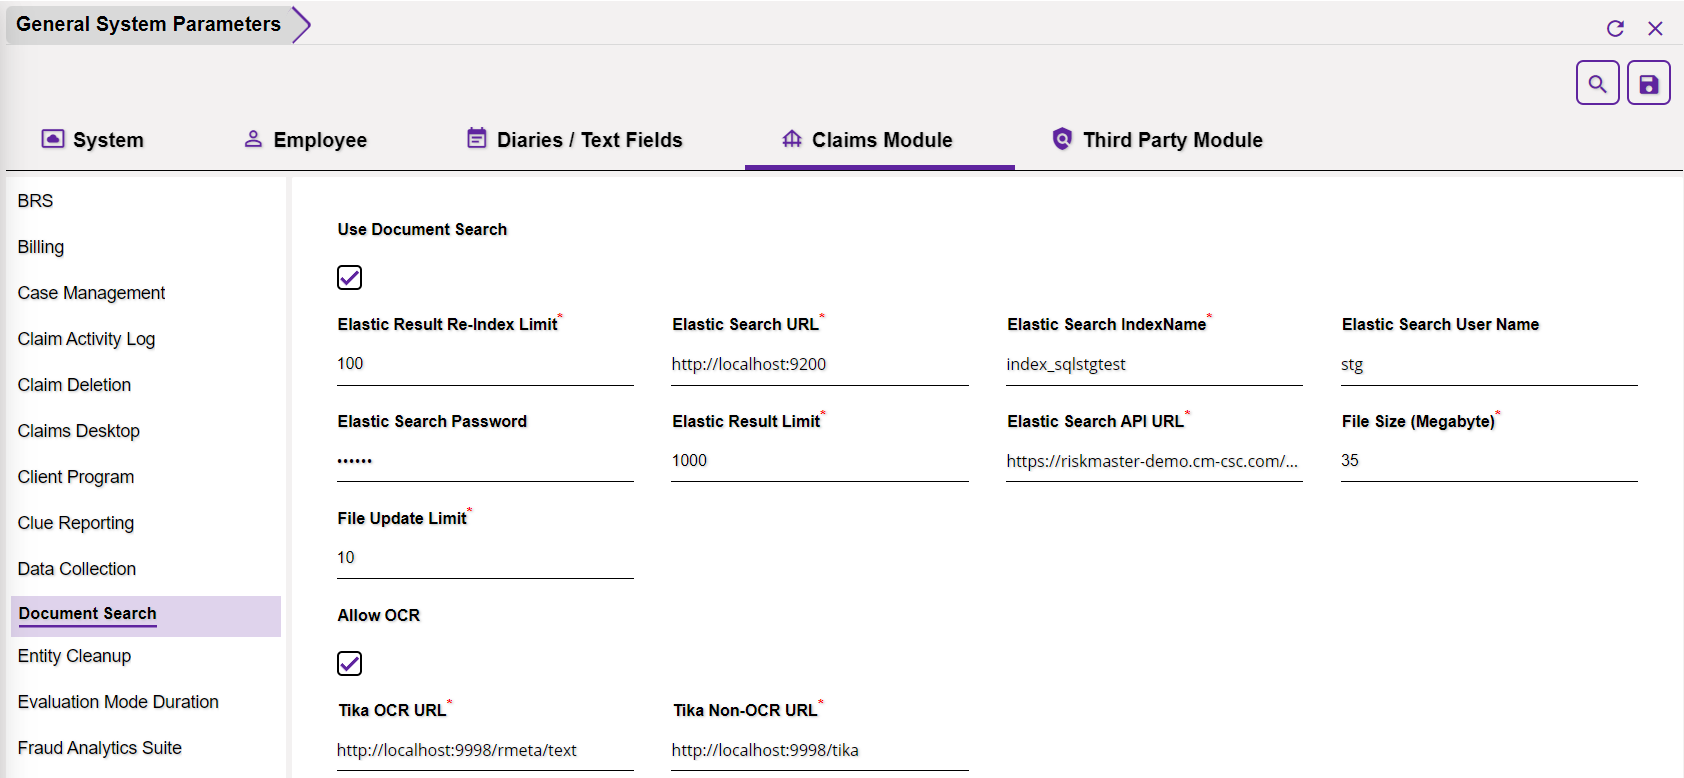
Use Document Search: Select the checkbox to enable Claim Document Search in the application.
Elastic Result Re-Index Limit: Enter the re-index limit for elastic search in this field.
Elastic Search URL: Enter the Elastic Search URL here.
Elastic Search IndexName: Enter the Index name in this field.
Elastic Search User Name: Enter the user name.
Elastic Search Password: Enter the password here.
Elastic Result Limit: Enter the limit for search results to be displayed. The number of search results displayed in the Global Search window will depend on the number filled in this field.
Elastic Search API URL: Enter the API URL of elastic search.
File Size (Megabyte): The maximum permissible size of the file that can be uploaded at the Claim and Event level is entered here.
File Update Limit: Enter the maximum number of files that can be uploaded at the Claim and Event level.
Allow OCR: Select the checkbox to enable Optical Character Recognition feature in elastic search. If enabled, the search option will even search documents and images based on the text written within them. Once OCR functionality is enabled, the following fields will become editable.
Tika OCR URL: Enter the OCR URL here.
Tika Non-OCR URL: Enter the non-OCR URL here.
4.11 Entity Cleanup

Use Entity Cleanup Tool: Select the option and the web-based Entity Cleanup Tool will be enabled. Once enabled, the Entity Clean Up Tool option will be displayed in the Tools and Designers section of the Utilities zone.
Change Payee Last and First Names in FUNDS Table: Select the option and the Payee Last and First Names in the Funds table will be editable and will be allowed to be changed if required.
4.12 Evaluation Mode Duration
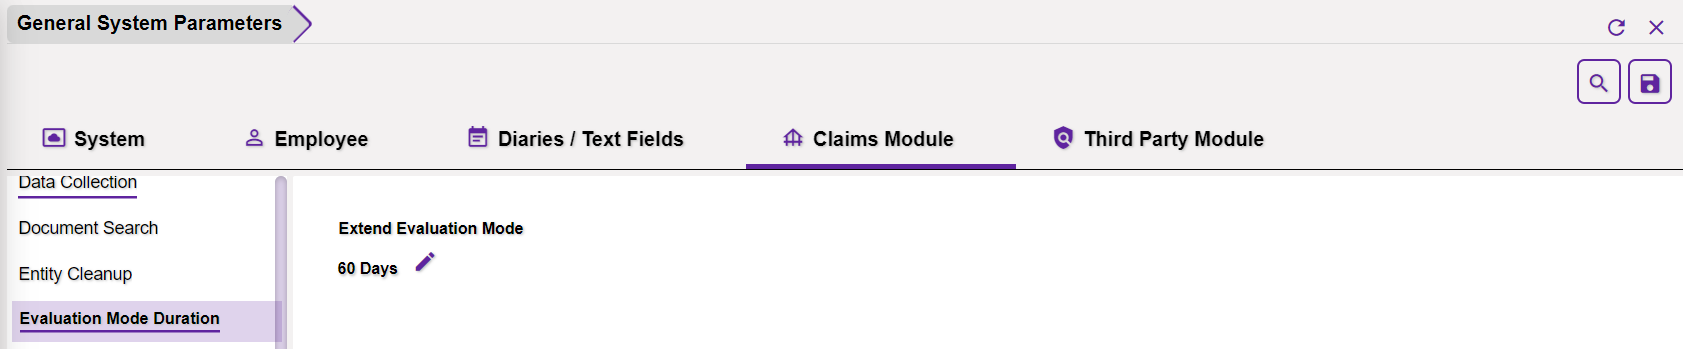
Evaluation Mode Duration: Some modules are available in Evaluation Mode. The duration of the Evalution mode can be fixed from here. The default duration is 60 days. In order to extend the same, select the corresponding Edit icon.
4.13 Fraud Analytics Suite
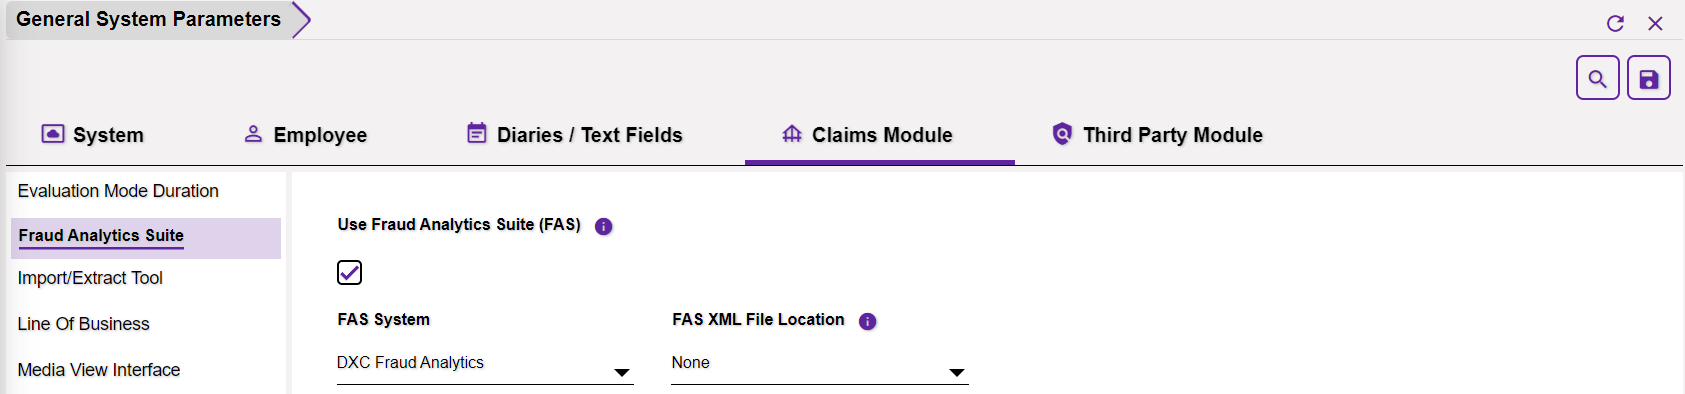
Use Fraud Analytics Suite (FAS): Users having the permissions to access the FAS system set in the Security Management System can only view and access the FAS weblink. This feature is available only when this check box is selected.
With Fraud Analytics Suite feature, you can access the FAS system from within Assure Claims and send claim and other information to conduct fraud searches.
FAS System: Select the required Fraud Analytics System from the options offered, that is, DXC Fraud Analytics and IBM FCII.
FAS XML File Location: Enter the path of the location of FAS XML file in this field.
As per the setup done here, the fraud score will be displayed on the Claim screen.
4.14 Import/Export Tool
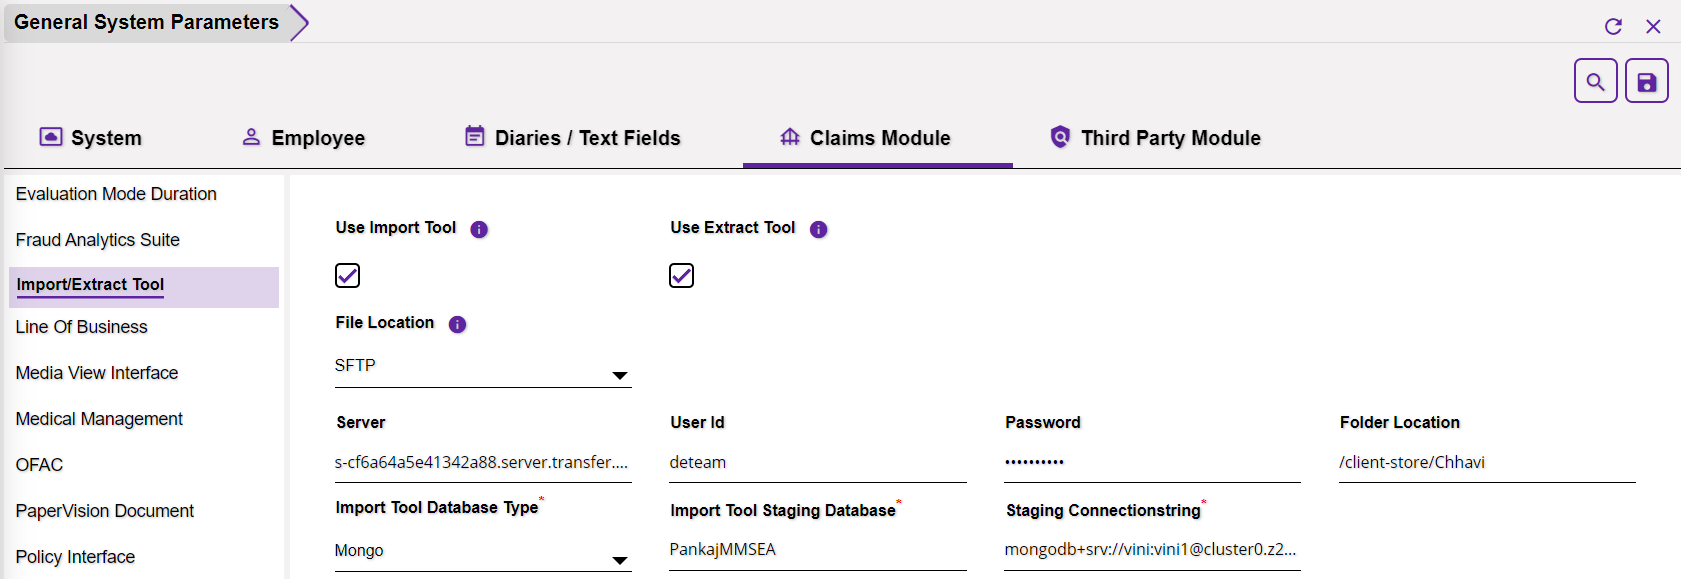
Use Import Tool: Select the checkbox to enable the Import Tool.
Use Extract Tool: Select the checkbox to enable the Extract Tool.
File Location: This location will be used to place the Import Files as well as get the Extracts from DXC Assure Claims. The dropdown list of the field offers 3 options, namely, Shared, SFTP and S3 (AWS Storage).
When the selected File Location is SFTP, then the following fields will be displayed:
- Server
- User ID
- Password
- Folder Location
- Import Tool Database Type*
- Import Tool Staging Database*
- Staging Connectionstring*
When the selected File Location is S3(AWS Storage), then the following fields will be displayed:
- File Path*
- S3 Bucket Name*
- S3 Access Key
- S3 Secret Key
- S3 Region*
- Import Tool Database Type*
- Import Tool Staging Database*
- Staging Connectionstring*
When the selected File Location is Shared, then the following fields are displayed:
- Shared Location
- Import Tool Database Type*
- Import Tool Staging Database*
- Staging Connectionstring*
A network shared path such a SFTP or S3 may be chosen by entering the necessary details
4.15 Line of Business
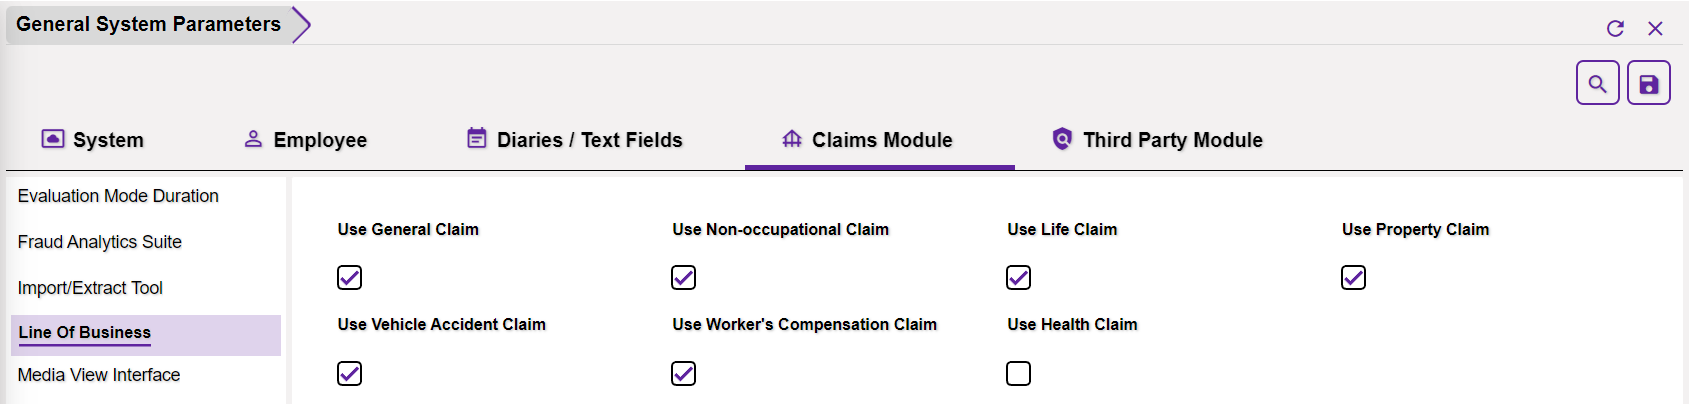
Use General Claim: Select the option to enable General Claim as one of the Line of Businesses of the application.
Use Non-occupational Claim: Select the option to enable Non-occupational Claim as one of the Line of Businesses of the application.
Use Life Claim: Select the option to enable Life Claim as one of the Line of Businesses of the application.
Use Property Claim: Select the option to enable Property Claim as one of the Line of Businesses of the application.
Use Vehicle Accident Claim: Select the option to enable Vehicle Accident Claim as one of the Line of Businesses of the application.
Use Worker’s Compensation Claim: Select the option to enable Workers’ Compensation Claim as one of the Line of Businesses of the application.
Use Health Claim: Select the option to enable Health Claim as one of the Line of Businesses of the application.
4.16 Media View Interface

Use Media View Interface: Select the checkbox to integrate the Media View Document Management System. You can use the Media View interface to attach and view documents from Assure Claims. When this feature is enabled, the Attachments button on the toolbar opens the Media View interface.
4.17 Medical Management

Use Medical Management: Enable the option to use Medical Management feature for capturing the details of an Employee’s Encounters of various visits to health clinics for different tests and procedures..
4.18 OFAC

OFAC Check for Payees and Entities: Select the option OFAC Check for Payees and Entities should be available.
Patriot Protector Web Service URL: Enter the Patriot Protector Web Service URL.
Patriot Protector Web Service Login User ID: Enter the login credentials of Patriot Protector Web Service.
Patriot Protector Web Service Login Password: Enter the password of Patriot Protector Web Service.
4.19 PaperVision Document

Use PaperVision Document System: Select the setting and key in the authentication credential to use the PaperVision Document System.
4.20 Policy Interface

Use Policy System Interface: Select the checkbox to activate the Policy System Interface.
Note: To activate the Policy System Interface, you must first activate the Carrier Claims by selecting the Use Carrier Claims check box on the Carrier Claim Settings.
4.21 Rule Engine

Use Rule Engine: The setting provides the ability to integrate Assure Claims with the Rule Engine for Visual Product Modeling System (VP/MS).
4.22 Script Editor
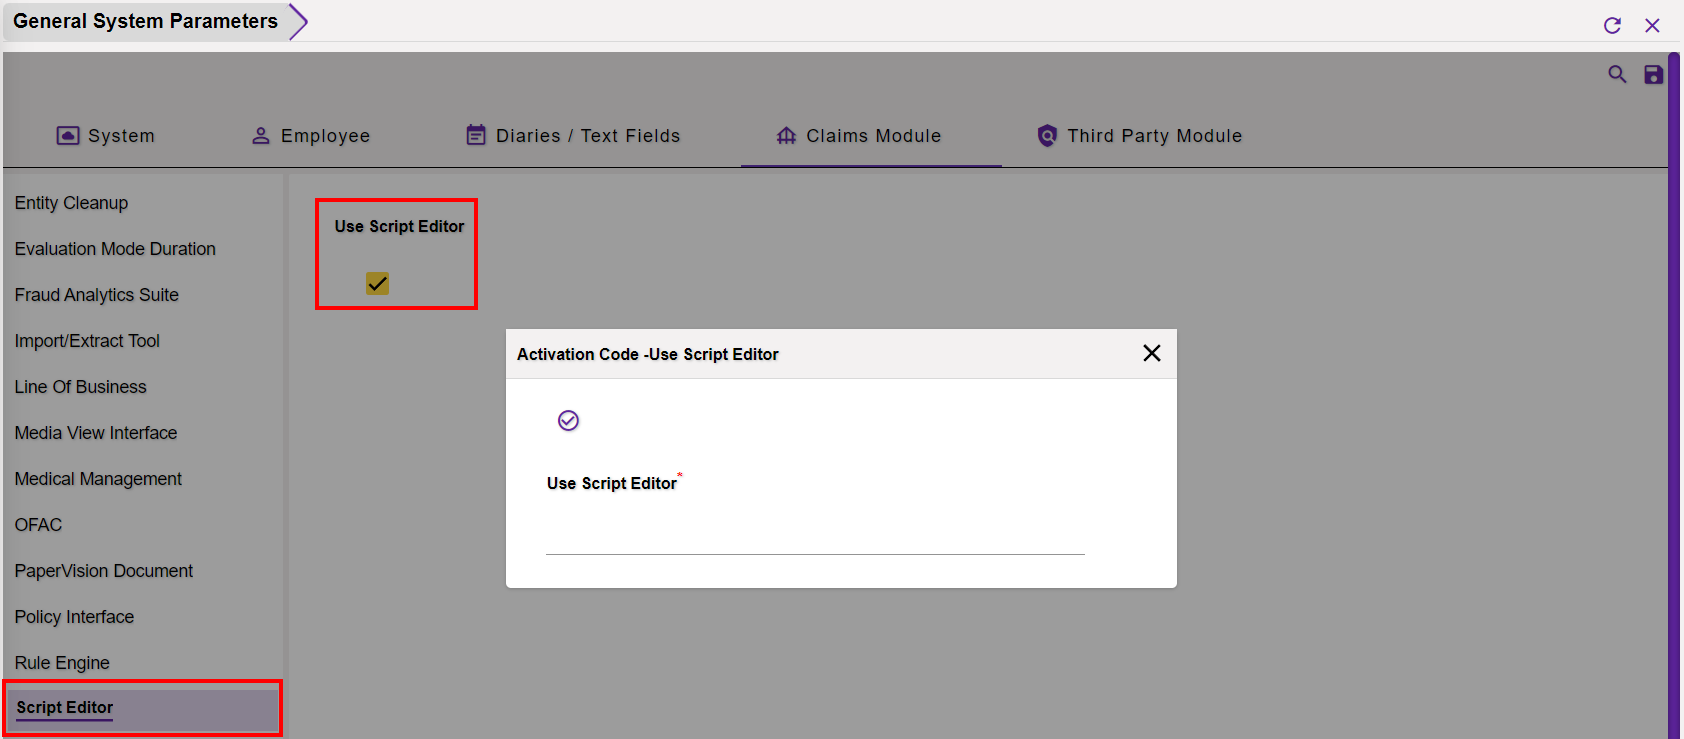
Use Script Editor: Select the setting to enable scripting support for data collection. With this in place, users will be able to define different scripts that work only for incidents and forms submitted during the Data Collection process. The Script Editor feature is not bundled with Data Collection. A separate license will be required for using the Scripting feature in Data Collection.
In other words, users can customize Data Collection by adding scripts via the Script Editor module to display custom warning messages triggered by certain actions.
4.23 Temporary Access
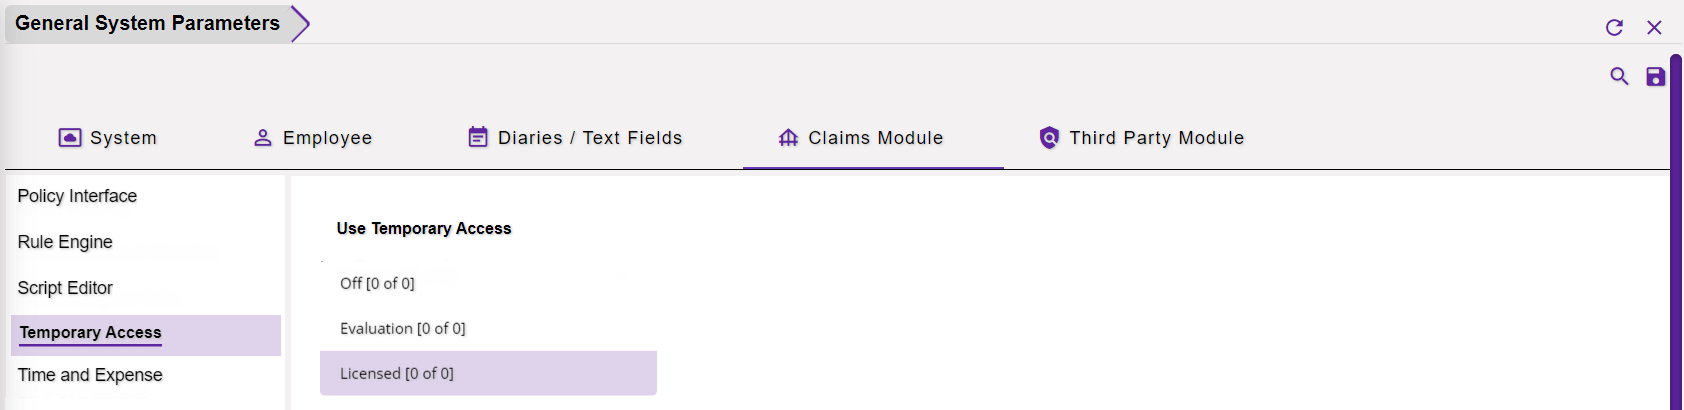
Use Temporary Access Link: Select the option by keying in the activation key to enable Temporary Access to any Record feature. The dropdown list has 3 options, namely Off, Licensed and Evaluation. When the option, off, is selected, the temporary access link feature gets disabled. While selecting Evaluation or licensed options, makes the share record feature read only or fully featured respectively. When the Evaluation option is selected, all access links will be valid for 60 days only. It must be kept in mind that, the evaluation mode allows the generation of only one direct links. Any attempt to generate a second link will result in the display of a warning message.
4.24 Time and Expense

Use Time and Expense: Select the option to enable Time and Expense functionality.
Rate Org Level: Select the Rate Organizational Level here from the dropdown menu.
Bank Account: Select the Bank Account from the options available.
Show All Transaction Types for Invoice Detail: If this option is selected, then, all the Transaction Types will be displayed in the Invoice Details.
4.25 Token Access
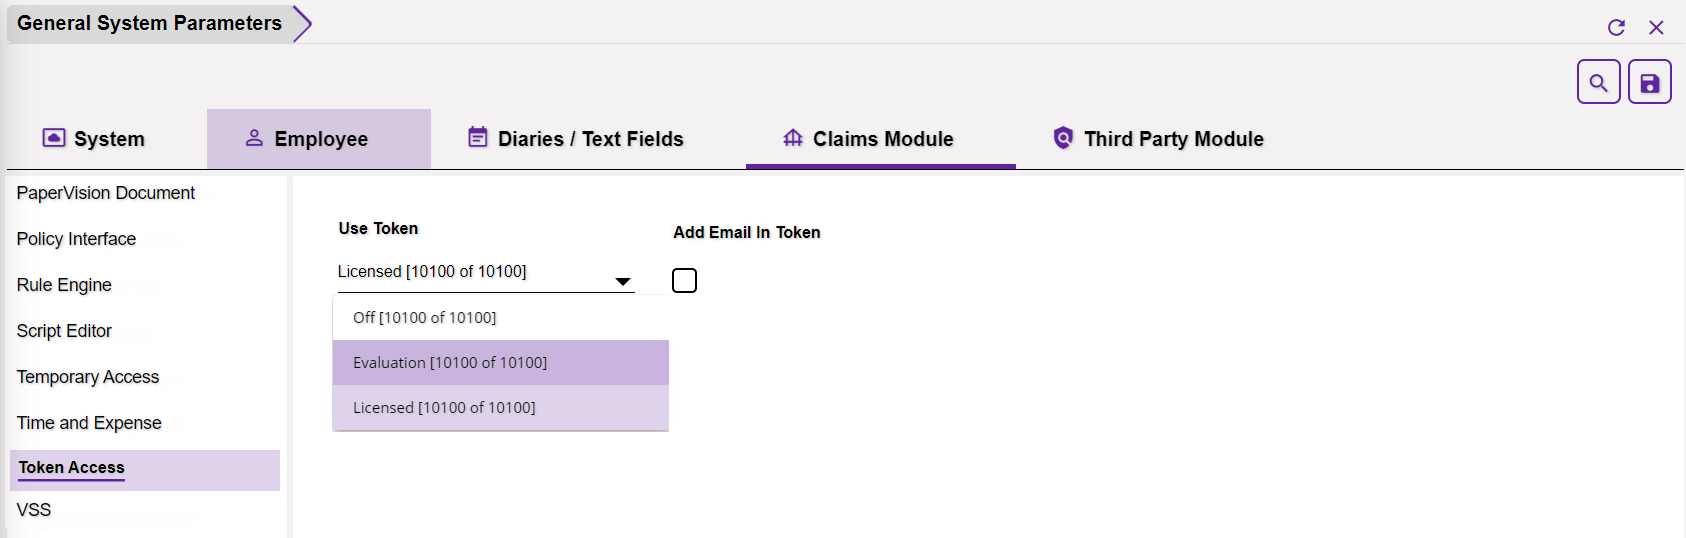
Use Token: Select any one option from the dropdown list of this field. The options include, Off [346 of 346], Evaluation [346 of 346] and Licensed [346 of 346].
- If Off [346 of 346] is selected, the option to use Token will be disabled.
- In case Evaluation [346 of 346] is selected, then, the feature will be enabled in the trial version.
- If Licensed [346 of 346] is selected, then, a Authentication window will pop up. A separate Activation Code must be procured to activate the licensed version and use this feature.
4.26 VSS

Enable VSS: Select the setting to VSS (Vendor Solutions Suite) feature. This feature provides an interface to seamlessly work and share information between Assure Claims and Vendor Solutions Suite. The VSS Interface provides features for the complete handling of assignments associated with the processing of a claim from the creation of a claim, assigning assignments and tasks for a claim, processing invoices and closing the claim. Once this is enabled, the VSS Interface Log will be enabled under the Managers section of the Utilities zone.
5.0 Third Party Module
5.1 360 Globalnet
DXC Assure Claims enhances the existing partnership with 360Globalnet by upgrading the process of automatic Claim creation based on the information provided in the First Notice of Loss (FNOL) form submitted in the 360Globalnet system.

Use 360 Globalnet Integration: Select the checkbox to enable 360 Globalnet module.
360 Globalnet Url: Enter appropriate 360Globalnet URL in this field.
360 Globalnet Token: Enter relevant 360Globalnet Token in this field.
5.2 Amali
Assure Claims offers enhanced Subrogation process by integrating with SubroPro (Powered by the Amali Solutions Group). This integration enables posting of financial data from Assure Claims to SubroPro for seamlessly processing Subrogation on a Claim in both Online & Offline modes.
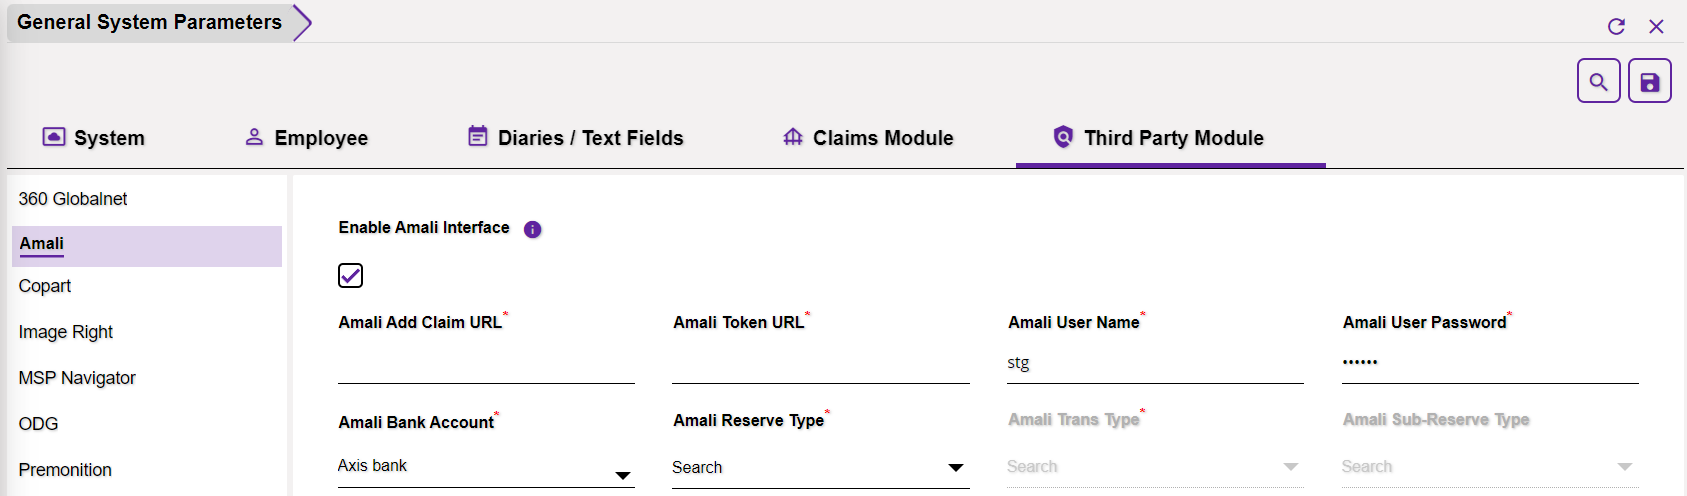
Enable Amali Interface: Select the setting to enable the Amali SubroPro Interface.
Amali Add Claim URL: Enter the Claim URL for Amali subroPro here.
Amali Token URL: Enter the Token URL for Amali subroPro here.
Amali User Name: Enter the User Name for Amali subroPro authentication.
Amali User Password: Enter the Password for Amali subroPro authentication.
Amali Bank Account: Select the Bank Account from the dropdown list for Amali SubroPro.
Amali Reserve Type: Select the Reserve Type from the lookup table.
Amali Trans Type: Select the Transaction Type from the lookup table.
Amali Sub-Reserve Type: The Sub-reserve Type will be displayed as per the Reserve Type. Select the relevant sun-reserve type from the lookup table.
5.3 Copart
With the Copart integration, insurance companies can now submit salvage assignments to Copart directly via the Assure Claims interface instead of submitting information on the Copart website. This partnership benefits the insureds too, especially when vehicles need to be salvaged and sold. Many such vehicles that Copart sells on behalf of the insurance company, are either damaged or deemed a total loss or not economically repairable.

Use Copart: Enable the checkbox labelled Use Copart. A popup window opens for entering a license key. After entering and saving the license key, fill in all requisite information provided by Copart in the fields mentioned below.
Third Party Identifier: Enter the Third-party Identifier shared by Copart in this field.
Copart Company Code: Enter the company code of Copart.
Seller Code for Vehicle Pick-up and Appraised: You will be provided with the Seller Code for vehicle Pick-up and Appraised. Enter the code in this field.
Copart Vendor Code: Enter the Vendor code in this field.
Seller Code for Vendor Pick-up and Sold: Enter the Seller Code for Vendor pick-up and sold.
Copart App URL: Enter the Copart App URL here.
5.4 Image Right
ImageRight® integration with Assure Claims enables modern content management and workflows for claims, underwriting, and distribution in the application.
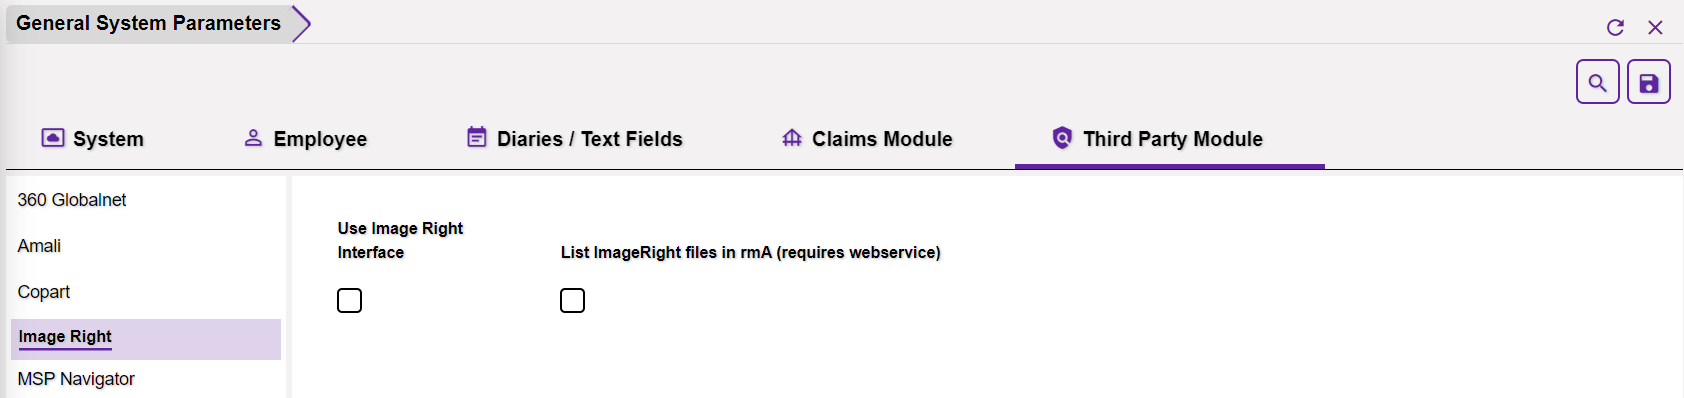
Use Image Right Interface: Select the checkbox to enable the ImageRight module in the application.
List ImageRight files in rmA (required webservice): If enabled, the ImageRight files pertaining to Assure Claims application will get listed.
5.5 MSP Navigator
With the MSP (Medicare Secondary Payer) Navigator, all MMSEA related information is validated before being sent for further processing to CMS (Centers for Medicare & Medicaid Services) . The system sends alerts in real time whenever an error is encountered, thus, offering correct guidance to provide optimal information with minimal errors to avoid penalties and damages.
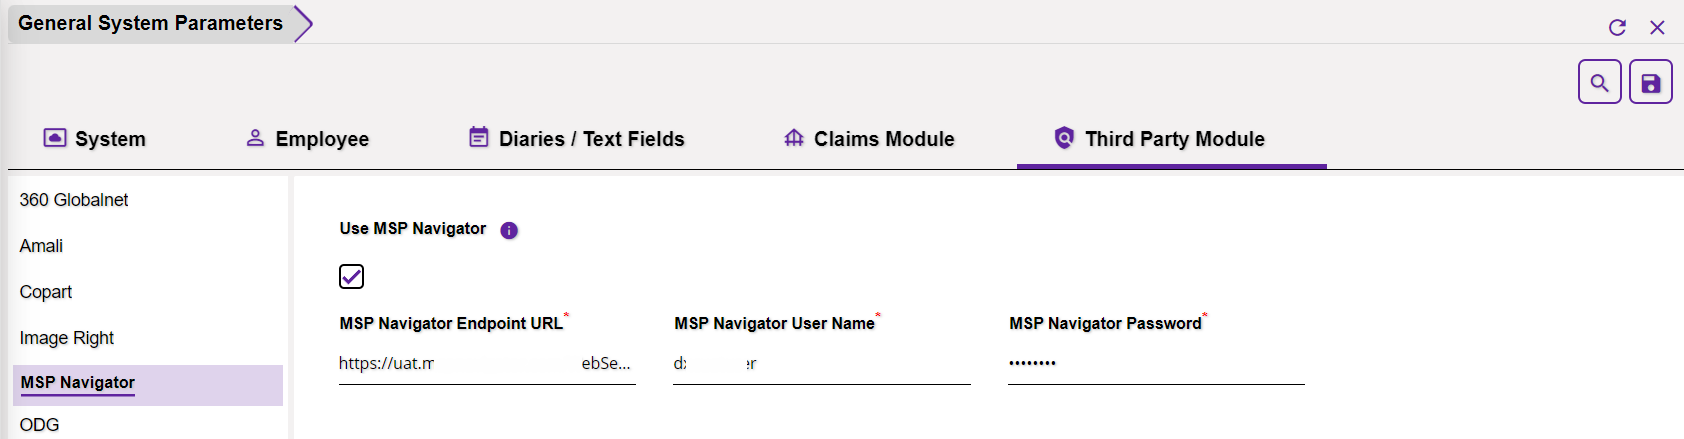
Use MSP Navigator: Select the checkbox to enable MSP Navigator® module for automated MMSEA Reporting.
MSP Navigator Endpoint URL: Enter the endpoint URL for MSP Navigator in this field.
MSP Navigator User Name: Enter the relevant Username in order to log into the module.
MSP Navigator Password: Enter the password to log into the module.
5.6 ODG
Return to Work (RTW) & Medical Disability Guidelines (MDG) integration with ODG by MCG integration provides Medical Disability Guidelines to estimate the length of disability in terms of restricted days and lost days. Medical Disability Guidelines address the need to improve communication during a disability life cycle, and to calculate the Return to Work (RTW) in an industry-accepted and uniform way.
The ODG settings are displayed in the Configuration Manager zone, as shown below.

The Return to Work Details and Disability Guideline can be assessed via Workers’ Compensation > Case Management > Medical Info (accordion). The Risk Assessment Score and the Reserve Analytics can be viewed on the Claim scree.
Enable ODG Return To Work (RTW) and Disability Guidelines: Select the setting to enable Return to Work details and Disability Guidelines. Once enabled, the same will be displayed in Workers’ Compensation Claims.
ODG RTW and Risk Assessment API URL: Type in the API URL for RTW and Risk Assessment.
ODG RTW and Risk Assessment Token: Enter the token for RTW and Risk Assessment here.
Enable ODG Risk Assessment Score: Once this is enabled, the Risk Assessment Score will be calculated as per the data entered and displayed on the Workers’ Compensation Claim screen.
ODG Disability Guidelines URL: Type on the Disability Guidelines URL in this field.
ODG Disability Guidelines User Name: Enter the user name for login authentication.
ODG Disability Guidelines Password: Enter the password for login authentication.
Enable Reserves Analytics: Select the option to enable Reserve Analytics feature that is displayed on the Workers’ Compensation Claim screen.
Reserves Analytics API URL: Enter the API URL here.
Reserves Analytics Token: Enter the Token here.
ODG Third Party Identifier: Enter the third-party identifier in this field.
5.7 Premonition
Claims Scan feature, powered by Premonition, is a powerful tool that will help augment Assure Claims’ settlement strategy for pre-litigated claims. With Claims Scan it will now be possible to identify unfriendly venues and spot litigious plaintiff lawyers, thus improving the settlement negotiations and lowering loss adjusted expense with the help of an hourly update of the win rate of counsels based on a vast litigation database. In other words, claims scan makes it easier to evaluate risk pricing, find a prefect counsel and win more while spending less.

Use Premonition: Select the checkbox to enable Claims Scan feature powered by Premonition.
Use County Of Injury if Jurisdiction County is blank: If this setting is checked, then, the County of Injury will be taken into consideration if the Jurisdiction County is blank.
App URL: Enter the App URL in this field.
Third Party Identifier: Enter the third party indentifier provided by Premonition in this field.
5.8 Scope
Scope, third-party module, intergrated in Assure Claims pushes the Event information in the application which in turn converts the Event to Claim.
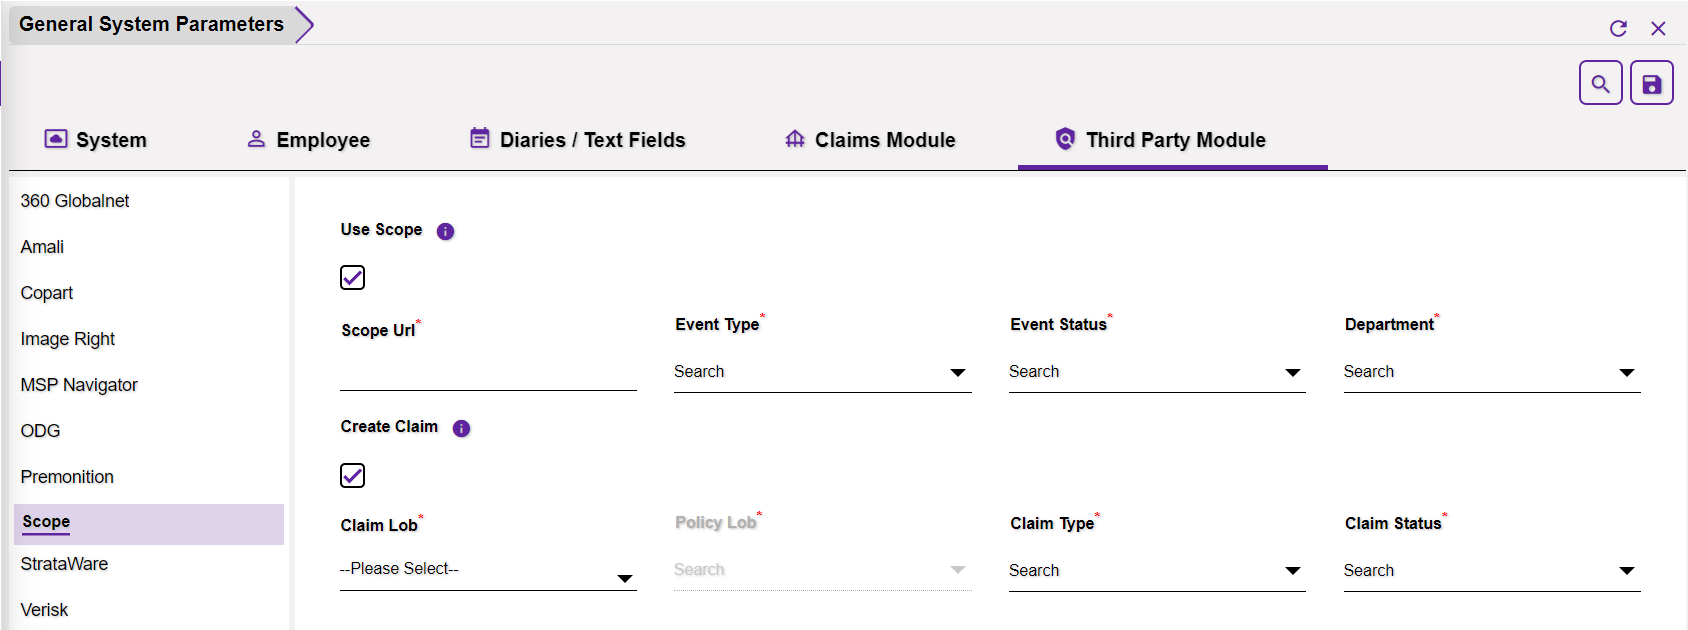
Use Scope: Select the checkbox to enable the module.
Scope Url: Enter the URL shared by Scope.
Event Type: Select the relevant Event Type from the lookup table or type to search the same for the same.
Event Status: Select the Event Status from the lookup table in this field.
Department: Select the Department in this field.
Create Claim: Select the checkbox to enable creation of Claims. Once the field is checked, following fields will get enabled.
Claim Lob: Select the Line of Business for which the Claim is to be created.
Policy Lob: Select the Policy Line of Business from the lookup table.
Claim Type: Select the Claim Type for which the Claim is to be created.
Claim Status: Select the Claim Status for which the Claim is to be created.
5.9 StrataWare
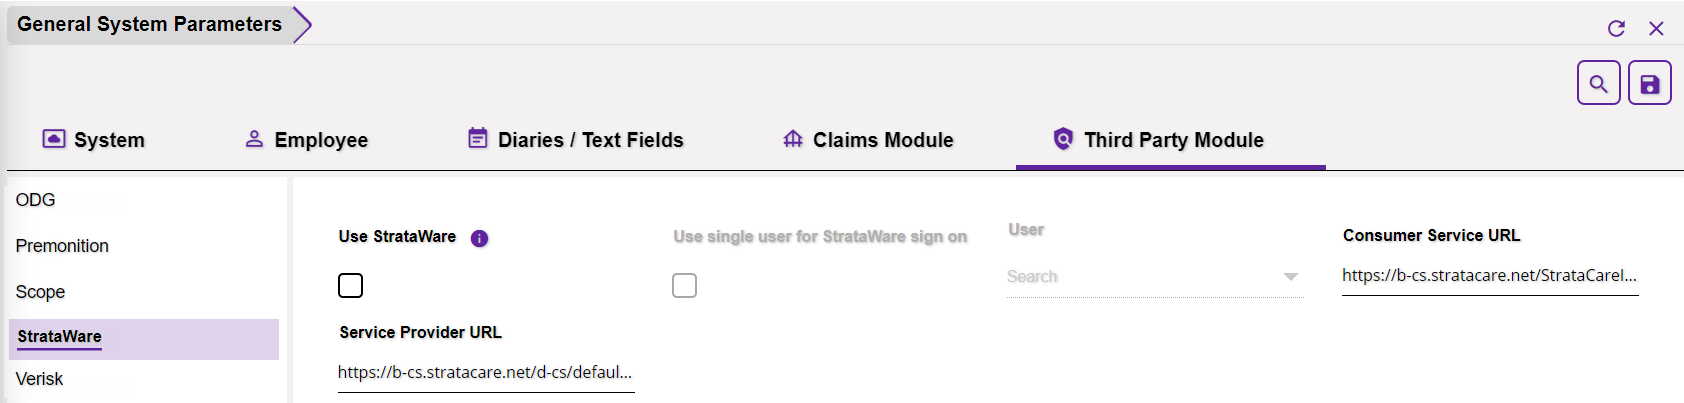
Use StrataWare: Enable the StrataWare checkbox to activate the StrataWare Bill Review services.
Use single user for StrataWare sign on: Select this field if only single user is allowed for StrataWare sign on.
Note:
- If ‘Use single user for StrataWare sign on’ check box is disabled then you must be logged in as a user whose account is linked and setup with StrataWare.
- This field is enabled only when the ‘Use single user for StrataWare sign on’ check box is selected.
User: Select relevant User for the dropdown list.
Consumer Service URL: In the Consumer Service URL field, enter the address of the consumer.
Service Provider URL: In the Service Provider URL field enter the address of the StrataWare service provider.
5.10 Verisk
With this integration, it will be possible to get detailed weather reports based on the Date of Loss and Loss Location. This will in-turn help Assure Claims Adjusters to better understand the risks around claims to take informed decisions with accuracy and improve underwriting and claims outcomes.
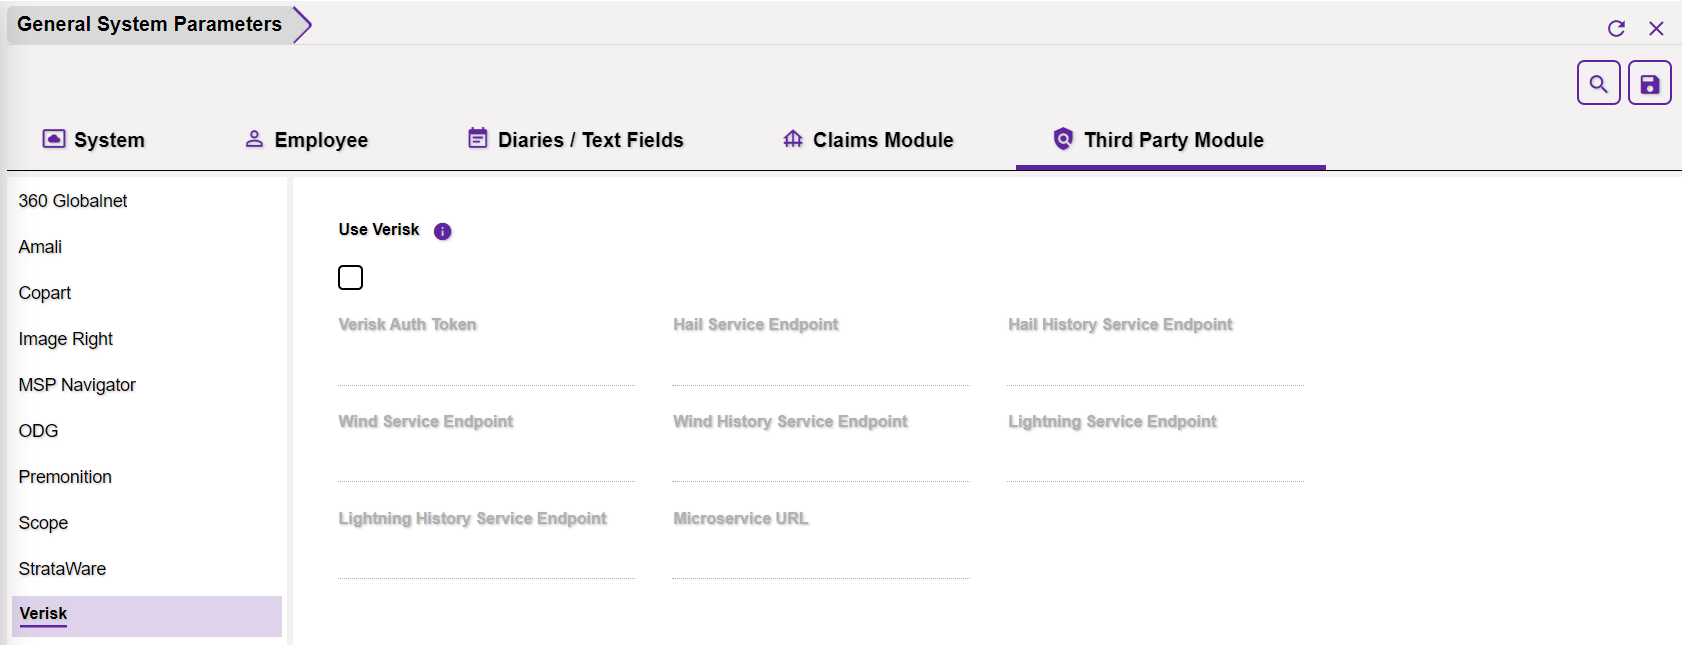
Use Verisk: Select the checkbox to enable and use the Verisk module.
Verisk Auth Token: Enter the Authentication Token offered by Verisk in this field.
Hail Service Endpoint: Enter the Hail Service Endpoint here.
Hail History Service Endpoint: Enter the Hail History Service Endpoint in this field.
Wind Service Endpoint: Enter the Wind Service Endpoint here.
Wind History Service Endpoint: Enter the Wind History Service Endpoint in this field.
Lightning Service Endpoint: Enter the Lightning Service Endpoint in this field.
Lightning History Service Endpoint: Enter the Lightning History Service Endpoint in this field.
Microservice Url: Enter the Microservice URL here.
5.11 Viewpost
With a view to facilitate the Electronic Claims Payments (ECP) for its users, DXC Assure Claims integrates with Viewpost thereby making transacting smoother on the platform.
This integration involves two steps:
- Sending Financial Data to Viewpost.
- Importing the status of financial data sent to Viewpost back into the Assure Claims system.

Enable Viewpost Interface: Select the setting to enable ViewPost Interface.
Viewpost Bulk API URL: Add the ViewPost Bulk API URL supplied in an email by ViewPost.
Viewpost Authentication Token: Copy the API Authentication Token to the Viewpost Authentication Token.
5.12 Workflow
DXC Technology has developed a new Workflow management feature to streamline the routing, reviewing, and documents approval processes with an easy automated system.
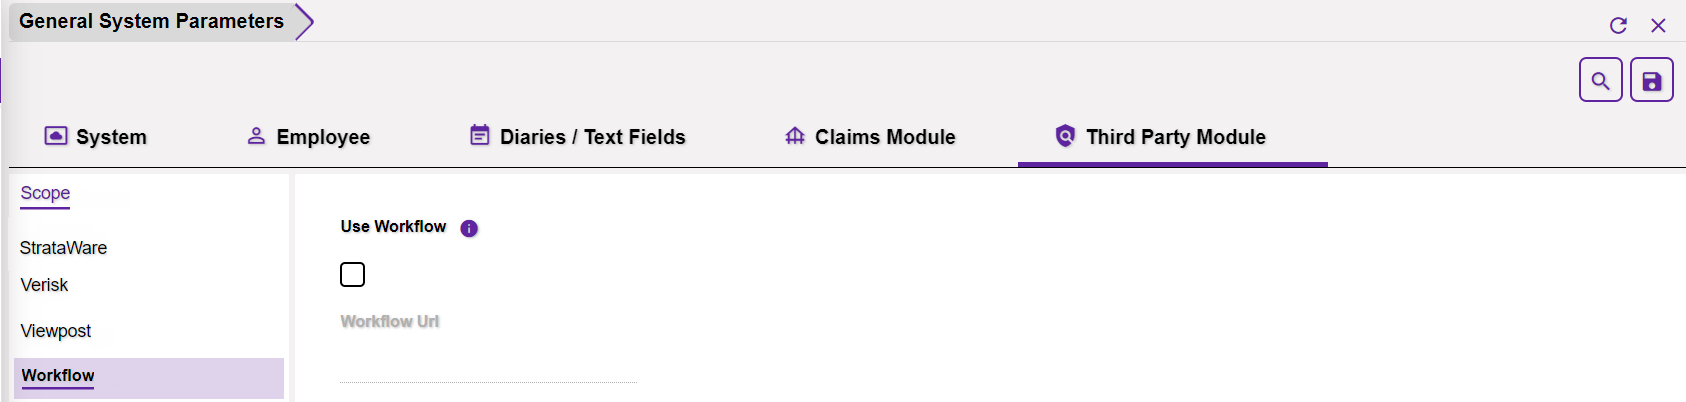
Use Workflow: Select the checkbox to enable Workflow module. When prompted, enter the license key to proceed further.
Workflow Url: Enter the Workflow URL in this field followed by the Save button.
5.13 Xybion
DXC Assure Claims introduces a new Medical Billing process by integrating with Xybion MBR, a comprehensive set of resources which streamlines the billing work flow and the cumbersome billing process. The flawless medical bill review software optimizes and integrates the work flow processes with the core functions of the Claims Management enabling seamless processing and billing.

Use Xybion MBR: When Xybion MBR is enabled, all the other Medical billing system, such as, BRS will get disabled automatically. That is, multiple billing system cannot work simultaneously.Once the Use Xybion MBR checkbox is selected, the corresponding field of the Xybion system will be enabled.
Xybion MBR Bank Account: Select the bank account from the dropdown list. The payment imported from Xybion will be associated to the selected bank account. If the Bank Account has any owner associated to it, then, it will not be displayed in the dropdown list.
MBR URL: Enter the integrated URL of Xybion MBR.
MBR User Name: Enter the User Name for accessing the integrated URL of Xybion.
MBR Password: Enter the Password for accessing the integrated URL of Xybion.
Download Status: Enter the Download Status Code of Xybion.
Upload Status: Enter the Download Status Code of Xybion.
Xybion MBR TPI Name: Enter the name Third-party interface that is to be mapped with the Xybion MBR interface.
Use Xybion Document System: Select the setting to enable Xybion Document Management System (DMS). Once enable the default document management system of the application will be disabled and the following fields will turn editable.
Use Common User for Signin: Select the checkbox to use common user for Xybion signin.
Use SSO to redirect to Xybion: If the checkbox is selected, then, SSO will be used to redirect to Xybion.
Document Base Url: Enter the URL of the Xybion document base.
Document User Id: Enter the User ID for accessing the integrated URL of Xybion DMS.
Document Password: Enter the password for accessing the Xybion DMS.
Document Query Id: Enter the Query ID here.
Document Root Folder Id: Enter the ID of the Root Folder for Xybion DMS.
Xybion Document Third Party Identifier: Enter the 3rd party identifier for Xybion DMS.